Long overdue since I lowered my box spring straight to the ground in July, I finally cleaned up the look of my bed by creating a custom wrap for it. A sleek DIY bed skirt, if you will. Hopefully other apartment dwellers and homeowners who, like me, have sacrificed their bedframes for the sake of interior design. I hope this helps others in the midst of a bedroom furniture transition.
I’m pleased with how instead of a box spring, it now looks like a white platform bed, and that look makes it a tolerable solution until I muster greater motivation to build my own bed frame. And now, the rest of you bed-frame-losing, low-rise-bedding folks can improve the look of your room too (fast, and on the cheap).

Allow me to explain myself. I had a bed frame and a pretty headboard. I liked them, but I had a tiny bedroom and unfortunately positioned windows. To make better use of the space, I decided to reorient the room and eliminate the headboard. I also relocated the bed where it was and aligned it beneath a window; however, the frame beneath the box spring made the mattress too high. To slide the mattress into the space beneath the window trim, I decided to remove the bed frame and make it work.
I lived with it like this for several months. It was was fine, but unfinished.

A boxspring, uncovered, on the ground beneath a mattress.
The solution? Wrap it up. Creating a custom box spring wrap might seem tricky, but it’s not. And covering up the exposed fabric leaves you with a room that looks more complete. It actually leaves you with the appearance of a flush platform bed.
To do this project, you’ll need:
- three yards of white fabric – I chose material that had some stretch
- straight pins
- sewing machine
- two feet of 3/4″ sports elastic
1. Remove the Mattress
This whole project is a lot easier if you remove the mattress to expose the entire box spring.
2. Trim Fabric Into Thirds
I trimmed the fabric into thirds, creating three long strips of fabric, each measuring three yards. The fabric I chose allowed each strip to measure 15″ wide.
Two of the three strips will not need to be cut further, but the third strip does need be trimmed to a 5′ length to create a panel along the front of the box spring. (5 feet was appropriate for my queen-size bed, but that can certainly vary to match a twin mattress, full mattress, or king-sized mattress).
Once cut, you will have three pieces of fabric: two 9-foot lengths and one 5-foot length.

A piece of fabric cut lengthwise into thirds to form three sides of a box spring wrap.
3. Sew the Fabric End-to-End
Sew the pieces together end-to-end with the shortest piece anchored as the middle piece. The piece of three-yard fabric is suddenly closer to 23 feet long (9 feet + 5 feet + 9 feet). The 5-foot length will cover the end of your box spring while the two 9-foot (3-yard) lengths will extend towards the headboard and wrap around to the head of the box spring.

Measure the distance at the head of the box spring. This is where you will sew lengths of elastic to make the box spring wrap fitted, removable, and washable.
4. Test Fit and Hem the Corners
Check the fit of your sewn fabric length by wrapping it around the perimeter of the box spring. Align the ends of the 5-foot length of fabric with the front corners. As the fabric turns the corner, there will be extra material that is likely to pucker. One way that you can remedy this is to “wrap” the corners like you would a gift, and pin it into place. You can also remove it and run that pinned area through the sewing machine so that the edges of the wrap are perfectly sewn to fit the size of your box spring.

Create pleats at the corners of the box spring so the fabric hugs the edge.
When all four corners are hemmed or pinned, you can sew this seam in place. Keep in mind that the fabric isn’t sewn into a full loop yet. You will need to finish the area that meets behind the headboard–there’s a special trick to help the fit of your box spring wrap stay very snug.

5. Add Elastic
The trick to sewing a taut box spring cover and helping your box spring look like a platform bed is to connect the two ends that meet behind the head of the bed with two pieces of elastic. I used two 1-foot lengths of 3/4″ elastic to stretch the remaining distance for my box spring wrap. Based on the size of my box spring, there was a 30″ gap between the two loose ends (could be more or less depending on the size of your box spring and mattress).
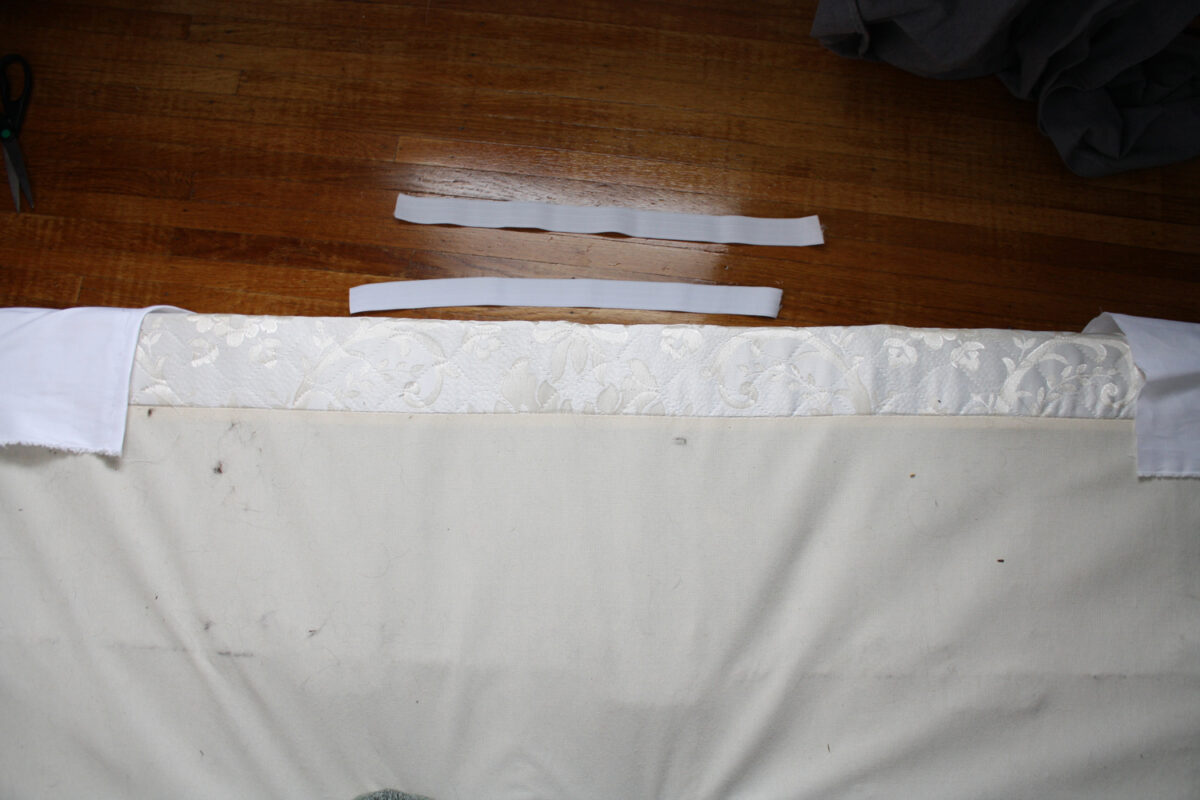
Pieces of unstretched elastic are positioned behind the head of the box spring.
Sewing the elastic to connect both ends makes the entire wrap more taut, just like the fitted sheet on your mattress.

Cover your box spring with a custom white fitted cover.


5 Comments
It looks great!
Thank you!
Hi – fun site! But just fyi the link to the disguise boxspring tutorial doesn’t work – takes you to the HGTV site and then cannot find the tutorial.
Ugh, thanks for letting me know, Sarah!
Hey Sarah! Just letting you know that I re-wrote the post here so the instructions weren’t lost. Thanks again for letting me know.