Sometimes, or a disproportionately large amount of the time, I ignore the easier repairs in favor of exciting projects. Case in point: we still had some very, very oak-y spots on the kitchen cabinets.
These spots were once obstructed by the previous countertop backsplash and overhang. When I originally gel-stained the kitchen cabinets, these areas were covered.
I had already had quite my fix of staining cabinets, and my fingernail beds had finally returned to normal after being stained for two months, but the stain needed to be fixed:

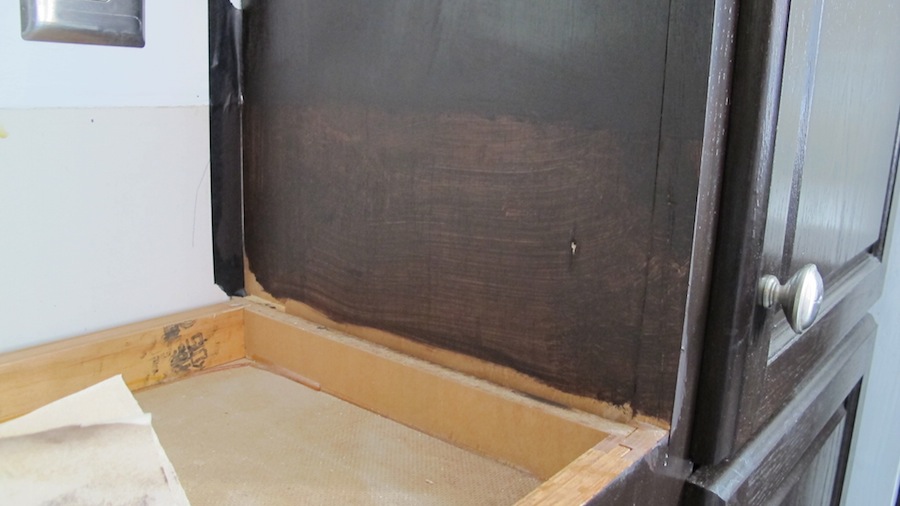
Need to touch up stain and paint previously covered by an integrated backsplash.

Need to touch up stain in this area previously covered by an overhang support.
I had a great experience using the General Finishes gel stain to transform our kitchen from oak-y to espresso brown, and I was confident that the leftover stain would help us successfully patch up these unstained areas.
Step 1: Sand the Surface
I started by hand sanding the problem areas, including the edges of the stain. There was a noticeable ridge of stain where the new finish met the old. By sanding until I could no longer feel any stain ledge, I guaranteed myself a fresh, smooth surface to re-stain.
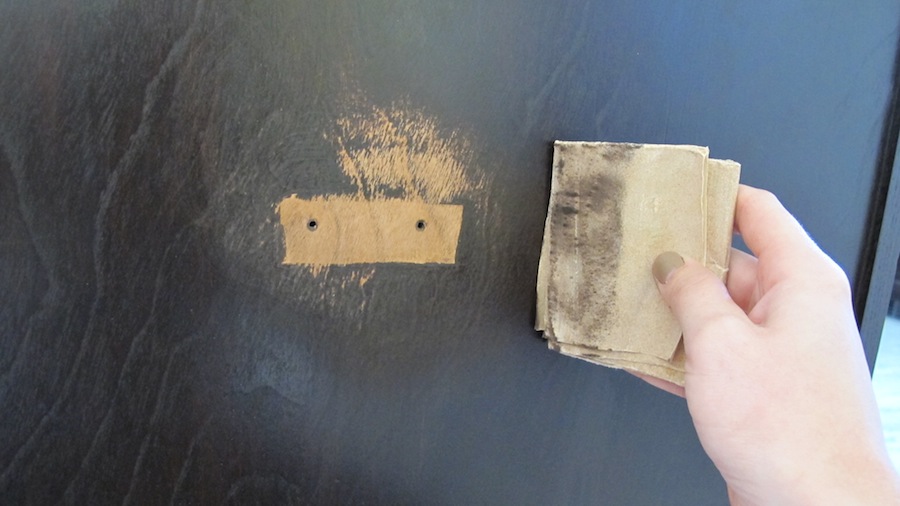
Sand to prep the surface before adding gel stain. Gel stain is easily removed with sand paper.
This is as good a time as any to note that if you do take sandpaper to your gel-stained cabinets, the stain will come right off, and easily too; this was no power sanding effort, but in addition to showing how easily the stain can come off, this post should help you see how easy it is to spot-correct scratches or dents that happen over time.
Step 2: Apply Coats of Stain
I stained these trouble spots in the same way that I had the original cabinets (as seen in gel-staining update #1, gel-staining update #2, and in the grand gel-staining reveal). You will want to apply one thin coat each day to allow it to thoroughly dry between coats.
After one coat, there was noticeable improvement, and after two more there was no sign of the oak.

One coat of Java Gel Stain to touch up a spot on the cabinet.
Three thin coats of stain later, the only evidence that proved that these spots had been patched was the slight distinction in finishes. You can see it in the above picture; the stain is matte, and the surrounding finished cabinets still glisten with satin polyacrylic. You will need to apply the coat of polyurethane to make the touched-up gel stain match the rest of the cabinet.
The larger of the two problem areas (the cabinet previously covered by backsplash) was something we navigated when the countertops were installed. Our installers suggested we leave that small piece of countertop loose so that it could be removed when we were ready to add stain.

I needed the integrated backsplash with the old countertop to be removed before I could stain and paint these surfaces.
Removing the small section of the countertop made it possible to stain the cabinet without damaging our new white acrylic countertops.
One coat of gel stain begins to blend into the existing stained surface.
Step 3: Add Coat of Poly
With a light coat of poly applied to the top of the new stain, you’d never know this was a patched job. It’s important to use the same polyurethane you originally used to cover the gel stain so it matches. Apply it in long strokes to the overall cabinet area for the best chance of it blending in.

Java Gel Stain by General Finishes transforms oak cabinetry.
The only remembrance of the old countertop is two small screw holes from the supporting brace, and while they’re slightly visible here (in a good way, since it helps you to see where the cabinet had been previously unstained) they really sit at about knee-height, and we never notice them on a day-to-day basis.

Looking for the Gel Stain that I used to stain the kitchen cabinets? I could not find it in stores, and my best resource was General Finishes via Amazon. Learn more about the product and purchase it for yourself. Two thumbs up :)


2 Comments
Your cabinets look great! I have a hard time telling you touched up some spots, even knowing where they were.
I totally ignore easier repairs in favor of more exciting projects, too! Last night instead of putting a second coat on the laundry room or the hall bath closet I ripped out our pantry. I discovered that our counters used to be a horrifying shade of “light urple” (Celebrity Jeopardy anyone?) and that there are three layers of wallpaper (plus two layers of paint, one of which is my fault) in our kitchen. Sigh.
Did you wipe excess stain off or did you use like a paint? I just got my java gel stain in and your cabinet color is exactly what I’m going for.