Our 1940’s foursquare home is abundantly squeaky. It’s situation that I happily ignored after a friend reminded me that no intruders would be able to enter unnoticed. At that time I lived alone, and if a big dog wasn’t enough, squeaky floors did seem to make me feel more at ease.
This squeakiness is a factor of the home’s age and its old bones. It’s likely due to the construct (there are places in our basement ceiling where the subfloor doesn’t rest on the joists), and due to wear (I’ve refinished the floors once already, and surely they had been done in the decades before me, but because they’re not non-tongue-in-groove there were some spots throughout the house where the ends of boards bowed loose. Loose boards are squeaky animals).
Pete hates the squeaks. He’s managed to fix most of the problem areas on the first floor by working from beneath, in the basement. In those spots, he used shims and cross braces to reinforce the joists and improve the tightness between the subfloor and the joists, but fixing squeaks on the stairs and in the second story of our home is a different story. You can’t access the joists from beneath unless you want to get into removing drywall and plaster which, yes, he has seriously contemplated and I’ve seriously considered approving if it means that he’d stop pointing out all of the squeaks that were once so endearing to me.
What I’m getting at is, we’ve been on a mission to fix those second story squeaks. Pete came across a solution that we had to try, and bought a few boxes of these Counter-Snap products on Amazon.
There are two different products:
- One that is intended for use when you know where the joists in the floor are located and
- Another you can allegedly use anywhere, regardless if you can hit a joist through your hardwoods, or not.
If you’re going to buy, search the store’s products closely because we found the descriptions and product differences to be confusing, but not confusing enough for us not to test them out for just $25 total.

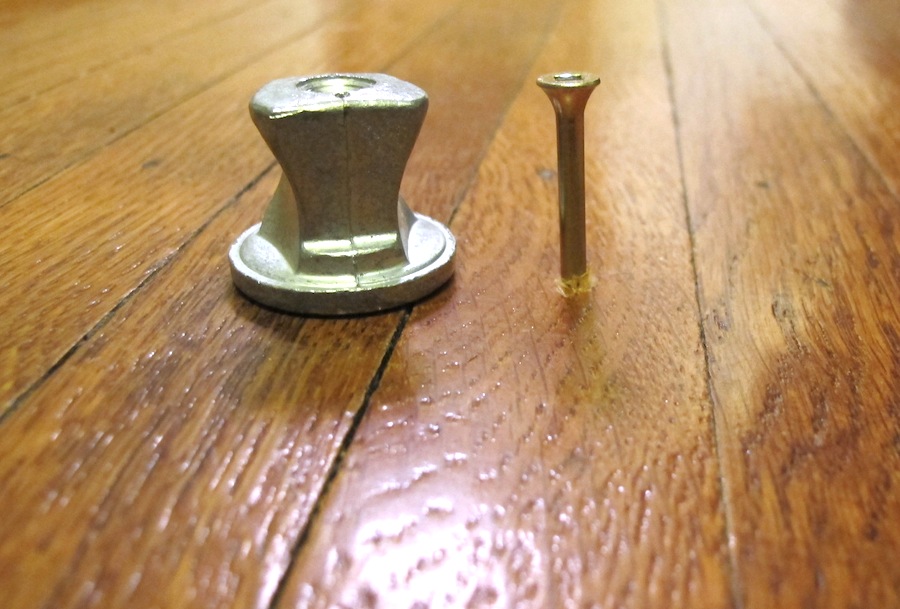
Two types of Counter-Snap screws.
If you think about it, screwing through the floorboards is a pretty obvious way to correct bouncing in squeaky floors. You’re effectively cinching that board back down to the subfloor/joist, reinforcing it into place and eliminating any bounce (and bounce so often = squeaks). The benefit to these screws is that the head of the screw is designed to break away, so you’re not left with unsightly phillips head noggins poking out of your beautiful floors.

Friendly warning: I think I labeled these wrong! The gold one is to be used between joists. The silver one is to be used on the joists.
1. Locate the Squeak
Hardwood floors squeak at two places, on the joist, and between the joist. Stairs usually squeak right in the center of the step. Once you focus on exactly where the squeak is coming from (which usually involves bouncing around like a Teletubby) you can pretty easily target where you need to make the fix.
2. Predrill a Hole
The process starts by predrilling a hole into the floorboards at the point of the squeak (the company recommends a 3/32 or 7/64 bit to prevent the floorboards from cracking. We also used this predrilling opportunity to see if we were going to blast into a joist or not.

Drill a hole into the squeak.
3. Set the Screws to Proper Depth
Using our impact screwdriver, we disregarded the manufacturer’s guide. The guide says to use metal fixture beside the embedded screw in the next photo. It helps DIYers screw just deep enough to satisfy the snap-off point). We winged it, having better luck setting the screw as deep as it needed to be visually.
Set the screw to the perfect depth (the tool guarantees its positioning and gives you a wider area to hit with the hammer).
4. Test for Squeaks
Even before we broke away the top of each screw to leave the working part counter-sunken, we did more Teletubby bouncing to test out the floors. I told you we needed a lot of screws; each one made a big difference. The path between the bathroom and our bedroom was improved significantly.
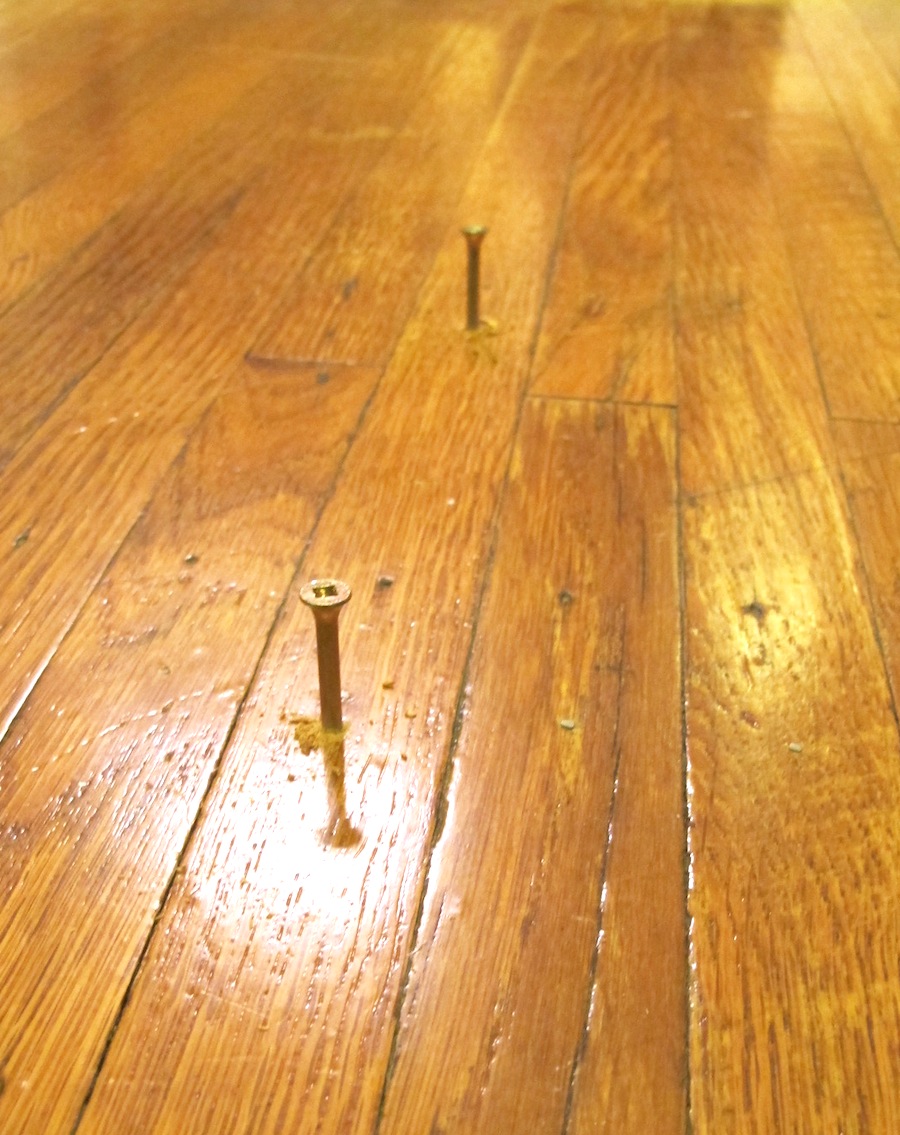
Screws in squeaky spots.
5. Snap Off Screw at Breakaway Point
Each screw broke away easily with a firm tap of the hammer. (And to note, we found it easier to break away the screws when the metal fixture shown two photos above was not wrapping the screw.)

Use a hammer to knock the top of the screw, which fractures it at the break point.
I initally thought that the holes left behind would be really obvious (they are, after all, bigger than the small nails that hold each floorboard into place). Turns out, when you stand up and look down, they aren’t so gaping, hardly noticeable at all. If you had them drilled in abundance, maybe your floor would start to look like swiss cheese, but in the 20 or so places that we drilled into our second story, you don’t really notice the “damage”.

Hole left after screw breaks away.
If you’re looking for a quick fix, I hope one of these products sparks some inspiration and interest. After all, it wasn’t a challenging project for the result it provided. Good luck!


8 Comments
I had no idea that they make screws like that! Do you fill in the leftover holes, or just let them stay?
I suppose they could be filled with wood filler, but we left them as is. The holes are much smaller than my macro images present, and I really don’t notice them anymore. Maybe they’ve just filled with dirt after sweeping over them a few times. (Gross) :)
Interesting!! In (what will be) the new baby’s room, there are some SERIOUSLY squeaky parts of the floor right as you walk in the door. Not good when you are trying to sneak in and out of a sleeping baby’s room! I cringe every time I walk in there. I was wondering if there was a way to fix it since it’s on the second floor. Good to know! We may have to give these a try.
I have been going batty trying to figure my floor out. That said, your blog has been helpful but I have a pretty big question. In the picture above you have a long silver screw and a shorter gold screw. The silver is way longer than the gold and on the pic you say that this is for between the joists (which makes sense to me), while the gold is said to be used on the joists. This was greatly helpful. However, when I clicked on your amazon links, both links seem to point to the shorter gold screws (one in a sort of kit, and the other being just screws). Are these the same? What happened to the longer silver screws? Was it just a mistake with the link?
Thank you so much for your help on this.
One side note. If you don’t want to leave the holes, I have found that Dap Plastic Wood does a great job with floors because it hardens. I’ve put that in the holes, lightly sanded after drying and then colored over the patch with a Minwax Wood Finish Stain marker (also SUPERB for floor scratches). This method has worked well for me. Now… if only I could get rid of the squeaks!
Finally, one may want to consider getting a stud finder ($20) to locate joists. Mine found an electrical box I almost drilled into under my floor… which has already been worth the money.
Cheers!
Dave
Sorry that the links aren’t correct anymore – they were right at one point but my guess is that the seller changed the product at the link. I went back into my order history and found the long silver screw product again:
O’Berry 3137 Linoleum/Hardwood Squeeeeek No More At Joist Screws 50 ct
Hope that works for you! Thanks for the plastic wood tip!
I know this post is dated by now, but I was curious if the labels on the screws in your photo are correct or if you swapped the use after getting the products? The seller on Amazon (o’berry) lists the silver screw as for the joists and the gold screw as for between the joists.
Really interesting, Geoff! So, yes, it’s been almost 11 years, but I still have the original boxes of screws so I got them out tonight to see if there were any directions with the packaging. Unfortunately, not. It definitely seems like there’s rationale for the silver screws to be used only in joist, which makes sense, and maybe we did it wrong because the directions were incorrect in 2012! Hard to say. But I can say, these are good products and they do help stop squeaks (even if we were using them backwards, they worked for our floors!). Thanks for pointing this out so I can make corrections in the post. Appreciate it!
Thanks so much for responding after 11 years and glad to hear they work well either way! We are in a similar situation as you and this post is a lifesaver!