
Last month, I was invited by my friend Lana at Making A House A Home to join her and two other bloggers for a springtime link party!
Throughout this month, you’ll see four different projects featured by me and these bloggers, and we encourage you to contribute your own projects too! Link to your own projects in the bottom of this post or leave a link or description of your project in the comments. Remember to check out the other projects on this springtime party train as they post later in the month:
March 12th: Roeshel at DIY Showoff
March 19th: Lana at Making a House A Home
March 26th: Kim at Design Thoughts
I’m going first (no pressure) and I hope you enjoy this little Spring Thing:
I had taper candles leftover from the wedding, but we don’t own any candlestick holders (we wedged them into a bunch of white glass vases with narrow tops at the reception), so I decided to make some out of pieces of f-r-e-e driftwood and oven-hardening clay.

A driftwood base for these candlesticks worked for me because 1) I have plenty of local driftwood and 2) I happened to have a few extra pieces cut and stored from a DIY magnet project. Fresh cut branches with bark on them would be equally resourceful, if that’s what you have laying around your backyard.
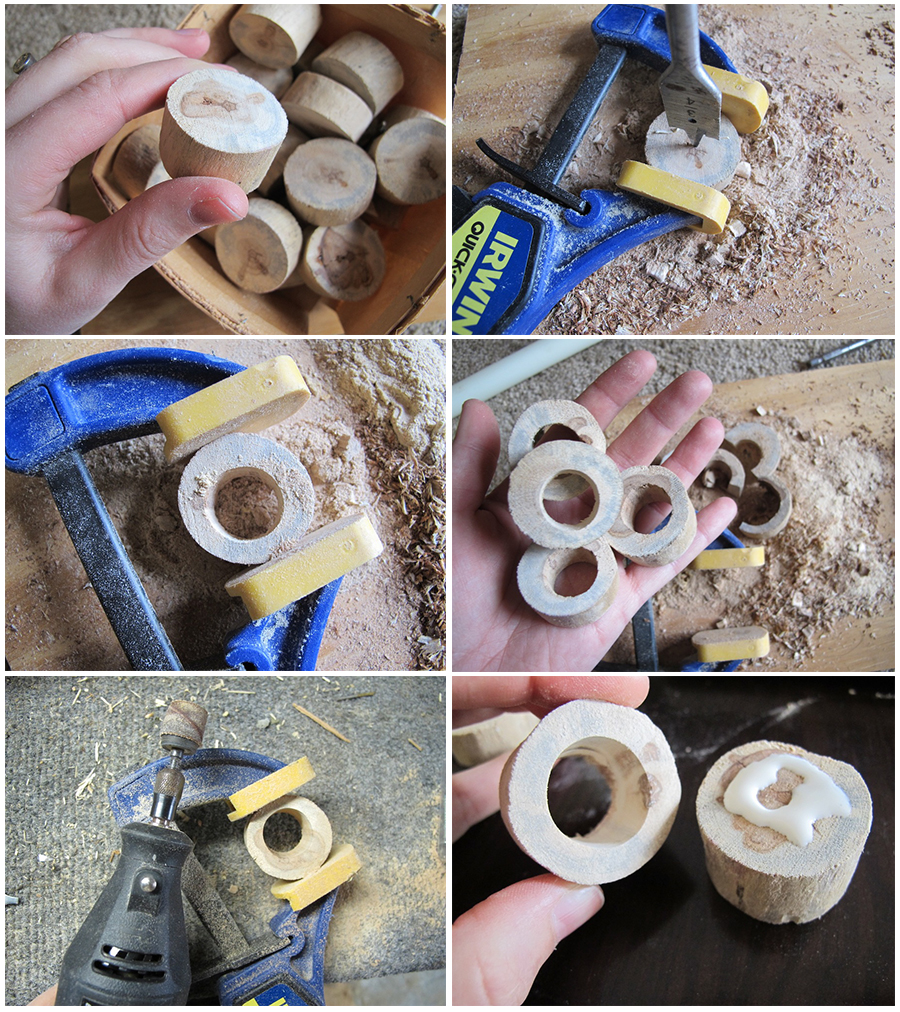
I selected several pieces of driftwood based on their ability to stack and sit flat and level, and then clamped each one securely before drilling into it with a 3/4″ paddle bit. The clamp is essential because the driftwood is hard to hold with your fingers whilst being drilled–it’s likely to spin and chatter a bit–and no one needs to gouge flesh while crafting.
It doesn’t take much to drill through the driftwood so long as the cross section is wide enough.
The 3/4″ bit was just a shimmy too small for the diameter of the candlesticks I have, so I followed up by fine-tuning the opening with the Dremel using a round sandpaper bit until the candle fit snugly, but not without having to force it.
I designed two of the four candlesticks to be double-height. To do that, I glued a piece of driftwood with a hole to a piece without a hole drilled (heavier piece on the bottom for weight).
For the bows, I picked out many different colors of Fimo clay at the store, honing in mostly on colors that would compliment the color palette in my home. Fimo’s great, really easy to work with, inexpensive (I bought mine on sale for <$2/color) and cures by baking in the oven (I used Sculpey when creating my succulent planter wedding favors and its a similar polymer play product). In an effort to infuse more yellow and yellowy-orange into my springtime decor, I chose an assorted batch of colors.
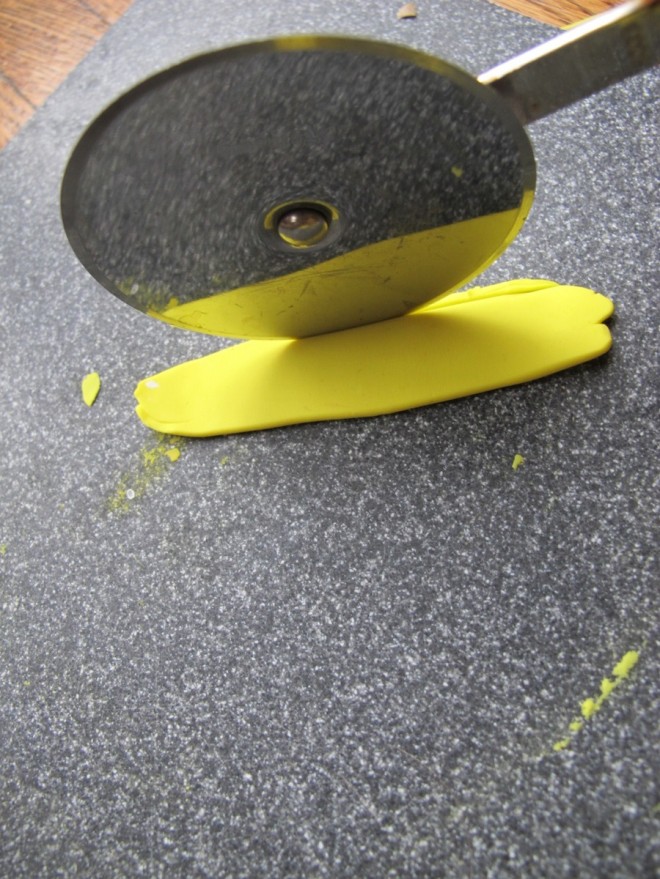
My flattest working surface of all is a piece of acrylic countertop, a scrap that my Dad gave me from their own home improvement efforts or something, with the intention that maybe I could actually use with food. It’s not so easy to use as a cutting surface – apt to dull knife blades – but works well as a smooth base for crafting.

The bow details would be glued to the surface of each wooden base, so I made four to scale.
Bows are simple to make (and squeeze-their-cheeks cute). After rolling the clay out, I trimmed the edges with a pizza roller. Having clean, sharp edges yields a cleaner, sharper, more ribbon-esque bow.
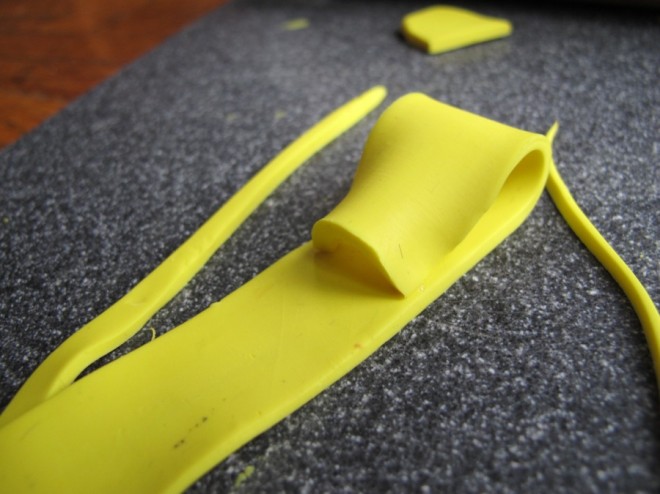
I flipped both ends of the clay inward, making sure that the fold still had some volume in it.
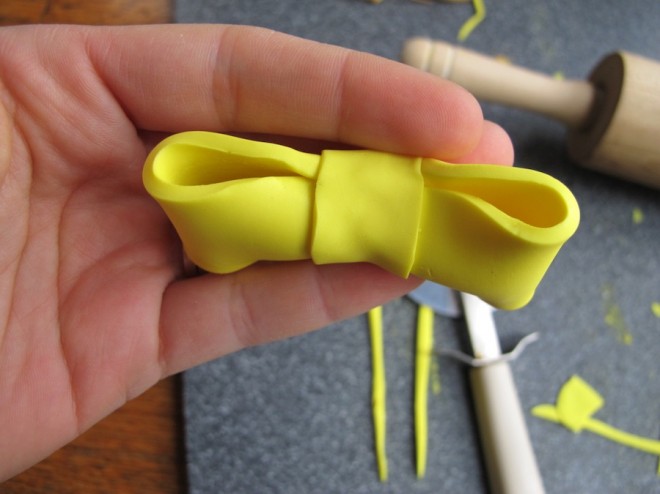
Then, using a second piece of clay rolled and trimmed, I pinched on the finishing touch. Camera angle makes this one look a little lumpy, keep on readin’.
Fimo clay requires baking, so following the instructions I baked them until they were solid on a pan lined with tin foil.

The finished bows, as I mentioned, were glued on to the wood with e-6000. It’s important to make sure the bows will rest evenly with the surface top when the candlesticks are propped upright, because they serve as a support (like a tripod) and make the candlesticks much less inclined to tip over. They’re one of my favorite DIY springtime accents so far this year.


3 Comments
Those are so cute, Emily! Sharing and pinning and then linking up and looking forward to seeing everyone’s creativity! :)
Thanks Roeshel! Glad you liked them!
Thanks for hosting, Emily. (Great idea with the candlesticks, too.) The yellow bows give a fun pop of color.