Lots to cover in this post:
- Railing attachment
- Railing baluster design
- Ladder design (there are two!)
- Roofing design
- Installation of the transparent polycarbonate panels

Sitting on the front edge of the playhouse before installing the railing.
There’s a lot to be said about making long term investments like this at your home. The process of building the playhouse/treehouse for our kids challenged us to create something that we’ll have for a long time.
Installing the Railing Posts
I consider myself healthily frugal but went into this project with a realistic budget. (Store-bought playsets in comparison are not cheap). We saved on our project by reusing some hardware and wood scraps from previous projects, and by being efficient with cuts to make the most of newly purchased wood. Safety features, obviously, weren’t something that we’d cheap out on.
And that’s why this treehouse probably has the best railing system that we’ve ever built.
More than anything else, I think this proves that practice in DIY makes perfect. Sturdy railings are more complex than you would think, and it was the step of the project that I was most weary about. I’ve built some railing systems in the past that required a lot of work to prevent them from feeling loose, and I wanted/needed these to be right on the first try.
From experience, it’s really best to anchor the railing posts to a real structure (don’t even bother screwing around with those metal cups, metal cups are phonies).
To do this here, I cut away part of the T1-11 paneling that I had already installed so that I could bolt the vertical railing posts down and through the installed floorboards, directly to the structural end joist.
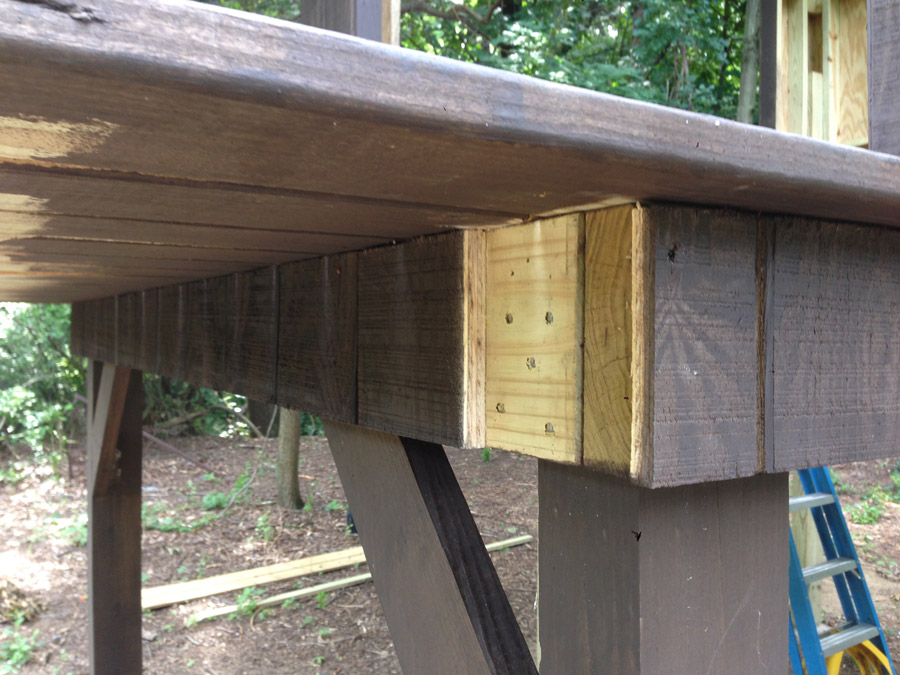
Removing some of the t1-11 facade to accommodate the railing.
The order of operations of construction may have been a little bit whacked in this case. Yes, I ended up removing something I had already deemed “complete,” but it was worth it to troubleshoot and brainstorm along the way.
The placement of the ladder was something we hadn’t firmly determined prior to this step. It was an 11th-hour decision to install it coming up the backside, which meant that we would be able to have one long stretch of railings.

Installing the railings on our modern treehouse.
Designing Custom Railing Balusters
For the balusters, I loosely followed a railing design that I liked in one of my inspiration photos, but retrofitted the materials list to fit a modest budget because cute railings made of premium wood can be damn expensive. Instead of buying ridiculously priced lumber that might look like crap after one season out in the snow and rain, I bought a bunch of 6-foot 1×6 fence boards, and ripped them to size. They’re pressure-treated, and fence boards notoriously last a long ass time.

We used pressure-treated fence boards for our railing balusters (one board = 4 balusters when cut to size).
A single 6-foot 1×6 fence board was enough to yield four 30″ balusters. We used the chop saw and table saw for speed and accuracy.
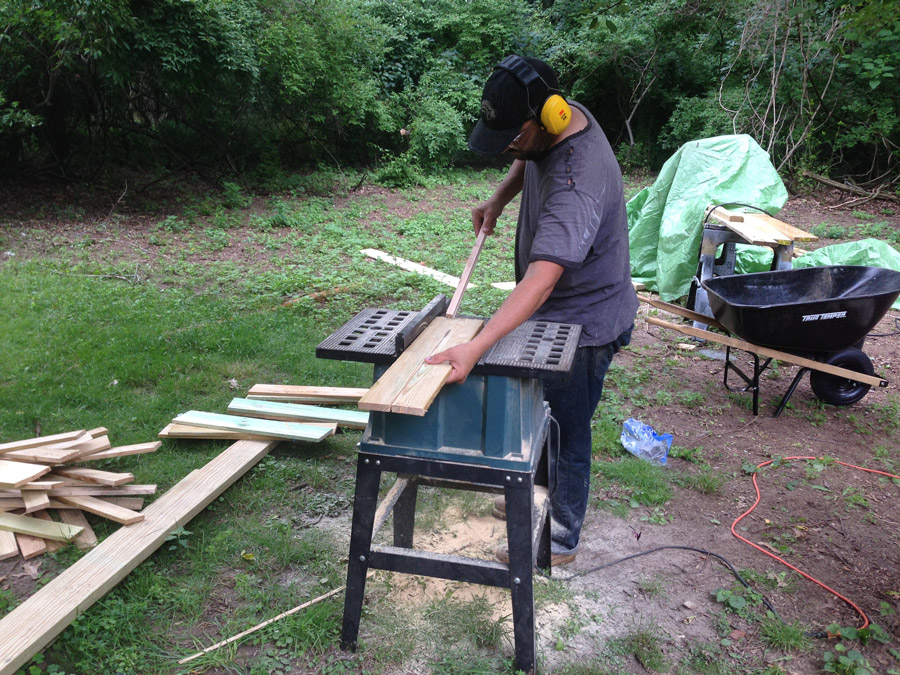
Cutting down fence posts to become railing balusters.
My ol’ friend the Kreg Jig doesn’t get much use these days, but came in handy while constructing the horizontal structure of the railing so there are no awkwardly exposed screws or bolts. We attached the 3″ wide balusters with 1-1/2″ deck screws by starting in the center, and working outwards, using a spare baluster as a spacer. Without much planning, this worked out pretty well.
We later went on to add a 2×6 board across the top to create a flat rail, which you’ll notice in some of the photos later in this post.

Installing the balusters to the playhouse railing.
Building Playhouse Ladders
The ladders for the treehouse were another big decision; we actually had two to make, the second of which you can sort of see if you look really hard through the chop saw in this picture.
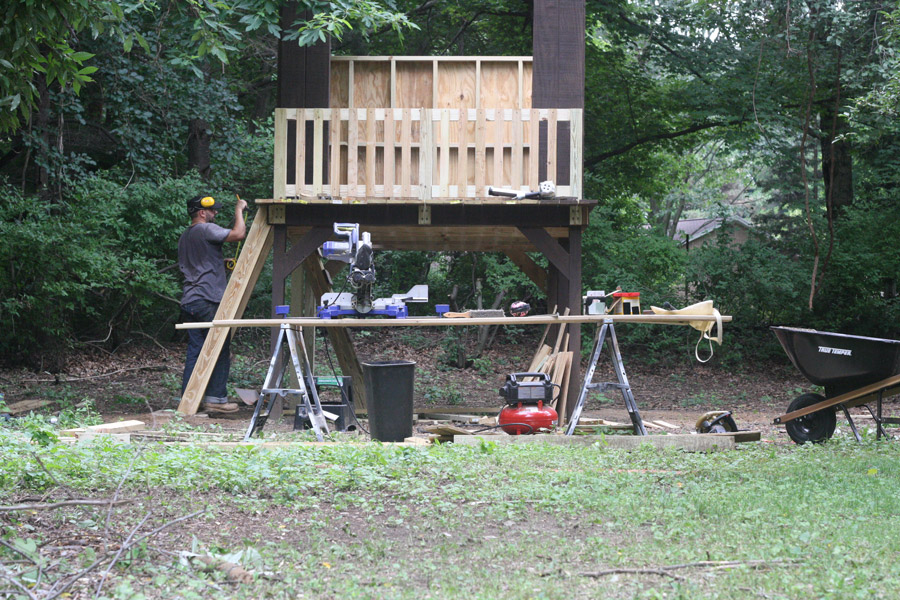
Installing the ladders into our modern treehouse.
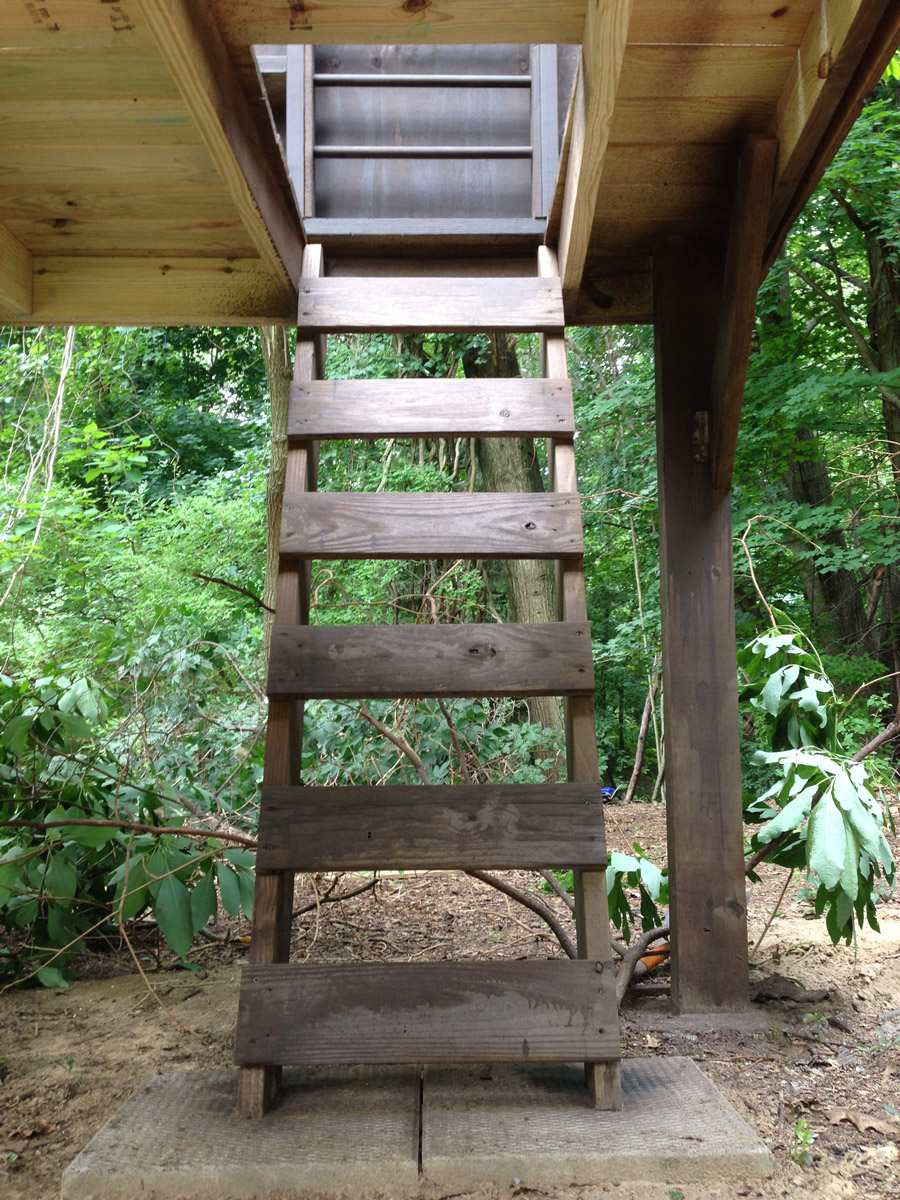
The first ladder resembles your everyday ladder, but with foot treads like steps.
Had we given a little more thought to the placement of each step, we definitely would have spaced them out a little bit more (we went with a standard 8″ rise, but didn’t account for there being virtually no tread “run” so if you’re not careful, anyone with adult-sized feet can get pretty tripped up (or down, I may have already fallen down). This one may get rebuilt eventually for convenience, but not immediately because so far the kids are nimble enough to not get tangled.
It does look damn good though, and I’ll always appreciate the way Pete took the time to dado and chisel this to visual perfection.
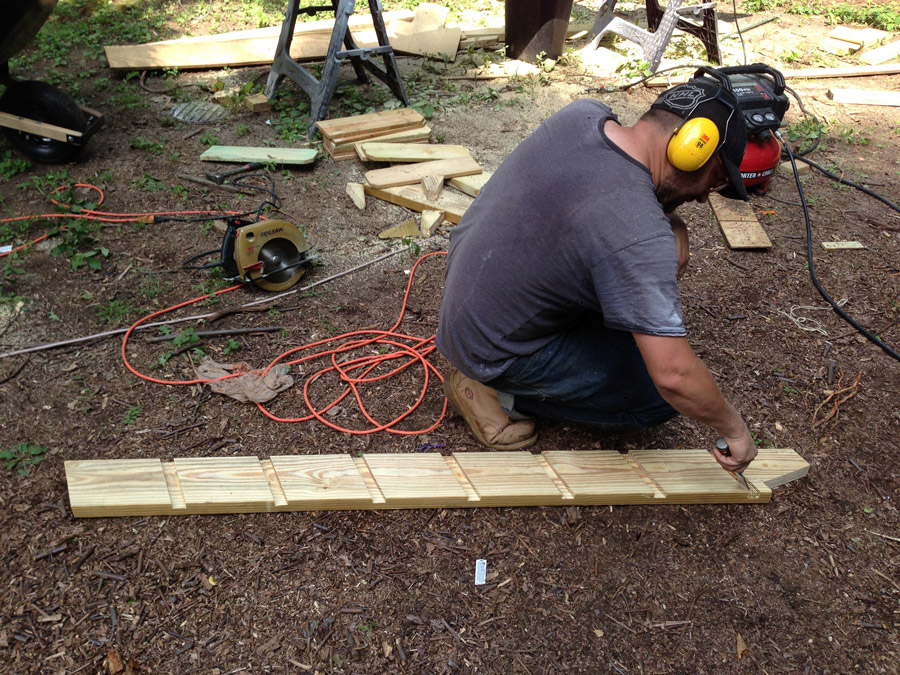
Designing a treehouse ladder.
That second ladder provides access into the treehouse through a small “trap door” opening in the floorboards (more about the finished trap door here). This ladder style is a straightforward, and easier to climb too. Since you’re accessing straight up into the treehouse, I added dowels into the wall here to grasp onto as you’re entering the enclosure.
The cement pavers that we used beneath both ladders were something we inherited awhile back when we lived at the old house but never used (but since we bothered to haul them from house-to-house, and then left them leaning against a tree for 14 months, they weren’t easily forgotten about and happily found a permanent home).
The trap door ladder into our treehouse.
Designing an Angled Roofline
The ceiling structure was a detail I anticipated as much as the round window (read about how we cut that round window here); to keep in the modern look and feel, we constructed the roof to be slanted (I think it falls 16″ over 12-feet).
Best case scenario, the roof would have completely covered the front porch area too, but our measurements (or lack thereof) made the overall treehouse a little longer than we envisioned originally, and so we settled with an even ~12″ overhang on the front and back.
Adding the structure for the angled roofline.
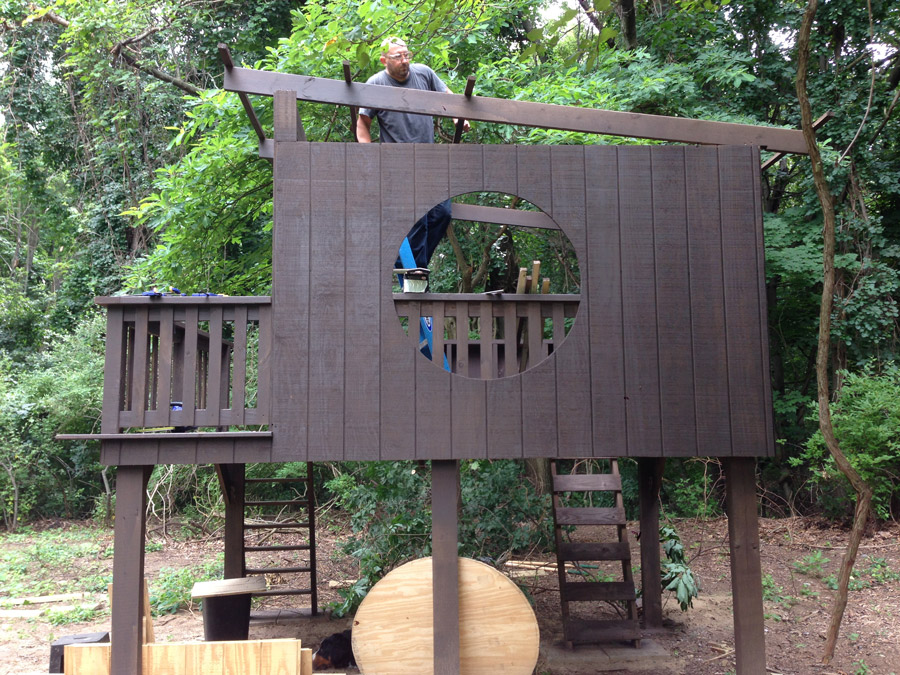
Each of the three boards up there was hand-notched out by Pete to allow it to sit in place, and was also toenailed securely with the framing nail gun (we used that tool a lot during this project; highly, highly recommended). We considered adding hurricane ties for added reinforcement, but without them it felt really sturdy, especially once we began layering on the ceiling structure that ran perpendicular. They’re always something that we could add on later, since it’s an open structure.

Our modern treehouse, with the unstained wood railing.
Somewhere in between finishing the railings and ladders, and installing the roof, we sprayed the raw woods with more of the opaque Oxford Brown stain; we continued to dilute the opaque water-based stain by 50%, which did a lot to stretch our stain and finish the job without completely eliminating the opacity of the stain. (Read more about the staining strategy here.)
Installing pieces of roof framing on our modern treehouse.
The corrugated roof was one of the only materials we knew we wanted to use when we started this project; we figured it would be easy to find. A roof finished with shingles was a viable option too, but transparent polycarbonate would let in more light. We needed pieces that were 12′ in length which narrowed us down to a Polycarbonate roofing product at our local Lowe’s (those tall sheets on the right):
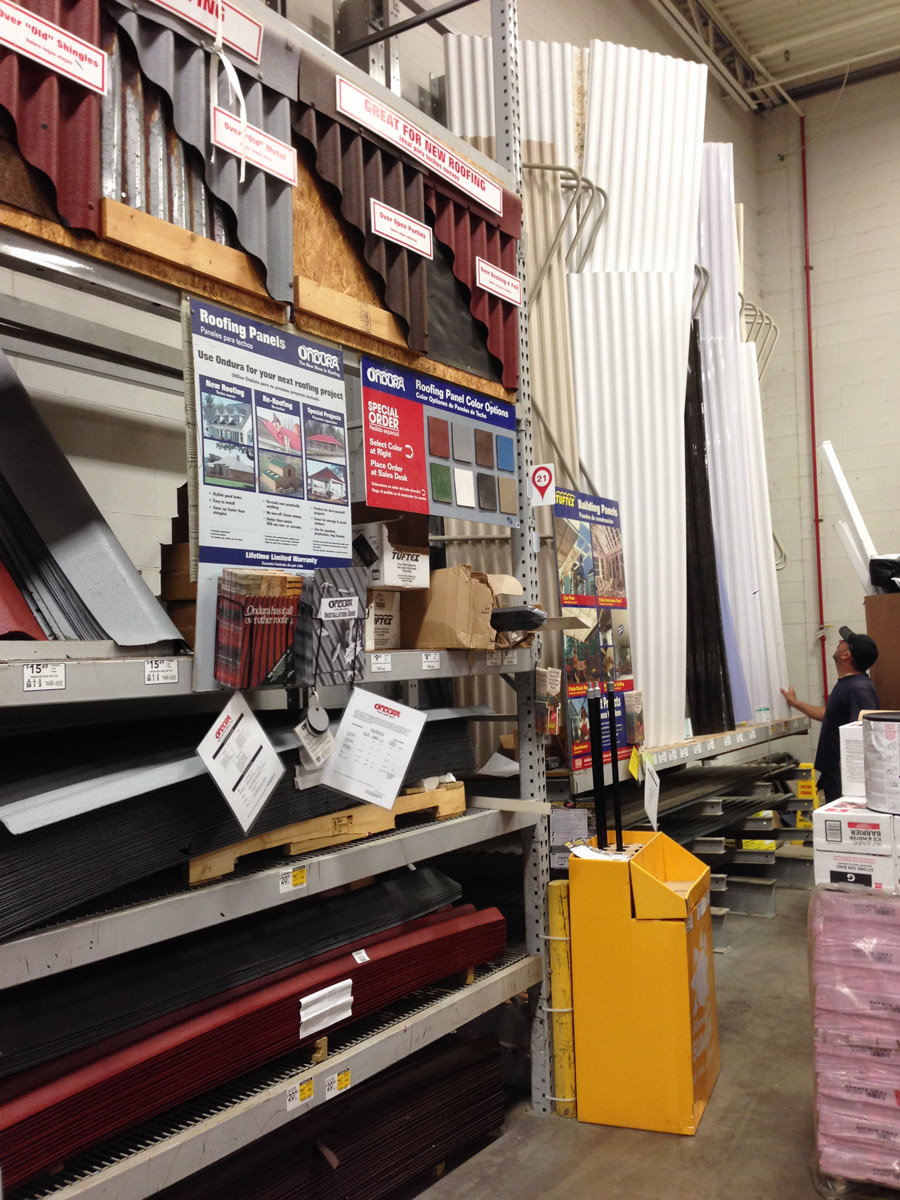
Polycarbonate and corrugated roofing options at Lowe’s.
The polycarbonate roofing we chose is most closely described as sunglasses, transparent but tinted. When used as a roofing material, you can see straight up through to the sky, but be shaded from the direct sunshine.

Carrying tinted polycarbonate roof into the playhouse for installation.
We had to get a couple of boxes of special screws to attach the polycarbonate. If you were to drill right through the plastic you’d be dealing with water leaking issues, so the recommended fasteners have a rubber gasket-like seal on them to help divert rainwater. At roughly $33/each (in 2014), we needed 5 sheets of polycarbonate and 2 boxes of screws to account for the necessary overlaps in panels. It might not have been the least expensive route, but it has kept our treehouse dry.
If you want to talk about saving a few dollars, the ceiling braces that run directly below the plastic roofing were ripped from leftover deck boards, a quick way we managed to save ~$15. I also didn’t stain the top of them, because why?

Installing the tinted polycarbonate roof on our modern treehouse.
We’re considering it “done” for awhile. We are going to install swings at some point in the coming weeks, but the novelty is in the treehouse itself right now, so we’re not rushing ourselves. Also, there are some finishing touches that I’ll add to the interior as I get around to it (paint treatments, pulley system, pegboards). And when I find the right set of outdoor children’s furniture, I’ll scoop it right up so the kids can have added space to play and draw.
Before & After
Before I head out, I’ll leave you with some photos that I took this morning:
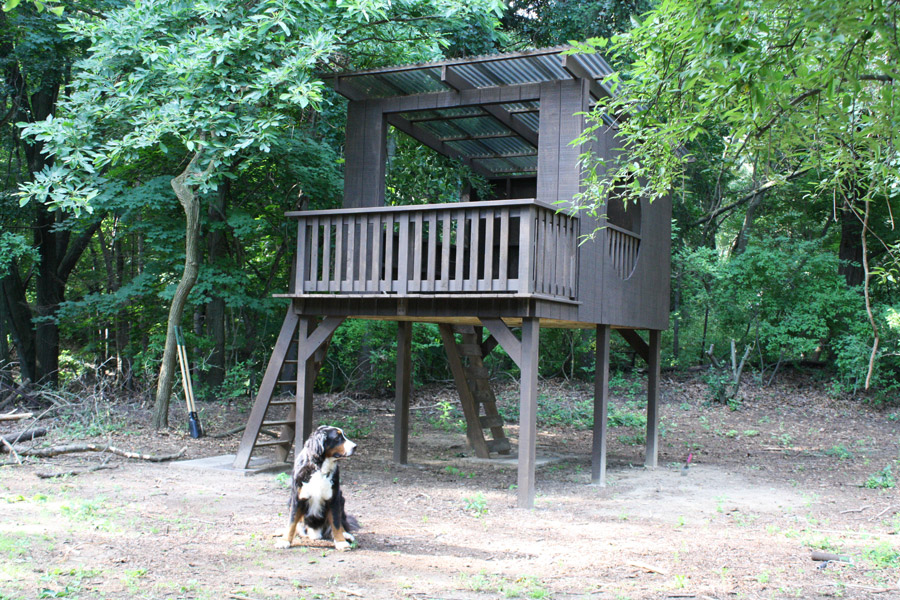
Our pretty, modern, and huge playhouse.

Our pretty, modern, and huge kid’s playhouse.
While spraying stain, Pete accidentally coated two of the cement blocks. May eventually go back and stain the others. May decide that I don’t care.

The new roofing, ladders and railings of our treehouse.

Ladders customized for our treehouse.
Inside, super spacious. A hole in the floor is the secondary entrance (it later received a trap door). The view from the half wall is wonderful, looking through vines and down into our ravine.
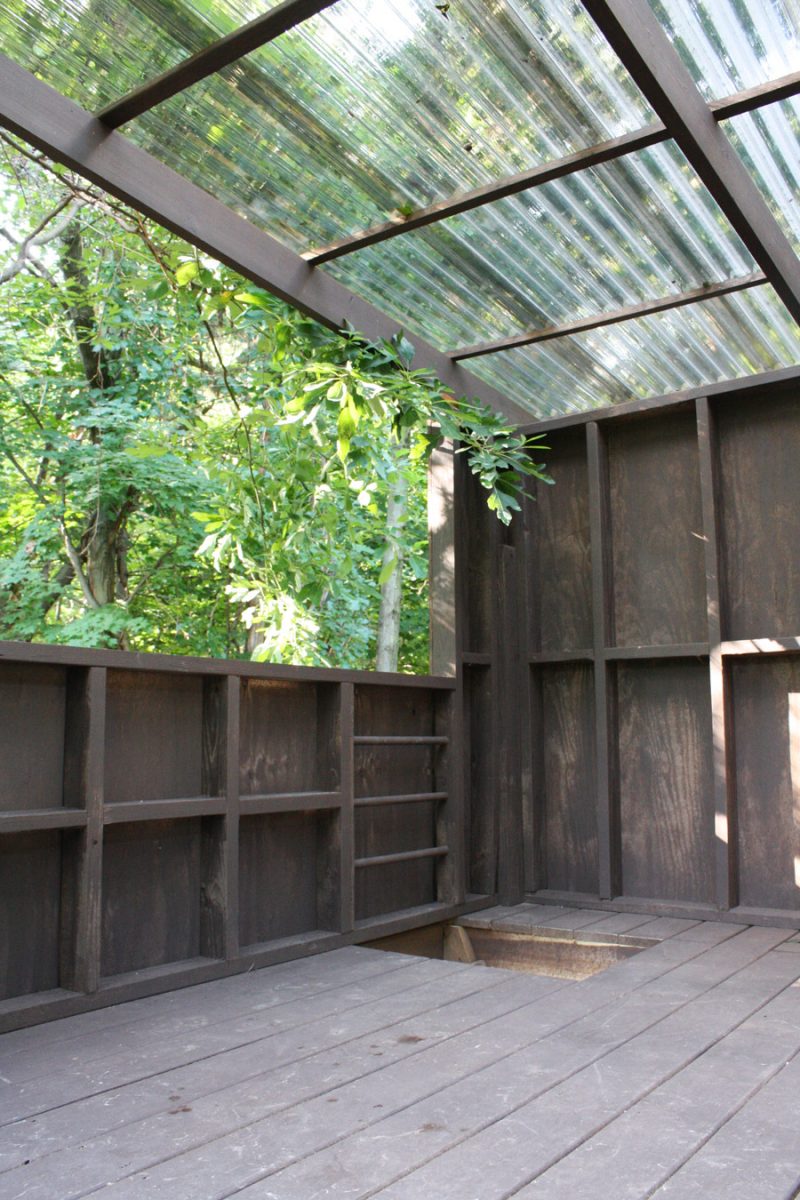
Inside our modern treehouse.

The new railing was installed for our round playhouse window.

Overlooking the backyard through the new railing.
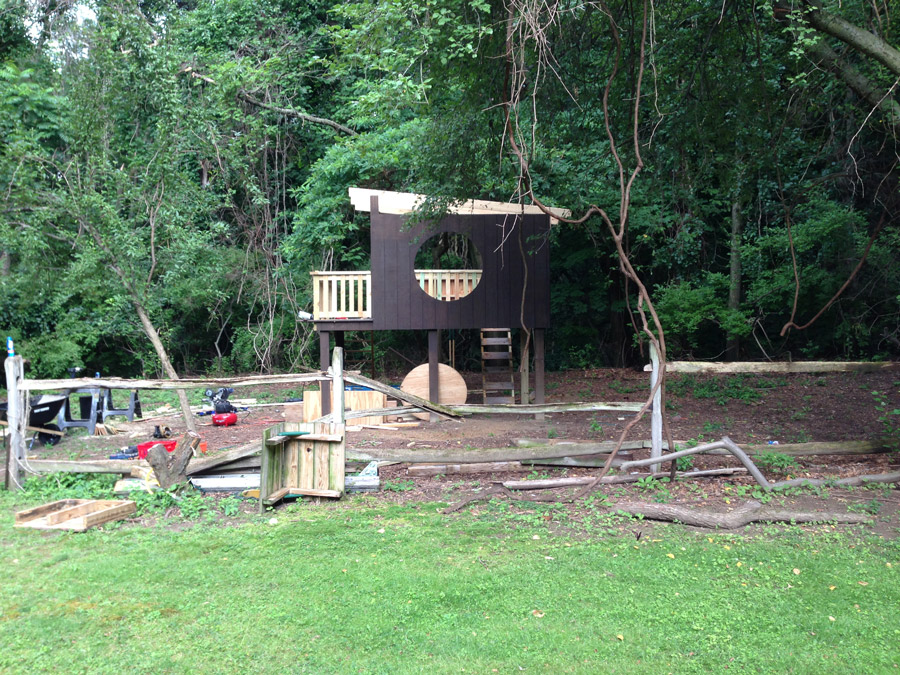
In any case, it’s unreal that in April, this area was still entirely overgrown…
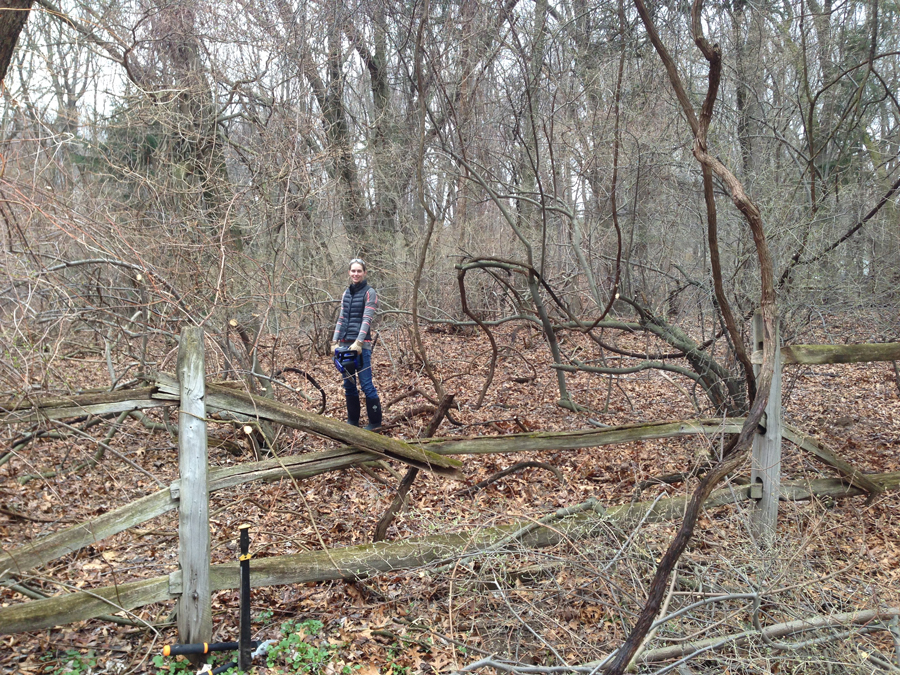
Before: Making space for the treehouse.
… and now it looks like this. (How’s that for a holy crap moment?)

Progress: Cleared brush makes space for a new treehouse.


14 Comments
Hi Emily, the treehouse looks fantastic! LOVE the round window, clear roof, and the stain color.
I wanted to let you know that the email I received from WordPress notifying me of this blog post was found in my Spam folder in Gmail. It said that the email was blocked due to it being similar to other emails that have been flagged as spam. Gmail is usually really good at catching Spam and filtering them correctly, so I NEVER check my Spam folder, but for whatever reason, I checked it this time and this email was at the top of the list. Maybe Gmail/Google is getting funny about WordPress because they would prefer you use their eBlogger? Anyway, just wanted to let you know that your users are no longer receiving the notification emails coming from your blog site.
I am so excited to see this! We are looking to build something exactly like this in our new home. We found a great house on 3/4 acre and honestly it’s screaming for multiple play/tree homes!
Thanks for the great inspiration and ideas!
Wonderful!! Glad you liked and have fun building your own!
The treehouse looks amazing, Emily! Great job by you and Pete!
Thanks Cait!
Wow this is incredible!! Amazing job!
Thanks Heba!!
Sometimes your local power company will sell or even give you used power poles. Our local company sells them for around $1 a foot. It is a good way to get some tall and sturdy poles for a structure like this.
Awesome tree house. We’re definitely going to need something like this on our property.
RAD – wish we had known that. We wondered before building where we could get something like that… and gave up thinking about it!
so cool; wonderful!!!!!!!!!!!!!!!!!!!!
Great fort!
Where did you get the stain and what color is the stain?
Kristi
I don’t even remember now! Sorry; it was something mainstream and readily available.
How much did it end up costing?
Hard to say, but at the time we estimated $1,000-$1,500 USD.