This post was originally published on DIY Network’s blog Made + Remade in April 2015.
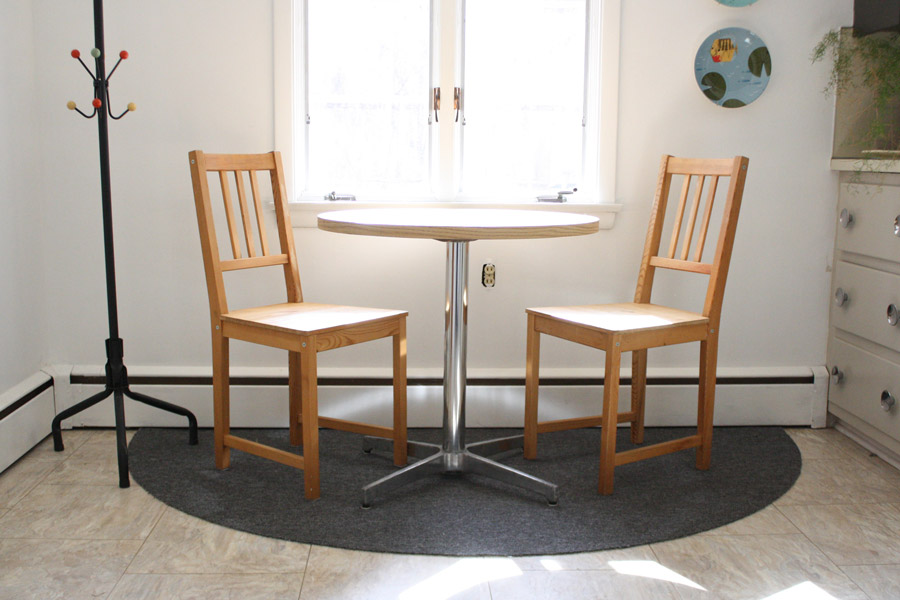
My ever-evolving home recently received a kitchen “upgrade” that took into account a much needed “downsize.” The new, smaller table in our eat-in nook is a 30″ round model with a “wooden” melamine top and steel base, a salvage find that served its original purpose as a table in a local school.

And never mind that uncovered outlet in the background; as always, other projects are always happening behind the scenes.
The table that used to live in this part of our kitchen was too big for the space – it was a giant, heavy square dark wood piece that had been in the dining room of our old house. When chairs surrounded that big table, they partially blocked the entry/edit to our back enclosed porch area, and moreover, the bigger surface area ended up being a catch-all for jackets and mail, occupying the space we would much rather let the kids use for morning waffles while we pack school lunches. A smaller table, a big win. Even when paired with some of our extra chairs, this smaller table leaves a lot of room for us to move about the space.
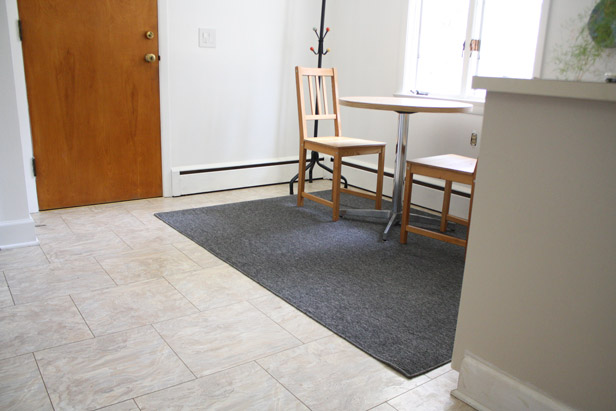
Part of my envisioned upgrades involved adding a small area rug too, something low-maintenance in this high traffic area, but pleasant underfoot for when we’re sitting at the table. The rug, a 5×7 indoor-outdoor model that cost ~$15 was a great starting point for this space, and coordinated simply with the cabinets that I painted last fall.
I wasn’t ready to leave it 5×7 for a few reasons:
- It’s was a little too big for the space. One corner was in the way of the porch door opening.
- That corner, and its surrounding 1′ square of carpet was likely to get heavily ragged on from foot traffic. I prefer to be able to sweep the dirt and dog fur that gathers at that entryway, so I wanted to be able to keep the foot-traffic-path reasonably clear.
- Round table paired with circular-inspired rug? Love it.

Making your own half-circle rug to fit a similar space isn’t hard – keep on reading below to get the full tutorial!
- Time: 30 minutes
- Cost: $20
Step 1
Flip the rug upside down. Measure the length of the rug, and use marker to “mark” the center on both edges. If your carpet is also 5×7, note that the centerpoint is 42″.

Step 2
Use the tape measure to connect the two marks along the width of the carpet; mark the 42″ spot along this axis. This is the step that will guarantee your circle to be symmetrical, not oval.

Step 3
Now’s the time to make a handy protractor-like tool. You’ll take a string, and attach it to the center mark along the long edge. A few tips: A safety pin works well. A post earring with a tight clip on the back. A push pin, as long as it doesn’t pull free easily when you tug on it. Tie a string to whatever you use, but make sure the string isn’t “stretchy” like yarn. You want to work with a pin that will stay in place, and a string that will remain taut so that your measurements are consistent.

Step 4
You already marked the 42″ point in the center of the rug; that’s your starting point. Extend the string to that point, and mark the string itself, so you know where 42″ on the string is.

Step 5
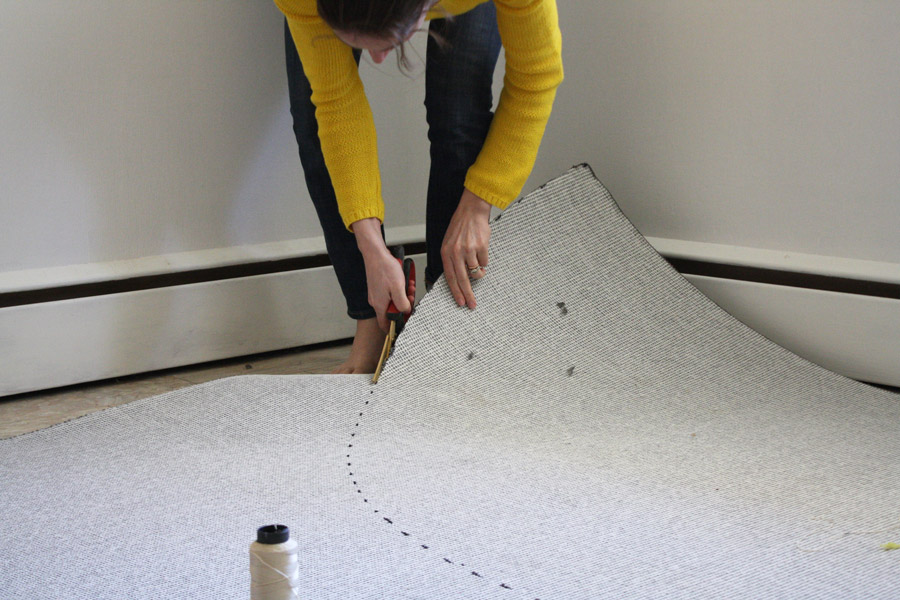
Rotate the string in a circular motion along the backside of the carpet, marking every few inches. There’s your guide line!

Step 6
Use very heavy duty cutting shears, and cut carefully along your dotted line. Not your nice fabric-cutting scissors, go for something with some muscle. I bought the heavy-duty Husky Titanium Scissors a few years ago, and they’ve come in handy more than you know.
Step 7
Voila! Upside down cut rug.

Step 8
The inexpensive indoor-outdoor carpet surprised me in that there wasn’t fraying along the edge of the cut; repositioned in our kitchen, it’s the perfect scale for our small seating area, and leaves plenty of open walkway for traffic coming in and out of the house.


Leave A Reply