Vinyl adhesive wallpaper has to be one of the greatest things to happen to DIY interior design. Hands down.

Adhesive wallpaper adds appeal to a midcentury entryway.
This is my first time at the removable wallpaper rodeo, and I decided to go with an adhesive product. The idea of installing real wallpaper scares me a lot – regardless of how mainstream it is.

Adhesive wallpaper that looks like light wood.
As I mentioned when I shared a post about repairing water damage on one of the entryway walls, I never painted the entryway when we painted the rest of the house. I thought at some point I might have a good vision for what the space could be, and I find that I’m better off living in a home for awhile to understand its potential based on how I use any space. This winter, we realized the need for easy hat/glove/scarf storage that our kids could reach, as well as the need for a place for friends to hang their jackets upon arrival. Entryway makeover inspired!
I bought two metal kitchen cabinets from a salvage shop, refinished them with epoxy spray paint, repaired the water-damaged areas, painted the rest of the room white including all of the previously off-white trim, and set out to purchase and install wallpaper to serve as an accent wall behind where the metal cabinets would be installed.
Why choose a vinyl, removable wallpaper?
- I wanted to avoid a mess. From what I’ve gathered from others, the permanent adhesive and glue process can be daunting (from applying it to the paper, to installing flawlessly, to keeping the surface of the paper clean and adhesive-free).
- For the most part, I’m comfortable making permanent changes to my home, but I’ve seen messed-up wallpaper firsthand, and it’s not awesome. Removable wallpaper takes a lot of the worry out of decor updates.
- If I did mess it up (or changed my mind in a few years) I wanted to have an “easy out.” Have you tried removing wallpaper? If so, that’s answer enough. If not, know that it’s usually time-consuming and sometimes damaging to the underlying drywall.
- The cost of removable wallpaper was comparable to the cost of buying permanent! Before I started price shopping, I was under the impression that adhesive would cost more, so I was pleasantly surprised to find a lot of designs in the $50-$100/roll range for 75+ sq. ft..
We installed maple hardwood floors over a year ago, and those things are here to stay. When it comes to choosing anything for this home, I think a lot about committing to items and making investments that will stick around for more than a few years. Committing makes it easier to avoid trendy patterns and colors in prominent or permanent ways, so I liked the idea of carrying a permanent element of the home into our entryway. The floors in the entryway are flagstone, and I think that the wood and stone looks great together.
Vinyl wallpaper looks like light wood hardwood floors.
Finding the Right Wallpaper
I didn’t have a source for wallpaper in mind when I started planning this project.
My preliminary online search led me to a few different online retailers that sold adhesive wallpaper. Once I found a light wood design that I liked, I took note of the specs and price-shopped around for the best deal. The specifications of the product (width and overall length and product description) were identical across websites, leading me to think that they were in all likelihood from the same manufacturer, but sold at dramatically different price points.
I describe all of this shopping-around stuff because what I paid for the product ended up being less than half of the cost of the product on the first website (plus, I found a coupon code for free shipping). $52 instead of $110. So, take your time, price it out, and land yourself a good deal.
Be sure to research how much wallpaper you’ll need for your chosen space – basic width x height will give you the area you need to cover. All reliable wallpaper sources should provide product specs as well as the overall projected square footage for one roll. Like with flooring or tiling, aim for 10% overage to account for pieces you need to trim to size, or lengths you accidentally miscut.
The wallpaper I chose was love at first sight; the perfect complement to our maple floors, a thick vinyl material with quality printing (not pixelated).
Measure, Cut and Install Your First Length
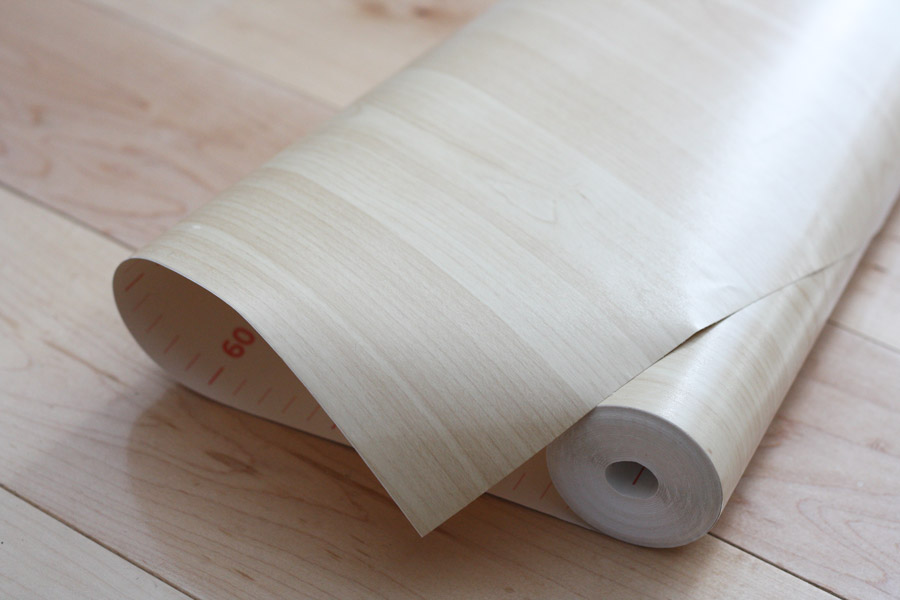
To install the wallpaper, simply roll out a length flat on the floor, nice side downward. You’ll find that most (if not all!) wallpapers have a grid pattern to help users cut straight lines, so use them to your advantage. Measure the length of wallpaper you need and trim to size.

Grid on the backside of the wallpaper makes it easier to measure and cut.
Leave the adhesive backing in place until you’re ready to stick one end of the wallpaper to the wall. Stand on a chair so you can apply it at ceiling height first; that way, gravity will help you as you work your way down. Before you actually install it make sure that your trimmed piece covers the surface you need it to, length-wise. You won’t want to get all the way to the bottom only to find you were an inch short.
Always prefer the manufacturer’s cut edge as you work. Start by lining the top edge square against the ceiling. Once in position, peel back the top few inches of the adhesive backing. I learned pretty quickly that you could place the wallpaper and it would stick firmly, but it would also peel it back like a piece of masking tape to adjust as necessary.
I did this multiple times on that first piece until I was sure that it looked amazing.
One length of vinyl adhesive wallpaper.
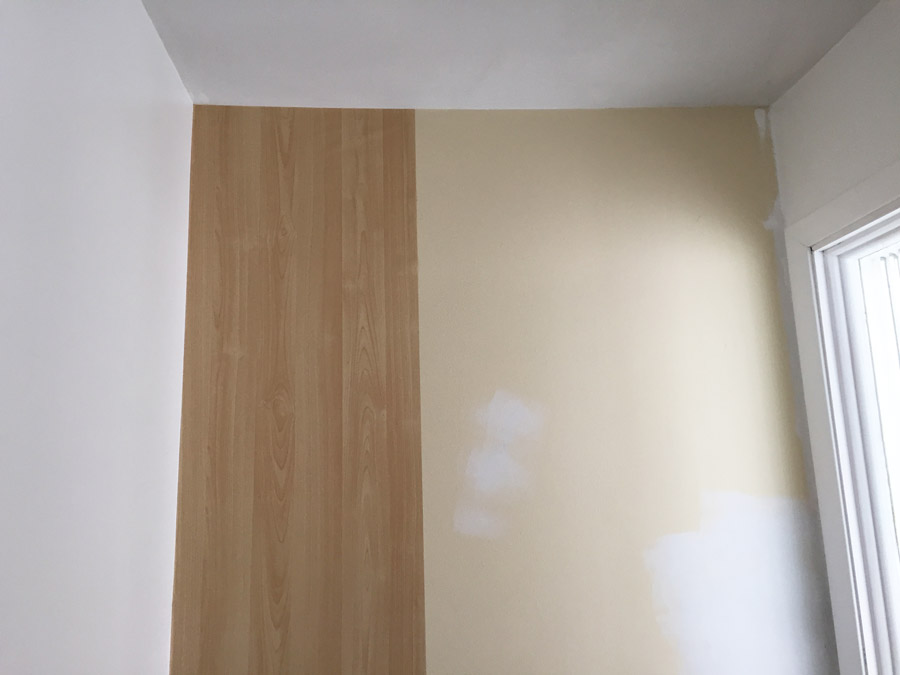
Those patches on the wall, I should mention, are where I used joint compound to repair the damaged spots. I primed and painted over those spots so that the wallpaper would have something to adhere to, not just dried compound.
Install the Remaining Lengths
Measure and cut your second length of wallpaper. Following the same process, it should go on smooth. Be sure you get the two vertical pieces so close together (even overlapping a millimeter) so you can’t see an iota of wall between the sheets.
Two lengths of vinyl adhesive wallpaper.
You can see in the above picture that I cut each length a little long – just to be safe. Because the second and third lengths that I cut didn’t have a manufacturer’s edge, and I very honestly doubted that my cut edges were perfectly square even though I was following the lines, I started leaving a little extra overhang at the top as well, so that a small bit of removable wallpaper wrapped up to the ceiling.
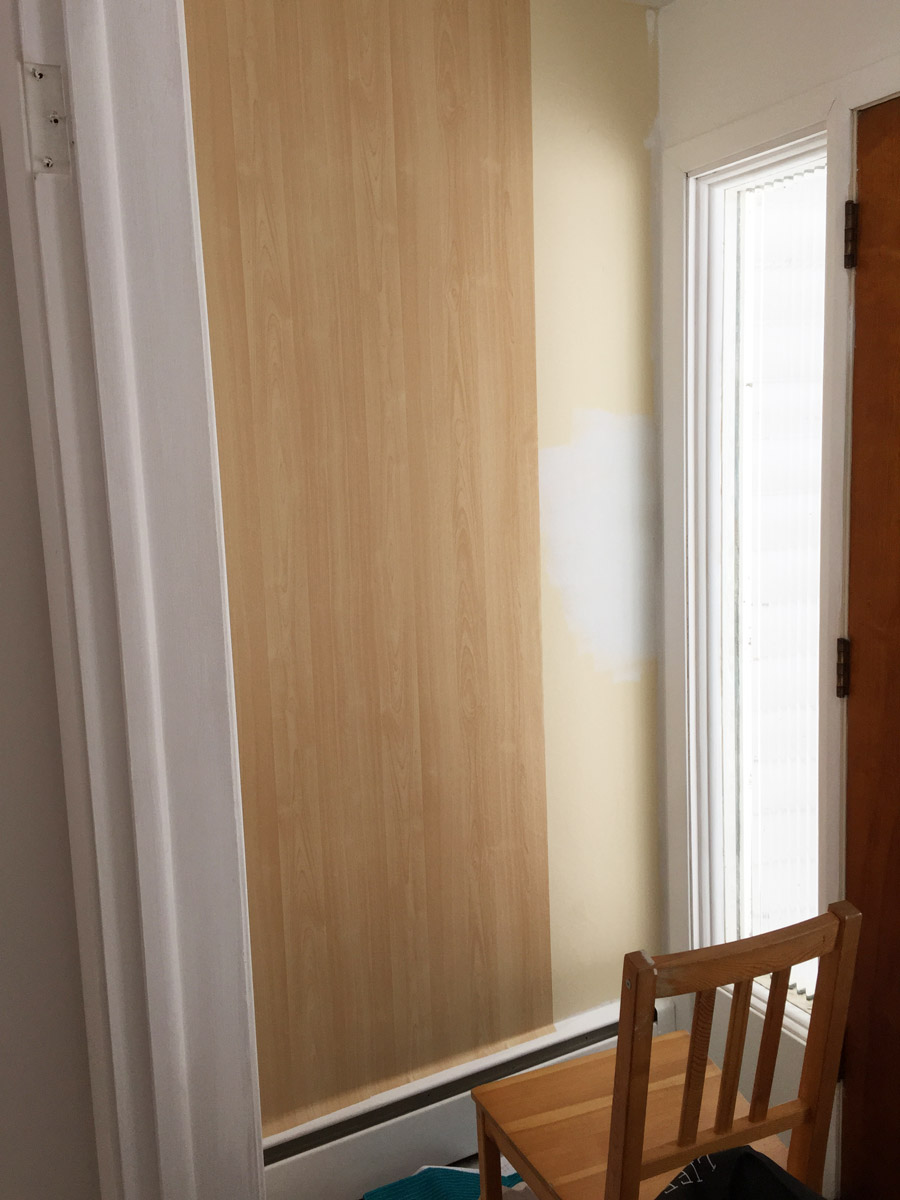
That last piece I installed was very close to fitting in the space, but because there was a 1″ overlap and I didn’t want to trim it lengthwise at the risk of it not being a clean cut against the wall, I tested the overlap, and am happy to say that you can’t even tell it’s there.

Overlap length at top and bottom of the wall as necessary. You can cut it away later with a utility blade.
Installation Tips
The process of installing the wallpaper down the wall is pretty easy.
- Gradually remove the backing from the paper once the wallpaper is affixed at the top edge, smoothing downward a foot at a time.
- Use a cloth to smush away some small air bubbles that will appear (they disappear easily), and work slowly to make sure that the paper is falling straight. Some guides will advise that you can use the edge of a credit card to smooth bubbles, but I definitely preferred using a cloth.
I’m pretty sure this is the same process as if you were installing real wallpaper, except if you had real wallpaper, situations like this would be a disaster. This really happened:

Accident when installing vinyl adhesive wallpaper.
It happened, but I was able to correct it. This product is extremely forgiving. Not only did it separate itself from itself where it stuck together, but there are no signs of creases or folds in the material. I was able to peel it from the wall and reposition it until it was perfect.
Trim the Excess
Once your wallpaper is complete, finish the job by taking a utility knife to both the top and bottom. Use the knife to trim the vinyl for a clean, straight edge.

Trim any overhang using a utility knife.
If you’re looking for an easy temporary or semi-permanent way to update your home or rental, vinyl adhesive wallpaper is just what you need!
Faux wood adhesive wallpaper in the entryway.


2 Comments
Hello, I was wondering if you could let me know the source for your paper. I saw this wallpaper on your updated door post last year and it stuck in my mind. I refinished some of our maple (possibly birch?) doors last year and there is an exterior door that I would like to match to them. The wallpaper looks like a good choice. Thanks.
Hey Beth – at the time, it was designyourwall.com. I remember price shopping around a LOT though because that exact product was available through different vendors. The product image and specs listed from site to site were identical. I went with this site because they were least expensive at the time, and I probably found a coupon code or free shipping deal to layer on top for more savings. Hope this helps!