This post was originally published on DIY Network’s blog Made + Remade in March 2013.
The progress I’ve made on my kitchen makeover goes to prove a few things: Painting over wallpaper can look good, umpteen coats of paint still seems not to be enough, and wow, that is one uggo fan.
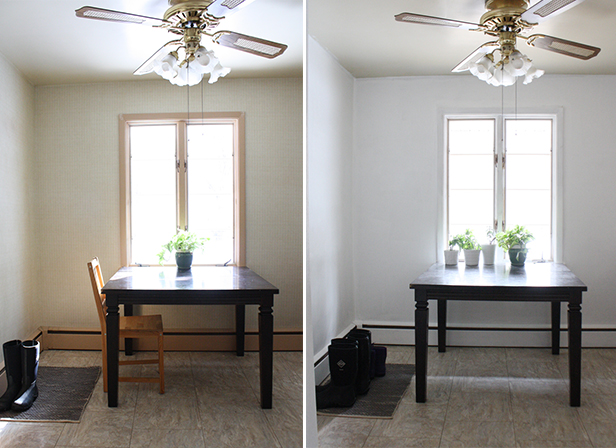
The first stages of the Mid-century Modern kitchen makeover that I resolved to do this year involved prepping the wallpaper for paint, and taking that wallpaper from tan to a painted, slightly textured white finish.
I do declare, it looks great — just check out this close-up and know that behind the camera, I’m smiling with joy.

Painting over the wallpaper was a risk. A shortcut. A step that I deemed the lesser of two evils, with the other evil being removing the wallpaper and causing so much damage to the walls that they would need to be entirely skim coated.
Kitchen walls are more susceptible to being beaten with moisture from steam (just like a bathroom), so the paint product I chose to use is a semi-gloss finish. I went straight-up white, right from the can, a low-VOC paint-and-primer-in one by Behr from Home Depot. White paint is a miracle worker, especially when atop anything that looks even the slightest bit dingy or dark. The semi-gloss finish adds to the luminosity, even if at the same time it makes us all the more aware that the ceiling is like a dark cloud of beige that needs to be attended to pronto.

Those silver knobs, by the way, will be reused.
If you’re preparing for a similar makeover at home, here are a few more things you should know:
- Where the underlying wallpaper isn’t prepped well-enough, the paint might revolt. A very real setback. I (apparently) didn’t clean well enough in one corner above the range, and as I cut in with paint on in this location, the paint refused to adhere well and wicked away from the offending area like oil and vinegar. You’ll have to wipe clean the paint, re-wash, and allow it to dry again completely before taking a second go at it (a lightly dampened rag works for this if the paint hasn’t set at all).
- If you’re working with textured wallpaper, use a paint roller designed for painting on texture, like on stucco walls. The thicker nap will help get the paint into the grooves better than a roller meant for a very smooth finish.
- Even using the combined paint and primer product, I was three coats in before I was satisfied. If you’re working atop an uncoated wallpaper, expect the paint to absorb a bit more than it would on traditionally painted wall.
Even though everything in the kitchen will eventually be painted, I still cut in around trim and ceiling edges to keep the process neat. It didn’t take much white paint to highlight how dark the wallpaper, trim, and ceiling are in comparison.

Want a peek of how it looked when it was done? Check out the the before + after section of this site.

For more ideas for your own kitchen makeover, check out the Kitchen Facelifts section of DIYNetwork.com.


Comment
I like your wallpaper tip. My walls have pretty awful wallpaper on them. I’ll have to have it all replaced.