This post was originally published on DIY Network’s blog Made + Remade in April 2014.
I originally expected that many of the improvements I was making to my mid-century kitchen would be subtle; changing the paint color would refresh the dingy wallpaper, and swapping the fan will eventually modernize the lighting situation in the room. I hadn’t really considered how impactful an electrical upgrade would be, but let it be known here and now that swapping out light switches is my favorite improvement effort (that also happens to be inexpensive, and only takes a little bit of know-how and time on the clock).
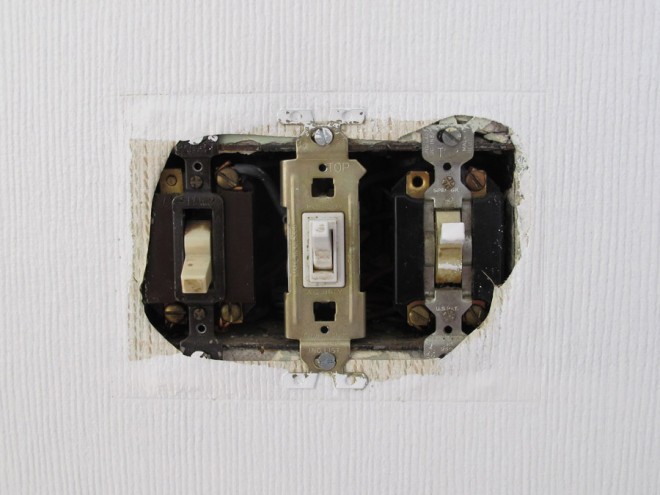
Paddle switches are undeniably wonderful, a nice upgrade if you’re going to make one throughout your home. Clearly, the switches in the kitchen had seen better days, what with their off-white, always dirty, pretty gross state. Given the opportunity to make changes, I went the paddle switch route.
I ran into a unique situation with that above set of switches: The original switches pictured left (the right set of the left photo) managed the outdoor spotlights, and as a way to simplify turning on and off those outdoor fixtures, I chose to wire them to a single paddle switch. Not only does this upgrade look like a million bucks — thank you, clean white wall plate with hidden cover screws— but the new switch on the far right operates in a way that better suits how we control those outdoor lights. It doesn’t help that the wall plates aren’t on these photos to remind you how dingy they looked before, but the switches that control most of the kitchen lights went from looking bad:
To beautiful:

In addition to dropping in those new switches, I also painted the ceiling recently, which made a big difference in the brightness and finish of the room. It seemed really apparent how tan the ceiling was once the walls were white, but rolling on the paint made it really obvious how different this room would look with a fresh ceiling.

I used a short-handled roller and a short step stool for the job; an extender isn’t something that I’ve invested in yet (maybe someday if I ever need to paint a much larger area). The paint I chose was a semi-gloss white right out of the can.
Semi-gloss, like for the walls, is especially recommended in the kitchen where you’re dealing with moisture from steam (or smoothie splatters from when the blender lid flies off, or the occasional pasta sauce explosion, whatever). If it’s semi-glossy, all of that excess will wipe off easily, and protect the underlying drywall or plaster from moisture damage.

There’s still a lot of work to be done in the kitchen. The biggest of projects is refinishing the cabinets and doors, and that will be taking place in the coming months as the weather outdoors improves. Also, finishing the painting of the window trim is high on my list, something that I’ll be able to conquer once the weather in New York is consistently warm enough to keep the windows open daily for painting the detail in the panes.
Anyone else out there in the midst of a kitchen upgrade?Share your progress in the comments! And for inspiration, check out the kitchen facelifts section of DIYNetwork.com.


Leave A Reply