What began as an idea to foster our daughter’s fine motor skills, turned into something that quickly became one of my favorite ever-changing pieces of art. In many of the art classes and craft camps that our kids have participated in, there’s often a fun weaving element that makes use of simple homemade weaving looms. The result is usually so pretty that it’s actually display-worthy (and it beats the hell out of finger painting). They use round weaving looms to weave small rugs; rectangular looms for hot pads, placemats, and wall decor; even long, narrow looms used to design camp bracelets way more ornate than any of the braided embroidery thread things I ever created.
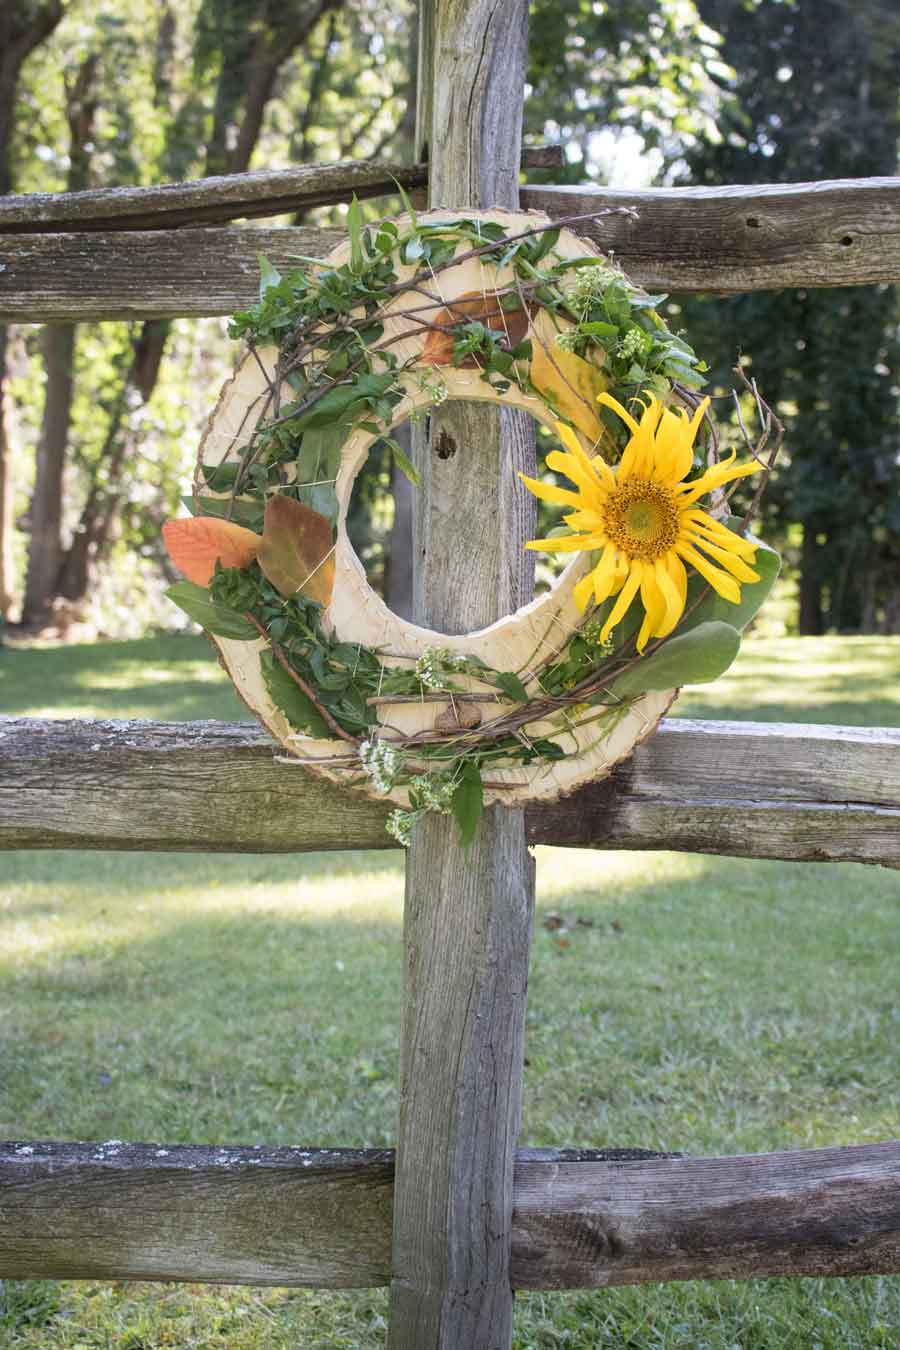
What we ended up with here though, is something that parents, kids, and your everyday wreath-lover will enjoy – a forever customizable weaving loom wreath made from a slice of tree trunk, and a tautly pulled cord. I have total heart-eyes for how it embraces nature to become a beautiful showpiece when hung at the front door. My preschooler loves the concept of this loom wreath too – afternoons are for crafting, and her designs are most often made of things she sources from around own home and in our own backyard. Will it wreath? Yes, almost always.
The materials and tools I used to make a weaving loom wreath:
- 1” sliver of wood (mine is sourced from a log in my own yard, but you can find them at craft stores too; affiliate link to a 9″-11″ slice that’s most like mine)
- 1/2” staples
- heavy cord
- items for weaving – flowers, branches, ribbons and fibers
- wreath hanging hardware
- jigsaw
- staple gun
Begin by sanding down the front of your sliver of wood.
Mine had some roughness from the chainsaw that I smoothed out. If your wood is store-bought, it was probably already planed to perfection; what I used was actually the base from my old rustic wreath, because waste not! Use a jigsaw to cut a hole in the center of the wood, and there you have it – something perfectly wreath-shaped. Add a hook to the backside of the wreath at this point too, so you can hang it up easily once you’re done decorating.

Staple around the edge.
I used 1/2” staples, and I’m glad that I did << the best part of this project. Weaving cord around nails may have been hard if the head of the nail wasn’t wide, and the cord certainly would have been more inclined to pop off while weaving. Furthermore, staples are pretty smooth, not as likely to poke, scratch or snag your children if you’re using this loom as an educational tool. Staples, once installed, proved to be incredibly kid-friendly, and made it super easy to secure the cord.
Adding the staples is easy with an electric staple gun, but possible with a manual staple gun as well. Place the staple so that it is only half-way jabbed into the surface of the wood. I encourage you to test this a few times on a piece of scrap wood so that you know how much pressure to apply to the tool to achieve the perfect depth (after all, pressing gently on a stapler is everything we’ve been trained not to do).
Add staples all around the center circle of your wreath, side-by-side. When you’re done, count how many staples are around the middle (I had 28) and place the same number of staples along the outer edge of the wreath, evenly spaced (another 28 staples for me).

Weave the loom
Use a heavy cord like twisted nylon kite string–or jute, if you don’t find it too difficult to thread a thicker strand through the staples–for the next step. Weave the cord back and forth through the inner and outer staples to create a zig zag all around the wreath. (Another affiliate link there so you can see what I used.)
Be sure that the cord is taut before you knot it off.

Assemble the masterpiece
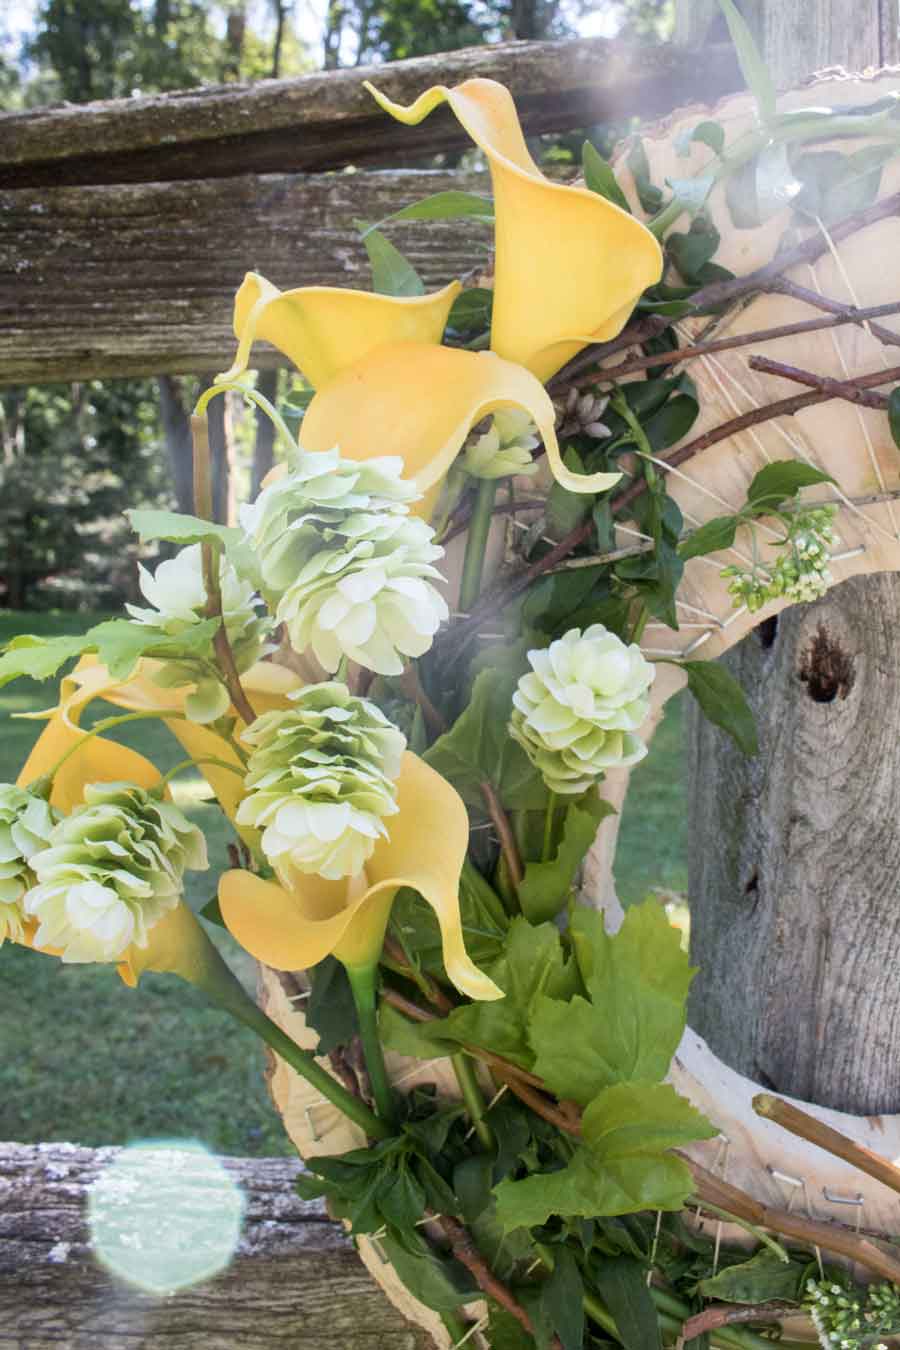
Source your materials for weaving and decorating. Branches, flowering weeds, leaves, garden trimmings, fronds. Basically, if it’s at least a few inches long, it’ll work. Consider pieces of natural fibers as well, and ribbons and other craft materials too.

Weave the materials in and out of the cord, overlapping and encompassing the frame of the wreath.

My fall wreath uses items straight from our yard and garden, including branches, leaves, a sunflower, and even weeds growing in amongst brush that would ordinarily go unbothered.

Modify the wreath for other seasons too – faux-flowers are one easy way to add color to the outdoor wreath during the winter and early spring. Layer them over real branches to help make them look more realistic and natural.
This was a great kids’ project because it spurs creativity and fosters development of fine motor skills. My daughter selected colorful pipe cleaners and ribbons for one of our iterations.

Hang the wreath in a prominent place, where you can continuously adapt the design and components as new flowers bloom, and seasons change.
Pin this:


Comment
Pleasure to go through such wonderful work!!