This post was sponsored by STIHL because they supplied the chainsaw and safety equipment. However, the project is my own and Swedish cut fire logs really are things we make and use at home. I figured it was about time you learned how to make your own too, and am happy STIHL partnered with me on the project!
We’ve been making our own Swedish torches for a few years after having noticed them for sale–in exchange for real money–at local stores. “I have a chainsaw, I can totally make those,” I thought, and that’s how it started. This firepit accessory is one of the most in-demand products we’ve “manufactured.” Starting a campfire has never been so easy.
Use a Swedish torch as an easy fire starter.
When you make your own Swedish torches, remember to cut a variety. Cut some that are thin and others that are thicker. That way, you have some options for when you want to burn for one hour, or something that will burn for many hours.
Honestly, if I have one tip for you, it’s that if you have a tree taken down, ask the crew to leave pieces of the trunk in manageable lengths and use those to create your collection of Swedish logs. If you ask nicely, they might even knock a bit off your bill since there’s less for them to muscle away. This project is best for those occasions when you have big, unsplit logs, and when the logs have a diameter greater than ~10″.
Cut the Swedish torches while the wood is still green, and then let them dry in a sheltered spot until it’s campfire o’clock. One-time burn logs like this are ideal for small fires. They ignite easily and burn from the inside with great air circulation and very little maintenance.
Step 1. Choose Your Chainsaw
Start by familiarizing yourself with the world of chainsaws. I’ve been a long-time supporter of battery-operated power tools because they’re lightweight, easy to use, considerably less intimidating, and you don’t have to futz around with the oil/gas mixtures.
The STIHL battery-powered chainsaws perfectly meet those expectations. The product I’m using in this tutorial is the MSA 120 C-BQ which is part of the Lightning Battery System® line of products. With a ¼” STIHL PICCO™ saw chain, it’s marketed as a product that can make 100 cuts on a single charge, depending on the size of the branches and logs you’re powering through.
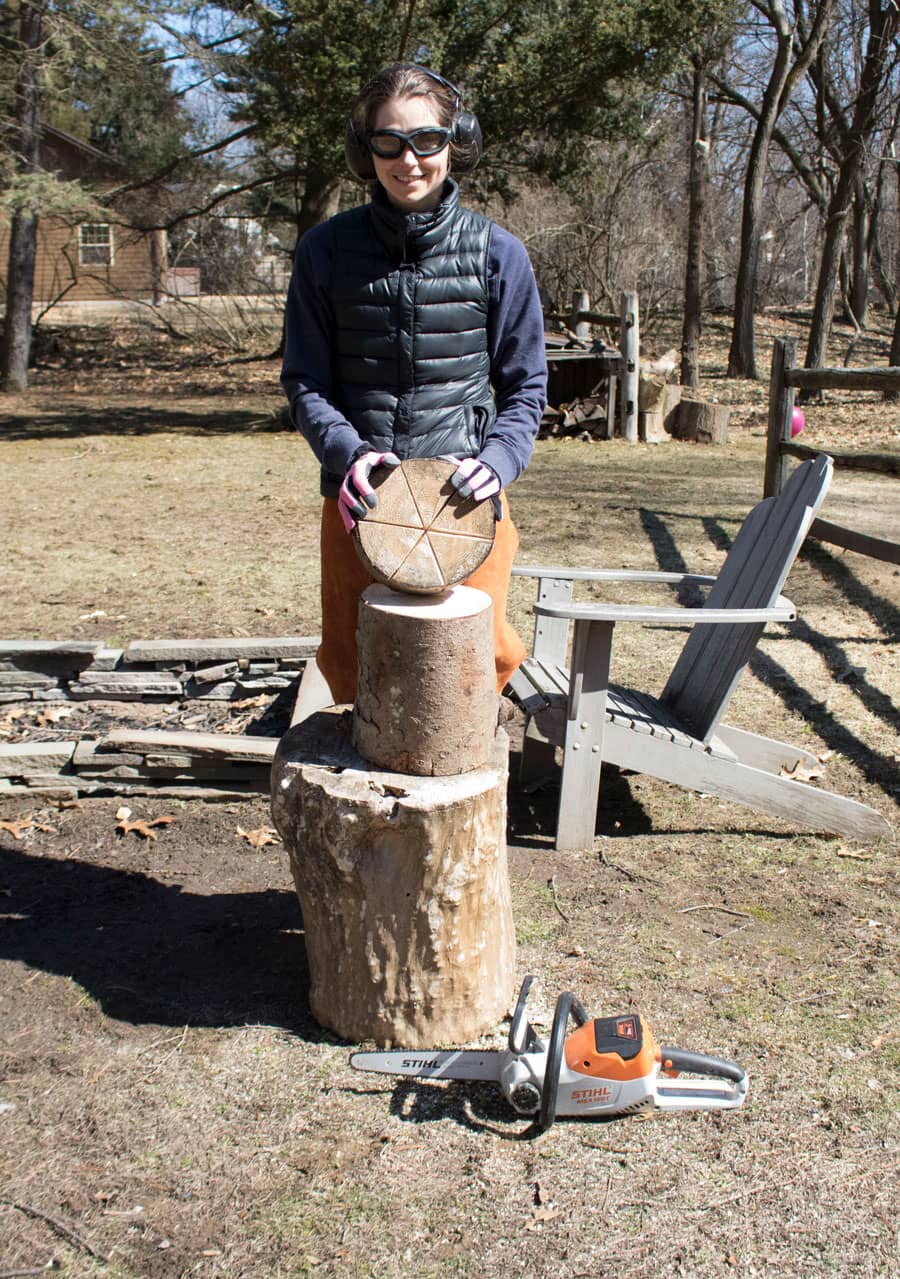
I’m also sporting appropriate protective workwear for my hands, eyes, ears, and legs, and wearing long layers because any amount of chainsawing usually means I’m probably going to be showered in splintery wood chips.

STIHL’s MSA 120 C-BQ used to cut a Swedish Torch.
Step 2. Stand Your Log Upright
Turn the log on its end. If there’s any doubt that it won’t be balanced (be wary of very tall logs, or narrower logs) put cinderblocks around the base to help it remain upright and stable.
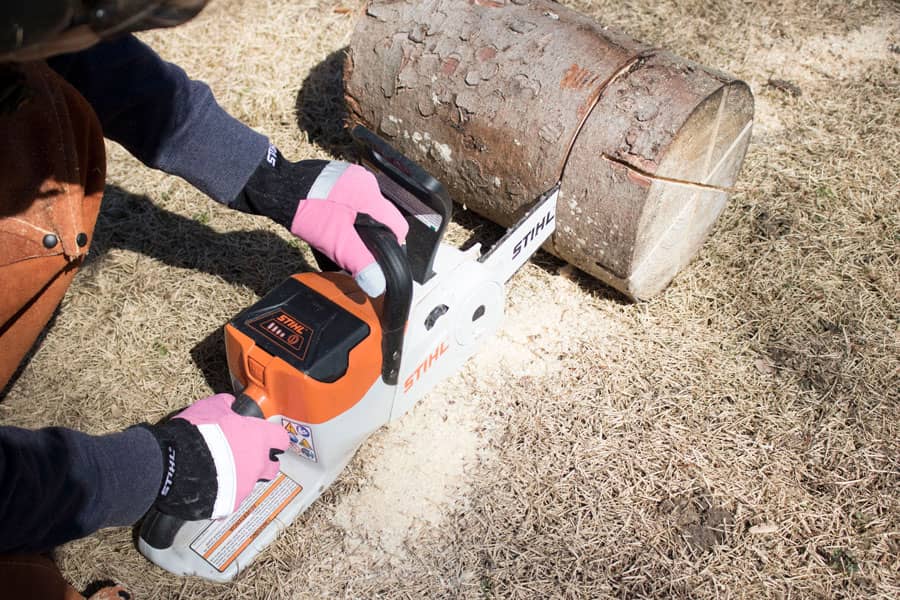
Step 3. Make Shallow Cuts Across The Top of the Log
The cuts you make need only to be 3-6″ deep across the diameter of the log. Let the weight of the blade and rotating chain do the work.
If the blade doesn’t reach all of the way across the log, switch sides and repeat the cut from the other side so that it’s an even depth.
Rotate your position and cut additional “pizza slices” into the top of the log.

Cut a “pizza” into the top of a log to create a Swedish fire log.
Pro tip: There’ll be a bit of sawdust stuck in the crevices you cut. Don’t make any extra effort to clear the tracks, because that sawdust makes for great kindling when you are ready to start your fire.

Overhead view of a DIY Swedish torch.
Step 4: Drop the Log On Its Side
Topple the log so that it’s on its side, and use the chainsaw to slice off the last 7-10″. The few inches of solid wood beneath the “pizza” cuts will increase the length of time your log burns. A “thick crust” cut will render a longer burn time. A “thin crust” is good for smaller fires.
Trim your Swedish log to length.
Step 5: Repeat to Make More Swedish Logs
Once cut, you can tip the log upright again and cut another Swedish log from the wood that remains.
Make your own one-burn fire log.
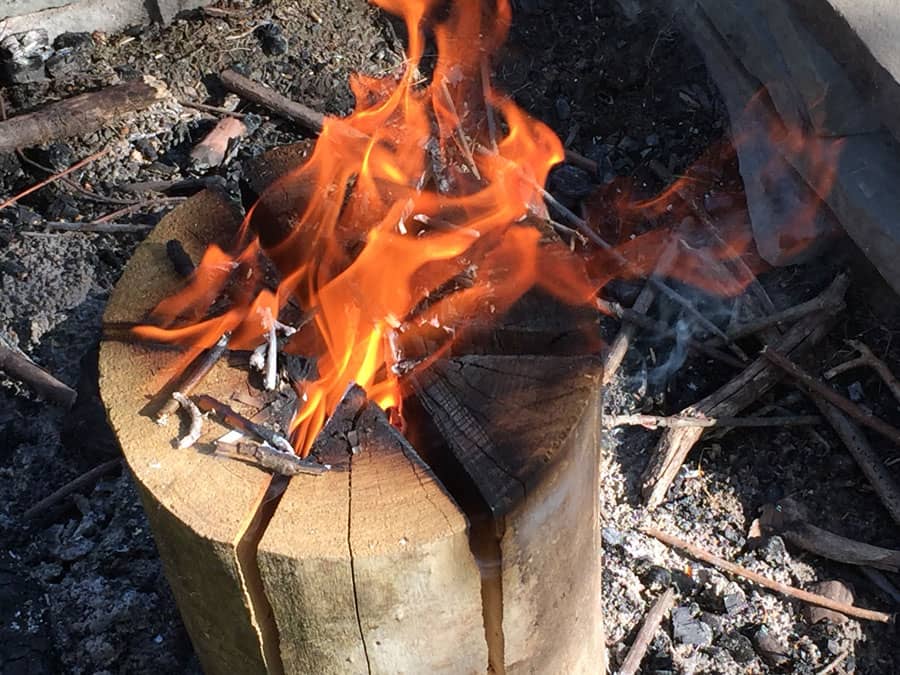
How to Light a Swedish Torch
- Position the log with cut edges upright.
- Place a small pile of kindling on the top center of the torch. That’s where the magic’s going to happen.
- Ignite the kindling, and watch the ashes fall into the center of the cut log. If you left sawdust in the crevices, it’ll ignite and quickly spread the flame.
- The Swedish torch will burn quite evenly from the inside to the outer edges of the log. So cozy, so easy! Stockpile them when the opportunity strikes, and you’ll always be ready to start a campfire.
Swedish log torch

DIY Swedish fire torch


2 Comments
nice project Emily. Didn’t know what a Swedish Torch was. Personally, really love my Stihl. cheers.
Wonderful ideas, Thank you so much.