Always committing to doing the things I say I’m going to do–in this case “barn quilt all the things”–I extended my collaboration with Buffalo-based designer Whitney Crispell of Local Color Quilts and made another totally crushworthy piece of outdoor art.
Y’all! Still addicted to the quilts. Can’t stop, won’t stop.

Last summer, I created a colorful design to produce a 50″ x 50″ modern barn quilt; this new one would be a gift for Mother’s Day. The original barn quilt (def the OG, or OGBQ) has officially seen all 4 seasons–fall, winter 1, and winter 2 were especially perfecto–and I knew reusing paints from the original palette would be nice for my parent’s house which is surrounded by trees and accessorized by gardens blossoming with every color in the rainbow.
Step 1: Assemble Supplies
Barn quilts are remarkably simple to make, and aside from a saw and a drill, all you’ll really need is patience and a few supplies:
- 1x6x8 board
- 18″x18″ piece of plywood
- circular saw
- ruler/tape measure
- straight edge
- pencil
- (12) 3/4″ screws
- paint samples
- painter’s tape
- paint brushes
- polyurethane/weatherproofing sealant
- hanging hardware (these brick clip products are great if it’s less than ~30 pounds; if it’s heavy, consider anchor bolts, wood screws, or masonry screws if you’re anchoring to brick/concrete.)
Step 2: Source and Cut Lumber
The wood I used was white spruce harvested and planed from trees that fell on my parents’ property. Assuming you’re buying your own lumber, you can easily make a barn quilt the same size out of one 1x8x6-ft board.
To determine the measurement of my square, I first stacked three 1×8 boards next to each other, side-by-side, and measured them as 21.5″ wide. To match the height, I then trimmed the three boards to be 21.5″ in length. Pushed together when side-by-side, they now form a perfect square.
Next, cut a piece of plywood into an 18″x18″ square, and use 3/4″ screws to assemble the barn quilt. Attaching the screws through the backside, use no fewer than four screws for each board. Attach the hanging hardware after you’re done painting so that while you’re painting, the wood sits flush on the table and is not wobbling all over.

Step 3: Choose Your Pattern and Color Palette
Whitney has a real eye for designing barn quilts, not just fabric quilts. The colors! Her refreshing take on heirloom quilting patterns! They’re familiar while being completely re-concepted with consideration for modern design (and my love of the rainbow). I should point out that she’s available for hire if you want your own custom design too.

Step 4: Draw Your Grid Template
This barn quilt design uses a 6×6 grid as a guide for painting, and dividing the face of your barn quilt into this same grid with light pencil lines is the first step to making this project easy. And please be smart and measure twice, mark once.

You’ll notice that I left a lot of natural wood exposed on this quilt. I prefer them that way because I think wood’s pretty, and this particular wood was thoughtfully preserved by my Dad himself, not just any ol’ 1×8 from the hardware store.
Most traditional barn quilts are painted across the entire surface, but if you want the entire surface painted, consider blanketing the boards with a solid coat of primer and white paint before marking your pencil grid lines and adding color.
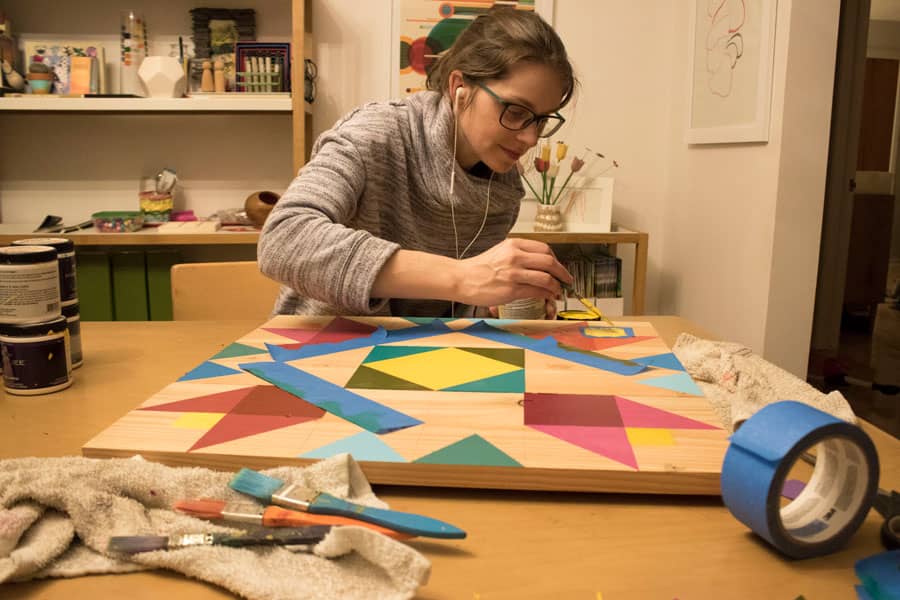
Step 5: Tape and Paint
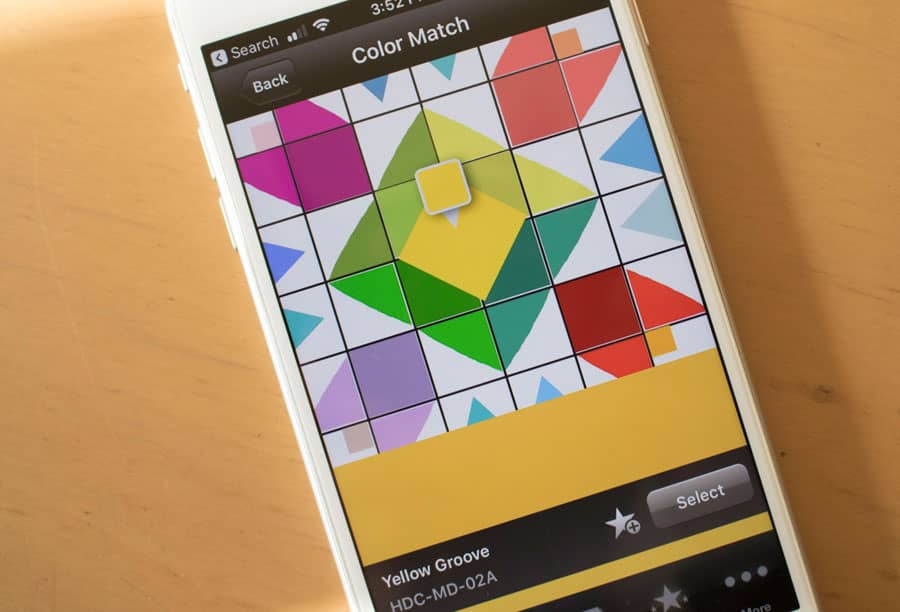
Painting the detail, as I’ve eluded, is where you’ll need to muster all of your patience. To match Whitney’s color palette to specific paint colors, I used a paint app to match back to a certain brand. Most of the colors were close matches, and for a few colors that didn’t have an automatic match, I went and found paint chips from other brands. For each color, I bought a sample pot of tinted color for <$3.
Painter’s tape is the true workhorse in this project, and you should plan to use a lot of it. Fresh painter’s tape prevents the paint bleeding and helps to make nice, crisp lines. When you start, you’ll be working in various areas of the design, filling in colors on opposite areas where paint lines don’t collide.
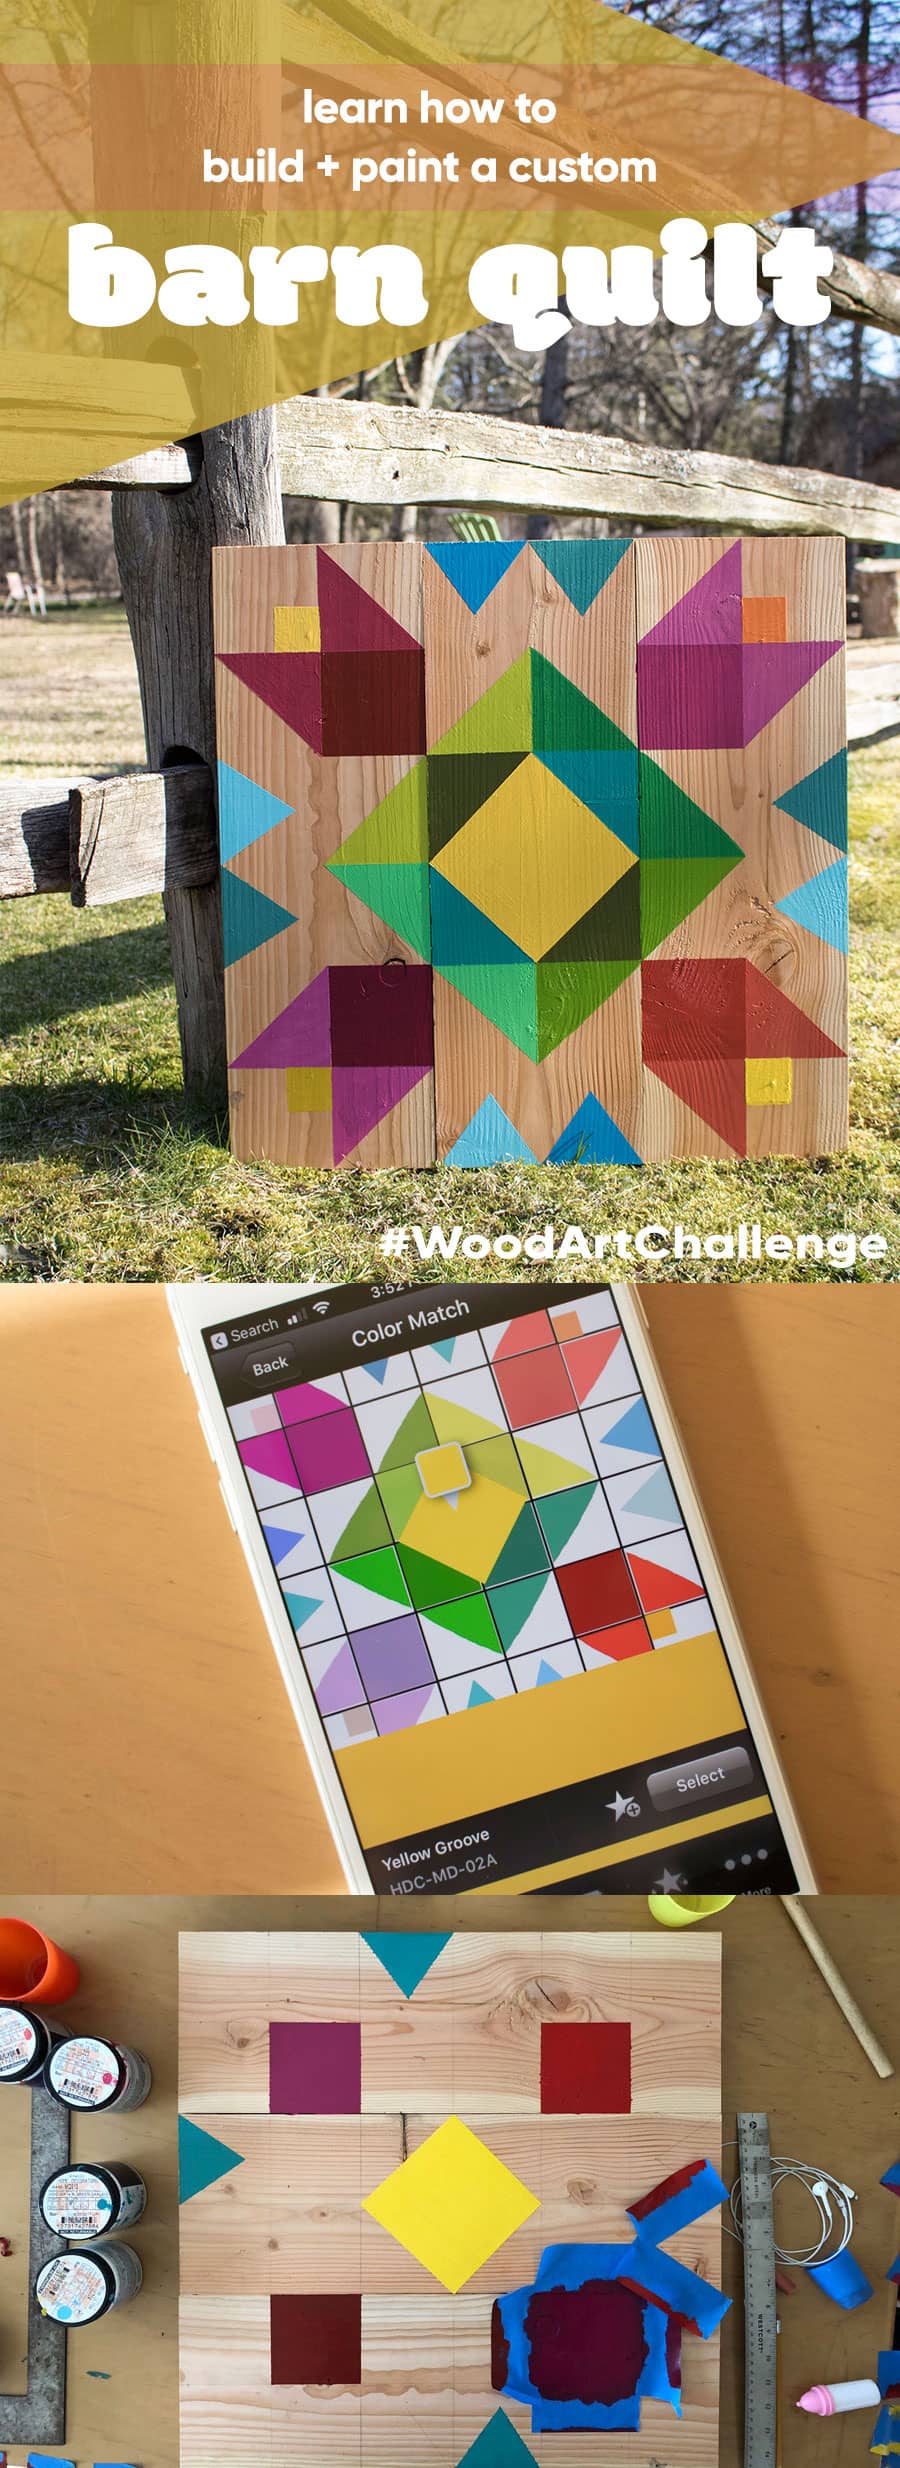
Prepare to apply several coats of paint in each space, and remove the tape before the paint has completely dried to get a sharp edge. You’ll need your first pass completely dry before you tape off and paint additional spaces, which is why this project takes a bit of time. This was my start, below, presenting as random colors with no rhyme or reason. Computer, camera, earbuds, ruler, dowel? Lots of cups? Doll bottle? Check, check, check, etc.


Finishing the paint on your barn quilt and removing the last pieces of tape is a really rewarding moment, so hang in there.
Step 6: Weatherproofing (Optional)
As for weatherproofing, I’m not convinced that a handpainted barn quilt wouldn’t look fantastic with a bit of natural wear from wind and rain, but I did apply a coat of water-based poly to this piece so that my mom’s art would be a little more protected. If you’re looking for serious durability, consider coating your piece with a heavier-duty transparent weatherproofer, such as the weather seal you would apply to your deck. Remember to cover the cut edges of the boards with a good coat, too!

When all of the painting is wrapped and the polyurethane’s dry, attach the hardware of your choice or affix it directly to your structure using long lag bolts into studs. We used 5″ bolts to attach the 50″ quilt square to the studs through our barn’s siding (in the background of the below photo), but this piece is lightweight enough to hang off a strong D-ring, as tested when I staged it against a tree in our yard.


To see more from the group of bloggers who joined the #WoodArtChallenge, poke at these links:
1. Reality Daydream
2. 100 Things 2 Do
3. House Becoming Home
4. Anika’s DIY Life
5. My Repurposed Life
6. 3×3 Custom
7. One Project Closer
9. Chatfield Court
10. Create & Babble
11. Hazel & Gold
12. Jen Woodhouse
13. Sawdust 2 Stitches
14. Wood Work Life
15. Remodelaholic
16. Evan & Katelyn
17. Jaime Costigio
18. Pneumatic Addict
19. Bower Power
20. Lazy Guy DIY
21. My Love 2 Create
22. Addicted 2 DIY
23. Her ToolBelt
24. Shades of Blue
25. Ugly Duckling House
26. The DIY Village
27. DIY Huntress
28. Mr Fix It DIY


29 Comments
I love your modern barn quilt! The colors are amazing! <3
Thanks Bethany!!
It turned out beautiful! I love the colors you chose.
Thanks Katie!
Such a pretty project Emily. I love the colors and the design of your modern barn quilt project.
pinning!
gail
Thanks Gail! That means a lot.
Love how pretty and colorful it turned out!
Thanks Anika!
Awesome barn quilt. What a cool app, I think I need this for some projects!
It has been a surprisingly handy little app! I have no affiliation with the brand, and other paint brands may have similar apps to color match their palettes, but the app shown is by Behr.
I love the colors in your barn quilt – it’s beautiful!
Thanks Jeanie! Whitney at Local Color Quilts does an *outstanding* job designing with color.
What is the app used to actually design the quilt? I love How you have a digital version first to try out different colors
What you see is a photo I’m referencing in the Behr app for color matching. The design and color assemblage was something uniquely designed by Whitney at Local Color Quilts, not using an app.
Emily,
I’m about to start on my own barn quilt for the first time. I see the biggest challenge as getting the design I want copied to the 2’ X 2’ board perfectly. Any tips for that? I love this barn quilt. A little advanced for my first try.
Flashing Content!! Great, keep up.
Save yourself a lot of money on painter’s tape by cutting the tape lengthwise in half to double your tape. Especially on a small project like this.
Great hack!
Do you have a preferred brand of weather sealant that you used? And they are beautiful
Nope! No preference.
Would you be willing to share your color codes for all of the beautiful colors you chose?
I’m glad you like them, but encourage you to make yours original. I can’t share the codes.
Do you use interior or exterior paint?
Whatever you want! Mine is just made using sample paint (definitely interior) and it still looks fine after years of weather. Obviously, many factors, just as if you were choosing paint or stain or treatments for any outdoor area.
I don’t understand how it was 50” when you cut boards 21.5”.
The tutorial is for a 21.5″ square barnquilt. The intro references a much larger construction I built a previous time.
Love to know about How to make own barn quilt, amazing one. Thanks for sharing this tutorial with us.
Glad you enjoyed it!
I’ve been making them too, very addicting ! At first I didn’t use the proper finish and got the weathered look, now I know better, I love yours❤️