Alternate post titles: Black Walnut is Bitchin’. or Buh-bye Shoe Rack End Table.
There’s not actually going to be a lot of interpretative dancing, unless you bribe me with cold, hard cash and I end up doing a little two-step on this new end table I just whipped up. Really, the title represents me, inspired by West Elm, but putting my own interpretative little twist on what I liked. Enjoy.
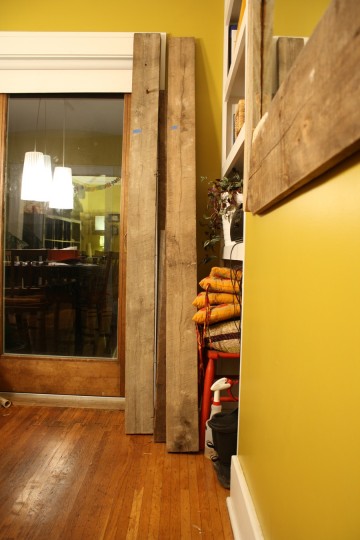
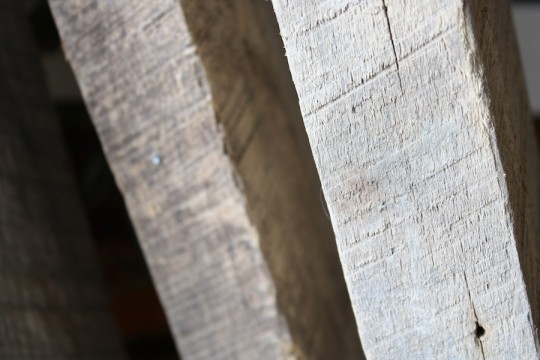
I lucked into several boards of reclaimed lumber thanks to my friends at the local salvage shop. My Dad has been occupied, pulling some very covert CSI: Horticulturist moves last week, identifying it as authentic Black Walnut based on its weight, texture, and a micro-thin cross-cut (to examine density). This may be right, this may be wrong, we think it’s a damn good guess.
The weight of the lumber was what originally intregued me (each board feels about 4-times heavier than your standard non-pressure-treated 2×6 pine board), so I’ve had them set aside for some time now just waiting for the appropriate project to arise. In planning to make a new living room end table to rest beside the couch, the black walnut seemed to be the right kind of wood for the job. While rough, weathered and unplaned, the boards offer a warm color, and good potential for becoming a solid piece of furniture.
Another thing I really like about this black walnut lumber is that some of the boards had bolts lodged in them – an authentic detail from their previous life. You’ll see that in the final piece, I was able to retain three bolts, partially because they’re studly and I like the authenticity, and partially because they are. impossible. to. budge. I worked around them.
Time to reveal which inspiration I was channeling. Voila.
I began planning to execute my own version of this raw wood side table from West Elm for my small space. The models offered at retail just weren’t the correct dimensions for my room and need, but they are mighty pretty and affordable if you want to pick one up yourself.
 Side note: Both Marty from Dadand and Cait from Hernando House offered uber-inspiring comments on this post after I cited wanting to build something with a metal frame, but alas, my salvage scouring efforts failed to yield anything that would work this time around, although the searching will continue.
I’ll preface this tutorial by saying that West Elm’s mango wood model is radical and appears well-constructed; I’m an amateur woodsmith, and I’m all for experimentation, but in hindsight, the price of $149 seems fair. Very, very fair.
I started by measuring out the boards and planning my cuts. Knowing that I wanted mitered corners like the inspiration model, I planned out a series of 45-degree cuts to make the most of the lumber I had available. I could have also done straight cuts and assembled in a lap joint fashion for a slightly different look. And sure, there are lots of different ways to plan lumber usage; this is just my way, and it’s always helped and reduced my scrap pile. The height of the table was going to be 32″, while the tabletop would measure 18″ across, and because there was enough lumber, I planned for 3-widths of lumber all around. It’ll make more sense when you see the dry fit a few photos below. Oh, and I guess when I was making the cardboard lampshade, I cut through this notebook accidentally with the utility knife.
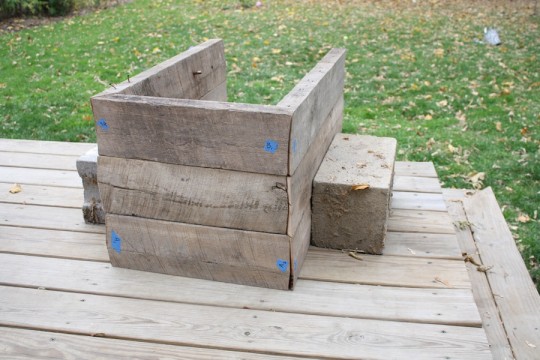
 With cuts made (thanks to Pete’s great dual-bevel compound sliding miter saw), I had the pieces I needed with reasonable ease, although black walnut is hard to cut through (I think I popped some new arm muscles in the process, and we probably need a new saw blade too). The blue tape pieces were more for my reference as I identified which pieces matched up together based on the boards they were cut from, nothing you need to see close-up.
A little dry-fit action on the porch allowed me to see how this would start to come together. Not as flawless as the West Elm model due to bowing of the unplaned wood, but as authentic and simplistic as I hoped it would be.
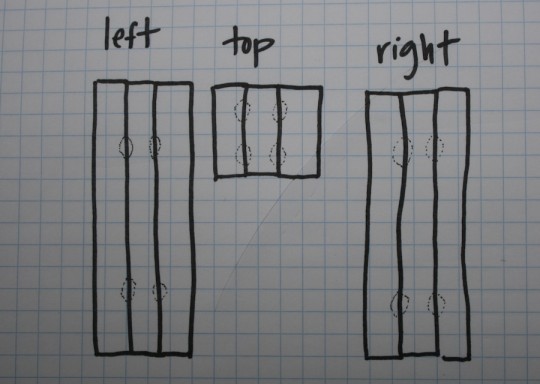
The assembly was quite simple; I used my biscuit joiner to attach the sections of wood together, so while those biscuits are impossible to see in completed form, know that there are little oblong chips of wood reinforcing the boards together lengthwise. For example, if I took an x-ray of the sides of the table, it’d look like this:
I used four short mending strips ($5 investment at the Home Depot) and 6 L-brackets (1-1/2″ wide, another $10 investment) to attach the top to the legs. More evidence that walnut is dense as a brick? I blasted through dozens of zinc-plated screws trying to get them in the predrilled holes. Screw-breakage bonanza. It was infuriating, but it got done.
Here’s why I know the West Elm artists are champs; the brackets I used (shown above) weren’t strong enough to keep the legs, at a right angle to the top. The mitered angles wanted to bow inward no matter what I did, but instead of buying new longer brackets that would have been more visible along the inside edge of the table, we decided to add a copper pipe brace at the bottom of the table.
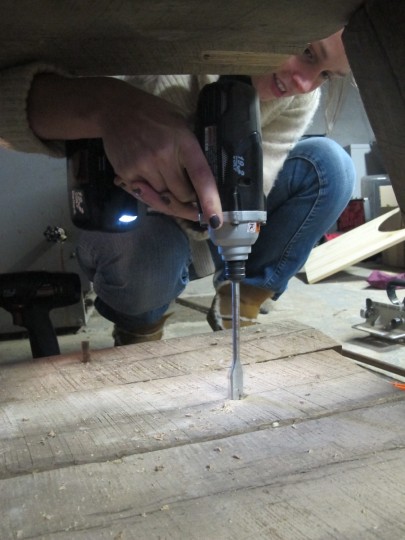
By drilling a 1/2″ deep hole with a 3/4″ paddle bit evenly along the inside of both legs, I created a little cove for the pipe to sit within, and the length of the pipe (15-1/2″) forces the legs to a straight and locked position, preventing the table from buckling in on itself. Strayed from inspiration, but it works and blends in nicely considering that it falls within the area that those vintage bolts are featured.
With all of the leg components attached and the copper pipe serving as an added brace at the bottom of the table, we carried it up from the basement (heavy, took both Pete and I to carry it up the stairs, I swear that it weighs more than my entire dining room table).
Swapping the light onto the new table, it was the perfect height and looked great.
Yeah, it looks a little funny having raw hardwood on raw hardwood. I need to let this decision stew a little longer.
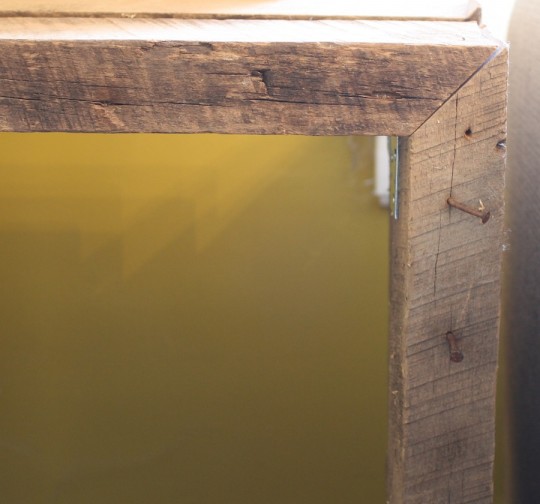
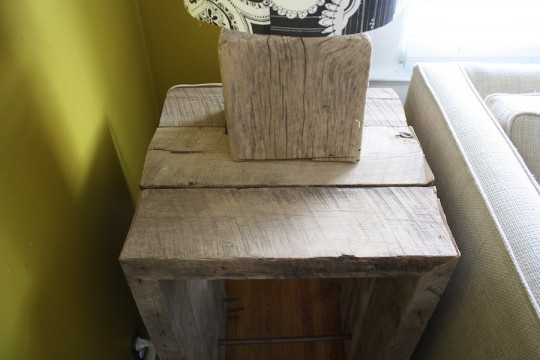 The mitered edges are damn close; it always amazes me how hard it is to cut 45-degree angles that fit flawlessly. A big reason that they don’t match up 100% here is because each board of unplaned wood has a slightly different bow; you’d have less of an issue if you were working with evenly-planed, or new lumber.
Here’s the best shot I have of the copper pipe and the original bolts. Subtle.
How ’bout it? I seriously considered polyurethaning and/or staining, but Pete encouraged me to live with it raw for a little while before jumping into doing anything not-easily-reversible to it.
But just for fun I tested staining and polyurethaning a piece of scrap to see how it’d absorb. Stain, left. Poly, right.







11 Comments
Stain! But I must preface that I have have a huge crush on dark stained wood. Love your shiplap walls, by the way. Bravo! Maybe poly would be better, since you already have a lot of dark wood going on ? But I do think staining it would be lovely, and flow very well! Good luck!
You emit the same wavering indecisiveness as me, Taylor. Poly! No, stain and poly! No, sand it a little better and leave it plain. Or poly it! :) Glad you like.
Oooh I love it! I vote leave it raw! It reminds me of the West Elm inspired console I want to build.
A vote for raw! A console sounds like a challenge. A good challenge.
Hopefully a good challenge! I’m thinking something along the lines of the no longer available West Elm Chunky Console Table.
I really love that. Super cool.
Okay I too vote raw!! It looks amazing! I think we’re going to have to try to make something similar when we get our tools out again, I can’t get enough WE inspired items in my house/life!
Cait…my sofa table is a lot like that WE one thanks to Ana White, you can totally customize it how you’d like! http://whatthegraham.com/?p=2538
Raw…..looks great.
Thanks!
Raw LOOKS good, not sure how it is to clean. That is always my obsession. Maybe poly might help smooth it a touch? But no stain – that’s my vote.
Exactly my thoughts too; I’m happy there are so many votes for raw because that was my original vision, but I might apply some elbow grease and sand down the surface so it isn’t as rough and give a coat of poly just so it doesn’t get as easily damaged by liquids…