This little unfinished bamboo friend has been hanging out in the house for the last 2 years. Rarely seen, it flows through the house like a ghost, rarely captured in photos mostly because it finds its way from one storage space to the next. In fact, one of the only good photos I have to show this piece in its raunchy before state was snapped back when Cody was looking much more puppy-ish and the guest room was still… nothing. Did I mention that this is a chair that I lifted stealthily from someone’s garbage pile in late 2009? Right. If it was yours, thank you.
Most recently stored in the otherwise-completely-empty sunroom adjacent to the living room, I’ve been meaning to give it a quick and simple overdo since the day I brought it home. I had only gotten so far as replacing the seat with a piece of plywood, and sawing off about 1″ from the protruding end from each arm. Both ends had been nicely gnawed by a dog, a dog that I was happy to have not encountered during my little garbage pilfering adventure.
The solution? Upgrade this a rough and tough chair with a nice clean coat of glossy spray paint. White enamel, please.
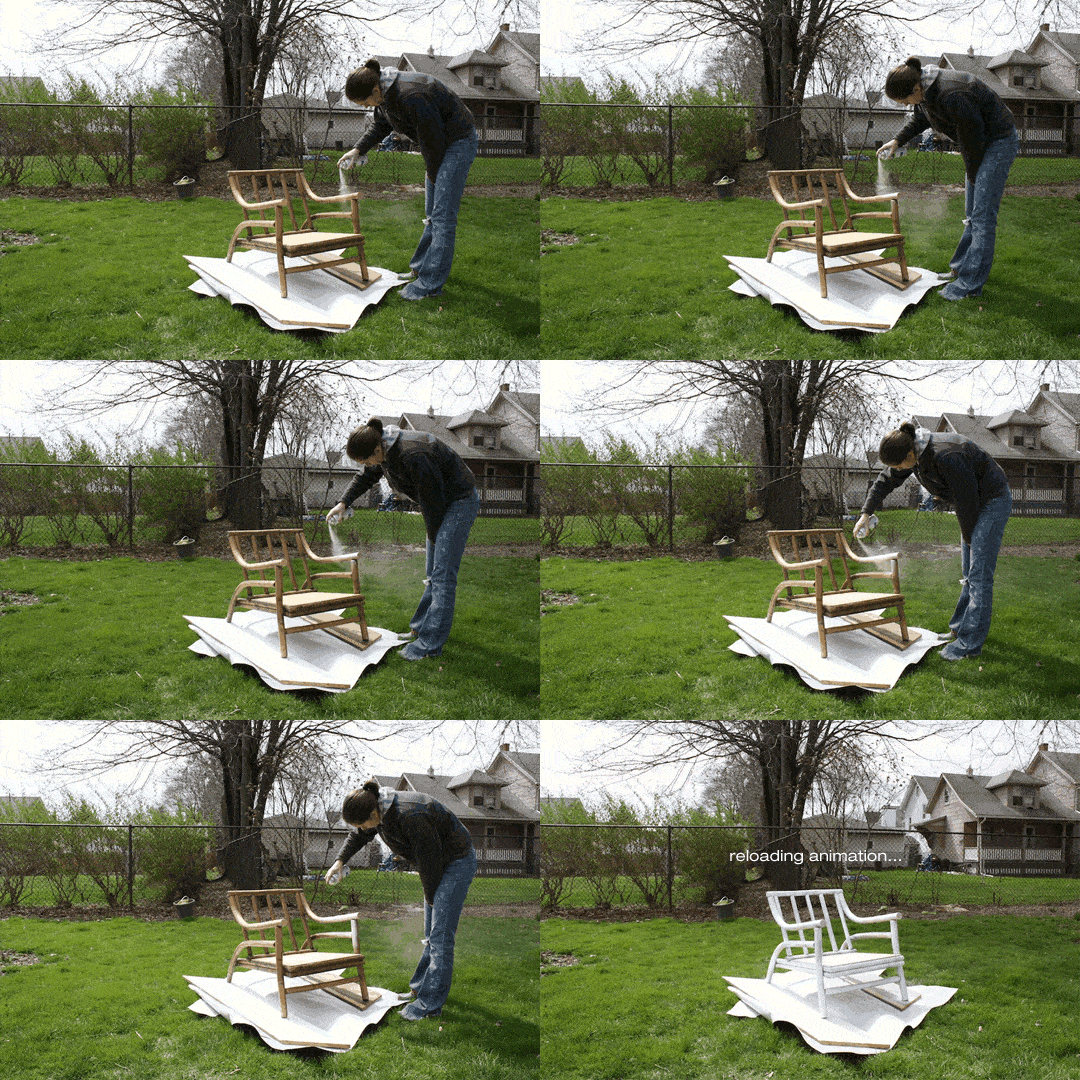
I set up shop in the backyard on a bright, dry morning late last week (one of the first projects I’ve happily tackled outdoors now that the weather’s improving), and applied a generous coat of spray primer to the entire frame. I didn’t bother to sand it first, the bamboo surface was smooth but not coated with glazes, and my attempt at sanding with a fine sandpaper really only scuffed it unattractively, almost damagingly. While working with great care to get the primer in all of the nooks and crannies, I was also cautious to hold the can about 12″ away from the surface itself to prevent paint drips and splatters. Worked like a charm.
After letting it dry for a few hours, I applied the first (of three) glossy white coats in fine, fine fashion. Once again, giving the can sufficient clearance from the surface and keeping it moving at all times helps the paint to be evenly distributed and not blotchy; the first coat sat outside until nighttime, when I then carefully carried it into the garage to continue its curing process overnight.
A glossy coat’s totally worthwhile when it comes to furniture; not only does it clean up really nicely and reflect wonderful light, but in this case, I chose a white enamel spray that dries really crisp, really hard, and after just one coat you could see and feel the strength. Still, I added two more coats (as much as was in the single can), mostly taking aim at the hard to reach spaces during the third pass. It was cleaning up well. I left it to sit in the garage for two more nights to cure more solidly before I hauled it indoors and made it subject to being used. In the meantime, I made it a new cushion.
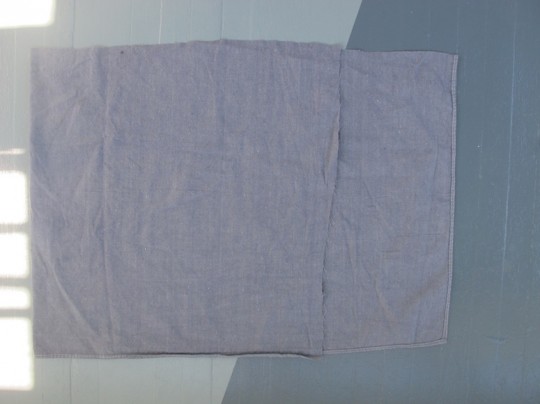
IKEA GOSA ASTER pillows have been one of those items on my IKEA list for the last 4 trips; sized 26″x26″, they’re not high quality (priced at just $6.99 each) but they make for rad cushions, oversized pillows, floor throws, etc, and mine have held up pretty well over the years. It just so happens that the base of this chair was 24″x24″, so the pillow fit right in there perfectly, adding enough cushion to make the chair comfortable without having to spend $30 on a piece of crafting foam. As a cover for the pillow-turned-chair cushion, I turned to my big bin of fabric scraps and chose a piece of leftover dyed drop cloth that I used when making the bedroom curtains. The scrap was slightly larger than I needed in length, which worked well because it still could be cut down into a square slightly larger than 26″x26″. The two best reasons I could rationalize for this fabric pick were that 1) the gray fabric tied in with the gray floor stripes, and 2) I don’t so much mind if the already-dyed, pre-shrunk fabric takes a sun bleaching beating if it lives in the sun room, because I can always re-dye and correct any issues. Win-win-f-r-e-e.
There’s nothing overly tutorialistic about this chair cushion, so I’ll keep it simple. Because I had folded the piece of fabric in half, I looped around and sewed two edges closed and was left with a down-and-dirty pillow case.
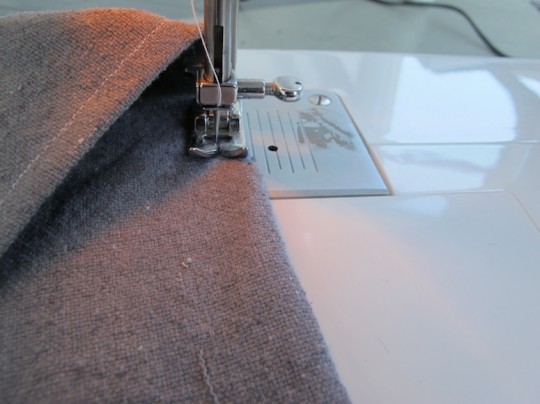
To add a little bit of a faux-piping around the edge, I flipped the pillowcase to the correct outward-facing direction, and sewed around the edge with contrasting white thread, aligning the edge of the fabric to the edge of the sewing machine foot in an effort to have some guide for a straight line (like I said, nothing overly complex about this DIY slip cover, no fancy tools).
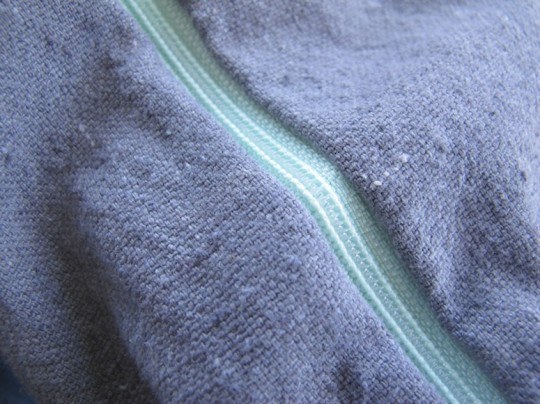
The final step was to add a zipper; I picked up this 22″ zipper from JoAnn’s a few weeks ago with a leftover 40% coupon (never letting a coupon go to waste), and the contrasting light green popped nicely against the gray. I’m still no zipper-installing pro, I don’t even have a special zipper-piping-cording foot for my machine, but I make do and try and get the needle as close as I can to the zipper itself while sewing. Aside from a visible zig-zag that resembles a seismometer report, it turned out great.
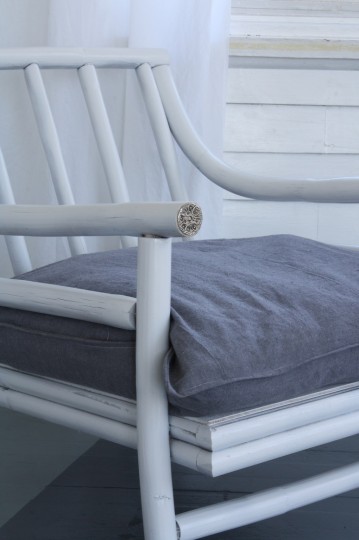
The chair itself, once dry and having cured in the garage for a few days, looks massively improved with the new cushion.
Some of the natural nicks and cracks in the bamboo are still visible even after painting, but I think that’s part of its charm, and in this beachy bright sunroom, it’s a great improvement and looks awesome. Up close, you can really see how much shine the white glossy enamel brought to the chair:
Voila. Not bad for a free chair. The expenses accrued were <$15 (spray primer, spray paint, and a $6.99 pillow).
Makeover anything fun lately?











10 Comments
It looks gorgeous! I’m always tempted to bring makeover projects home from garage sales (referred to frequently as my ‘chair problem’), and have been wanting to go gloss white with something soon. I love the soft, casual shape of the cushion as a nice change!
Have you ever been to Craft Bits ‘N’ Pieces in Fairport village? They’re great for finding things like zippers and project fabric and various other surprises…for pennies. It’s my favorite vintage/craft treasure trove.
It’s a constant struggle to NOT bring home every piece of rehabbable furniture – if only I had the space for it. Can’t wait to check out Craft Bits ‘N’ Pieces – not only have I never been there, but I’ve never even heard of it! Thanks for pointing me in that direction.
I am refinishing my dresser. I really love the color of your shiplap, so I got the same stain and did my mirror frame as a test this weekend. Love it! Will be doing the rest of the dresser next weekend!
Awesome! Love that stain color + the dry-time of the “ultimate” formula!
I love it! The fabric you chose is just gorgeous and I am always amazed at what spray paint can do. More please!
We just bought a new house and are going from a tiny apartment to a big, three-floor Victorian. I am thrilled for lots of reasons and one of them is for the potential to turn thrift store/garage sale finds into new pieces. With the house, a front porch, and a back deck, we have a lot of space. Right now my struggle is to NOT buy any more project pieces until we move in.
Excited for your move; those Buffalo victorians are to die for. I hope your closing date coincides nicely with the onslaught of yard sales and rummage events that are bound to start popping up more and more! Garage sale signage on street corners mark my favorite time of the year.
that chair looks totally awesome and absolutely comfy! Nice work Em!
Thanks Ashley! Used it today, can vouch for that cushion’s comfort. The bamboo back could use another small cushion or throw over it as a little extra softness, but it’s overall pretty great for being pulled from the garbage.
I just picked up a pair of similar chairs at a thrift store. They currently have a shiny white paint on them but it is dingy and needs revived. Can I spray paint directly over the current paint. It is smooth with no peeling or should I put a primer on it before the new paint?
You chair looks great. I can only hope mine turn out as well.
Thanks,
Ruth
You can probably get away without primer, but it would a good idea to lightly sand the surface of the existing glossy to rough it up a little bit. Spray paint works best when it has something to grip to. Glad to hear you liked my chair, I hope yours turns out well too!