Squeal! Today’s post is super photo-heavy, so to make the whole project more digestible, I’ve broken it into a few scrollable sections. Even I have a short attention span when it comes to DIY projects, so I also went back to formatting photo galleries instead of using big-ol’-full-screen images all over the place. Just remember that you can click on the images to view the entire slide show full-size! Enjoy.
I special-requested a set of wooden folding chairs from my parents about a month ago with a great DIY project in mind:
Go head, pin your little heart out.
Background:
These perfect little sunroom chairs are a great height for our new table, light enough to move about as we wish, perfect for extra seating without being too formal, except they are a little hard on the tush when you’re sitting and working all day long. You’d know this if you’ve been to weddings or VFW events or 4-hour high school graduations where these wooden chairs are often brought in as rentals.
The inspiration for these chairs stemmed from a favored design sold by Anthropologie, which I had pinned on Pinterest to keep them more top-of-mind:
Priced at $198, they’re more than a little bit out of my price range, and dropping $800 of my own seemed especially impractical considering that they’d be placed in a 3-season room that is beaten by extreme heat and extreme cold. Around my dining room table, maybe, but not in this secondary space so much.
So, as you already saw in the image at the top of this post, I set out to make my own. And I succeeded, keeping the budget below $50 for a set of 4.
Step 1: Make a base for the cushion.
I considered a few methods for seat cushion assembly before I really got started, but decided that instead of attaching the foam and fabric to the original seat of each folding chair, I would create a new wooden seat using leftover underlayment from our bathroom renovation last winter. Because it was scrap, my wooden bases were f-r-e-e (!) but you can pick up a small piece of plywood that’s about 1/4″ or 3/8″ thick for <$6 at the hardware store.
Starting with a simple newspaper template, I mapped out the surface area of the seat (fortunately, all four wooden seats were identical despite coming from different manufacturers and suppliers, so I only had to make one template). I did drop $4 and pick up some new jig saw blades at the store, opting for the finest blade in the store. That’s finest, in the sense of being capable of making fine cuts, not finest as in the finest/fairest jig saw blades in all the land. At 21 TPI (teeth-per inch), it’s well-suited for making really smooth cuts and curves, especially when you’re working with splintery wood like this underlayment or other thin plywoods. The thinner boards tend to reverberate a lot while you’re cutting, and in my experience, that seems to make the situation worse.
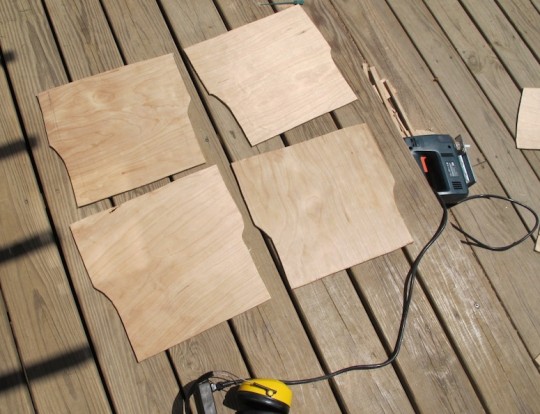
With the template transferred to the piece of scrap underlayment, I set up shop on the back deck and carefully carved out all four seats. No in-progress photos of this, mostly because I was driving the saw with one hand and using my other hand and my entire body to keep the board from reverberating uncontrollably, and more importantly, from reverberating myself right off the edge of the deck. It worked though, they turned out really nice.
You’ll want to take your templates back to the seats themselves as you cut and make sure that they fit on top of the seat with absolutely no overhang.
*Note: You’ll see later in the post that I do go back and rip an extra 1/2″ from all edges of these seats; in testing out wrapping the fabric, it seemed like the wooden edge would rub against the fabric and potentially damage it.
Step 2: Choose and chop seat foam.
There are plenty of foam options at the craft store, this you probably already know. You also probably already know that to get anything substantial, you have to pay up big time. One thing I really like about the inspiration chairs at Anthropologie is that they’re firm when you plop on them. There’s no chance of your rear hitting the wooden base of the seat, and no sense that you’re gradually going to leave a butt impression over time.
I held my breath for a few weeks until the foam selection at JoAnn’s was marked down 50% and then layered on the savings with an extra 10% off coupon, so my first-choice of 3″ high-density foam (2’x2.5′) cost about $24.
Make it easy on yourself and use a sharp serrated knife to saw through the foam. As shown here, I lined up the seats onto the foam, and then cut through to make the foam seats.
This is where I started to wonder about whether the always-a-little-rough edge of the wood would want to rub unfavorably against the tightly wrapped seat fabrics (they would wrap over the foam and under the wooden seat templates). I decided to use the foam as a buffer to prevent the fabric from rubbing against the seat and wearing thin, so I took a 1/2″ sliver from each underlayment board so that it was scaled like this:
The foam received a little bit of retrofitting too. I didn’t want a boxy square seat cushion, I wanted a nice beveled gradation to the seat cushion. To help the seat take this shape, I did a little DIY bevel using the same serrated knife to add that gradual grade to each side of the foam seat.
Step 3: Buy fabric.
My fabric arsenal is becoming larger and larger these days, but what I had in mind for the seats of these chairs was a little more eccentric than anything I’ve used before. Scouring Etsy, I finally landed upon a shop out of the UK that sold African wax cotton fabric. The shop, Chilli Peppa, offered fat quarters measuring 18″x22″ for (what felt like fair) prices, so I selected three patterns. Yes, it was one of those “the shipping is more expensive than the product” moments, but each cost between $2.70-3.50, and with shipping the set came across the Atlantic for <$18.
They took a few weeks to arrive thanks to customs, but when it did they were wonderful. Vibrant, bright, happy, but still holding some common ties to the olive and orange colors that flow throughout the rest of the house.
The fourth fabric, I decided I would pull from my own scrap stash. I had some leftover fabric from my first round of ottomans that would work well, and I knew I could tap into the vintage fabrics that I brought home from this garage sale earlier this spring.

Step 4: Sew, Sew, Sew, Assemble.
One more twist in the planned design of the seat covers: I wanted to combine a couple different fabrics on each seat. Shown in that above picture, I hand selected different textiles that would compliment the busier patterns when used on a chair seat.
I cut pieces of the chosen fabric to size, keeping them roughly 22″x15″ so that there was plenty of fabric to wrap around the seat and secure, and then sewed the complimentary pieces together. Once the pieces were sewn together, I ironed each seat cover and then sewed back over the seam for reinforcement. Maybe the pictures tell the story better, I’m no technically-articulate seamstress. Fire away questions if this is totally unclear.
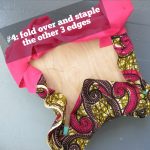
Once the four seat covers were sewn and ironed flat, it was time to wrap the seat and each piece of foam with its own piece of fabric. To secure the fabric tautly to the piece of underlayment board, I used some 1/4″ staples that we already owned (but if you need to buy them new, they only cost about $5 at the store).
Using my own body weight to compress the foam and staple the fabric in place, the process was pretty simple:
Here’s a better close up on how I worked the corners. Rather than wrap the corners with sharp, crisp edges like you’d make when you were wrapping a present, I bundled the fabric cleanly so that there we no severe creases on the top of the cushion. The whole bunch was secured with a smattering of staples. It worked really well, despite it looking sloppy.
At this point, the fabric still feels a little bulky on the underside of the wooden board, even spilling overboard depending on how you tuck the excess. So trim it down.
It’ll sit much nicer without the added bulk.
Step 5: Secure that puppy.
It didn’t take much to secure the new seat to the original folding chair seat. Instead of using adhesives or staples, I predrilled a hole from underneath the chair through the original seat and through the underlayment board, and filled it with a 3/4″ wood screw. The screw was long enough to securely attach the two seats to one another, and because I kept the chair stationed upright and my hand on top of the cushion to keep it perfectly in place, the seat was perfectly centered and locked down.
Wood screws are really secure, but an added benefit is that they’d also be easy to remove if I ever wanted to remove the cushions to rewrap them or eliminate them all together.
Yes, working at this angle is a great forearm workout. Call me Popeye.
Once one screw was secured, I went back and added 3 additional screws to the bottom of each seat, so there are four total holding the cushion to the original seat.
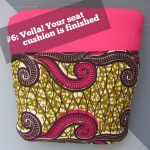
It’s secure. They’re not wiggly, only entirely cushy. So there’s only one thing left to do:
Step 6: Sit and enjoy.
Make anything inspired lately?
Pin me:










18 Comments
I was just looking at those chairs yesterday, how timely! Your chairs look fantastic, and thanks for the link to the show selling African wax prints. I’ve been looking for a reliable source for years.
Glad you liked, Meghan! The seller’s products arrived in perfect condition. Very crisp and vibrant.
The pictures seem to indicate that the fabric is a little thinner, like common quilting or muslin fabric. Yes?
I want to buy so many yards of this fabric to sew garments with but not if they’re heavy upholstery weight. ;-)
That’s correct, more like quilting cotton than upholstery fabric. It’s a little stiffer though; the “wax” in it makes it feel like it was starched.
We totally did this with our dining room table set (a cheap-o from K-Mart that we painted and added cushions too). It makes it totally look like a different dining set! :)
Good job! I love the fabrics you chose!
So glad you loved the fabrics, you have done a great job with them and your blog is great!
chilli x
Gorgeous! I love the great colors on the seat cushions that gives the white sunroom beautiful pop of colors and giving it a comfy vibe. Great job!
Thanks Kate! Love the pop of color in an almost all-white room too!
These look fantastic! Now I want to create cushions like this for our own hard-on-your-tush patio chairs. Thanks for sharing :)
I love how the chairs turned out! The fabric is great! I reupholstered a pair of chairs for the ends of my dining table in some Serena & Lily fabric. I didn’t have to make the base, but I did sew the piping to the cushion!
http://www.willscasa.com/2012/03/chair-facelift-complete/
Thanks Amber! Your chair looks great (and I love the carpet in your dining room!)
You did a wonderful job! I adore your fabric selection. I also like how you created a new wooden base to attach to the seat – it seems much more secure and professional that way!
Thanks Whitney! Glad you liked them (they’re very comfy).
Thanks Whitney! Glad you liked them (they’re very comfy)!
Nice job!
I did something similiar with Ikea Terje folding chairs, take a look.
http://deluxlei.com/2013/11/09/265/
They’re cute!! Turned out great!
Looks great! Are you still able to fold the chairs up all of the way?
Yep! The cushion doesn’t interfere with the folding at all.