This post was originally published on DIY Network’s blog Made + Remade in March 2014.

Sow, sow, soon the garden will grow. The seed starting season is upon us now (Zone 5, representing!) and soon enough, we’ll be prepping those outdoor beds for our favorite flowers, fruits, and veggies. Setting up a comfortable dwelling for your seeds is the first and most important step to cultivating a healthy, thriving inventory of seedlings, and spacing of the seeds is critical to success since you want them to have enough room to root and develop in the soil.
Get those seeds on the right path by using this simple wooden ruler hack shown below to make those rows immaculately straight and evenly spaced for optimal root growth (and then sit back and wait for your garden to flourish).
Step 1
Start with a ruler, a drill, and several drill bits – 3/32″ and 5/16″ worked well for me.

Step 2
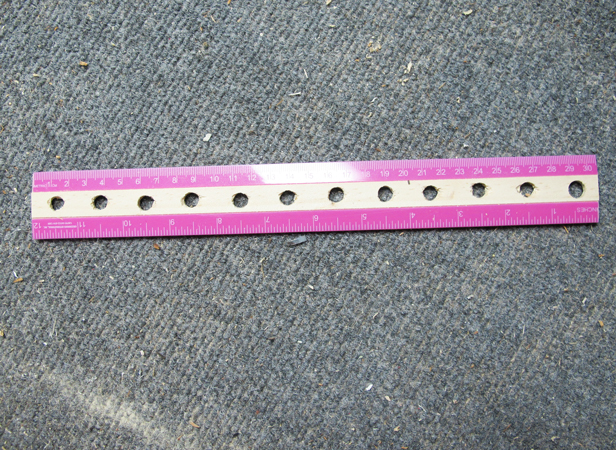
Starting with smaller drill bits helps with precision, and helps a wooden ruler from cracking. Using the rules already imprinted on the ruler, drill a pilot hole using the smaller bit at every 1″ interval. My ruler had a hole drilled by the manufacturer at the 1/2″ mark, so I used that and made additional marks spaced accordingly. Most seed packets ask that you plant between 1″ – 4″ apart for optimum root growth, so this will make it easier to plant at the correct spacing.
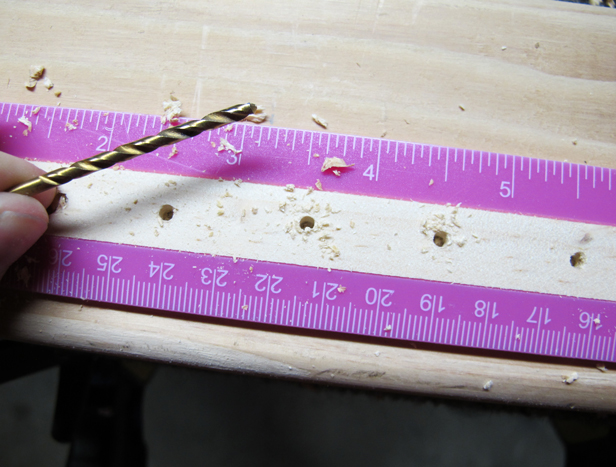
Step 3
Follow through with the larger bit to open the holes up wide enough for a standard pencil to fit through.
Step 4
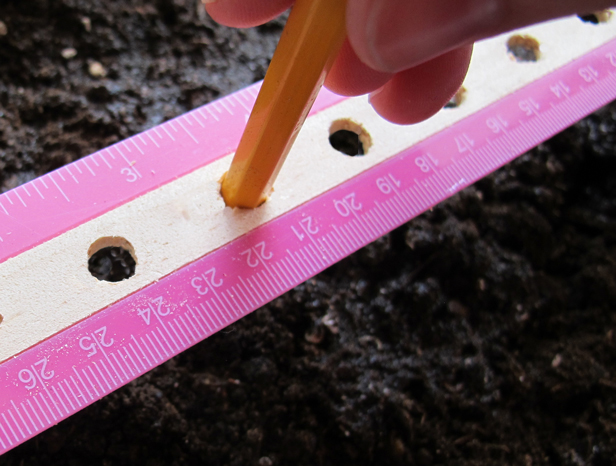
Put your handy new tool to use by simply aligning it over pre-moistened soil, and poking a pencil or dowel down through the holes at the interval your seed directions specify. Drop the seeds into each hole, and don’t forget to water regularly. Happy Spring!


Leave A Reply