This post was originally published on DIY Network’s blog Made + Remade in May 2015.
Finishing touches are where it’s at, guys. I love finishing a project, but the finishing touches aren’t always easy to come by or quick to complete. You can probably relate – think about the finishing touches you’ve been stalling out on – maybe it’s the crown molding, or adding a final clear coat to your refinished furniture, or taking the time to install all new hardware on your new kitchen cabinets.
Sometimes it’s tedious, but the final details on any project seal the deal on your ability to take your vision, and make it reality. Totally worth it in the end.

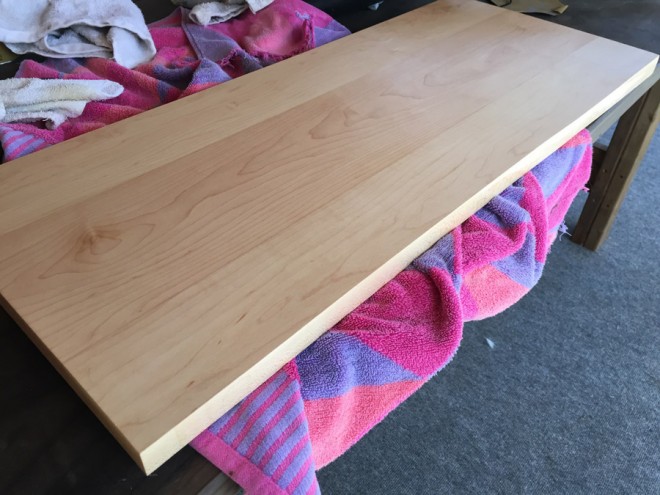
The floating metal cabinets that I installed in our entryway have been working perfectly for us, but to finish them off, I wanted to install a final countertop. Finding a countertop to match my vision wasn’t as easy as you might think; my short list of requirements read 31.25″x12.5″ and around 1″ thick. A very light wood – think maple, ash, poplar – to coordinate with the vinyl wallpaper that I hung behind the storage units.

My personal workshop has plenty of tools, like table saws and joiners, so you would think that building my own might be easy. With this in mind, I started by sourcing raw lumber to work with, but my search actually led me down a path of purchasing a pre-joined, stain-ready piece of maple from a local millwork shop. The perk? It was scrap leftover from a high-end job that was too small to be useful for their other clients, yet nearly the perfect size for my job – I paid the shop to have them trim it down to my size ($50 covered the material, which was already professionally pre-joined and finished, and the sawing of the board to fit my needs), so if there were ever a time for an enthusiastic fist-bump, here it is.
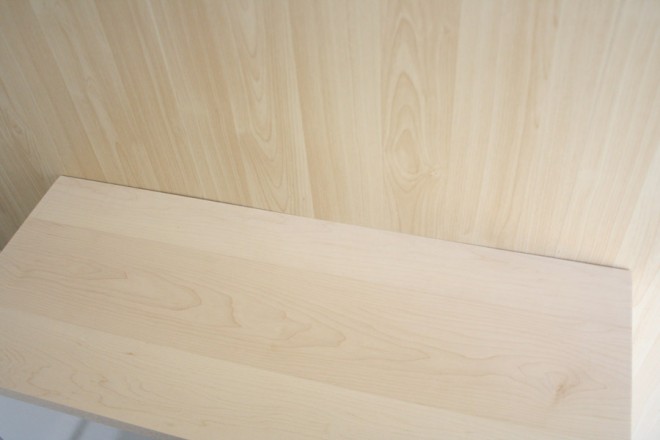
The board itself is perfect, and with no visible seams, easily a bit nicer than I could have constructed myself with my novice joinery abilities (keeping it real). The catch? (There’s always a catch.): My entryway wall is bowed.
Whomp-whomp.
So, it’s not obvious enough to the naked eye, but when I put a flawlessly straight piece of wood up against it, the irregularities in the surface of the wall became pretty obvious. Uneven drywall happens a lot, so I’m not surprised, but knowing how to work around it is part of the whole “finishing touches sometimes take a long time” experience.
If you’re in the same situation, here’s what I did to finish the countertop:
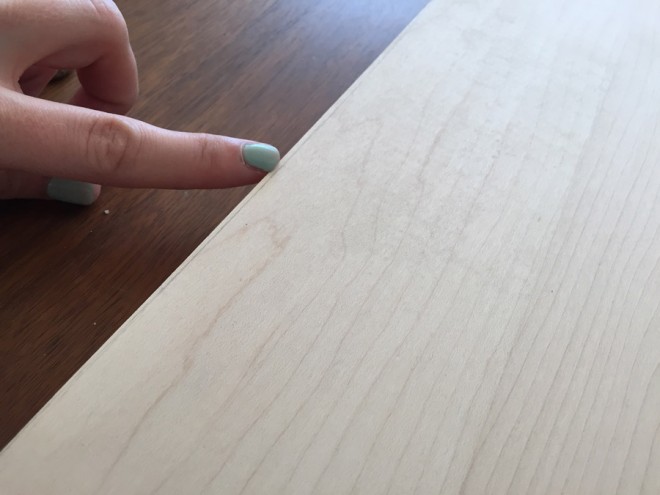
Identify where the biggest gap is between the wall and the countertop board. Say it’s 1/8″. You’ll need to sand down other parts of the board by 1/8″ to correct to the curve.
Bring the board out from the wall evenly, and adjust a compass to match the space of the gap.

Create a fine line with the pencil end of the compass along the edge of the board. The pointed end of the compass should ride along the wall, and the pencil-end, along the wooden board.

The irregular curve in the drywall will then transfer to the board, allowing you to identify which parts of the board will have to be removed.
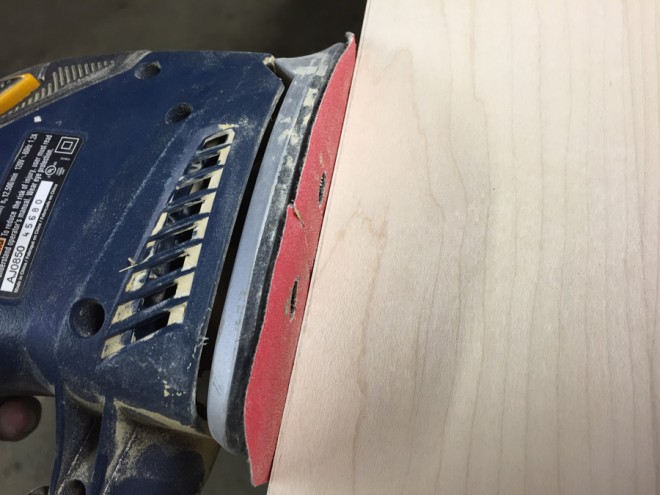
Assuming the curve in your wall is “minor,” like mine, you’ll be able to use a palm sander or sandpaper to correct the edge of the board that rests against the wall. Some parts of my line required me to remove as much as 1/8″. Sanding right up to the pencil line all along the countertop board worked perfectly. I definitely recommend continuously re-fitting the board against the wall to assure that the fit is correct.
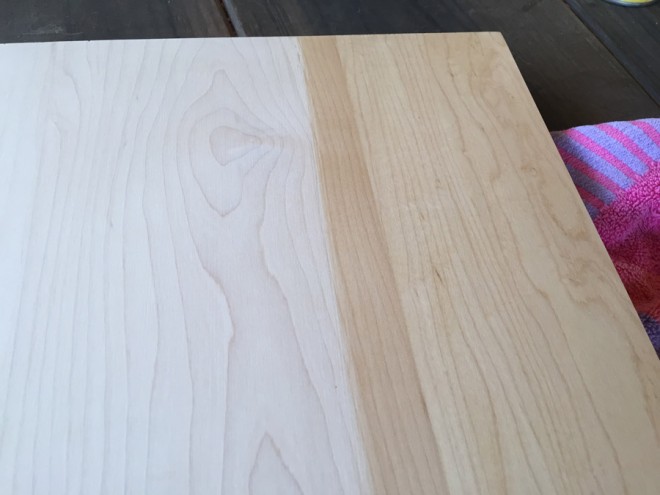
To finish the countertop, I needed to seal it. I tested and labeled a few different stains on the underside of the countertop to see what worked best, and overlaid each stain with a coat of poly and wax to see what final finish looked best and felt most durable.

My favorite combination (the combo that left the maple board most closely matching the color of the wallpaper in the entryway): Natural colored stain, with a wax (not poly!) finish.
Pretty, right?
Once dry, apply a finishing wax using a cloth to seal and protect the wood; any water will repel the surface, and the wax will leave you with a finish that isn’t glossy, like some polyurethane or acrylic finishes.
Before you install the countertop, create holes in the top of your metal cabinet with a drill bit. Pre-drilling the holes makes it easier to install screws into the countertop from beneath.

I installed 4 3/4″ screws, one in each corner of the countertop to hold the countertop in place.

The finished entryway is a perfect place for us to store hats and other outerwear accessories!

To learn more about this entryway redesign:


Comment
A beneficial article. I appreciate you bringing this to our notice, and I look forward to further discussion. I’m looking forward to hearing what you have to say next!