Things don’t always come together so easily.
Pete won a sexy little 19″ flat LED TV at a work function around the holidays (read: totally free), but since he didn’t know where to install it in his apartment, it stayed in the box in a closet. For shame! I just kind of lucked out by getting the chance to install it in my own house and maybe I let him move in just so that I could take advantage of his free TV… I’ll never tell. But of course, we’ll both enjoy it. A lot. Thank you Pete.
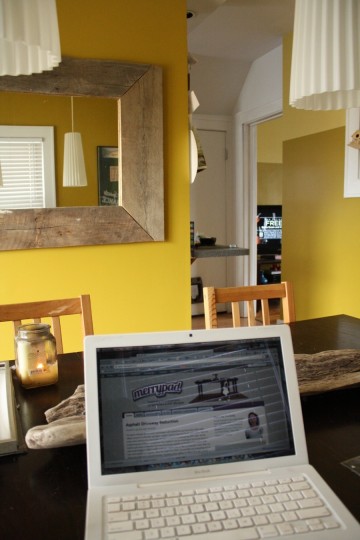
We’ve been spending many evenings working at the table in the dining room where we can sit comfortably for hours at a time (he’s been developing content and strategy for Dadand, which you should absolutely check it out if you want a laugh about dad life and man stuff). But here’s the “issue”: you can’t really see the living room TV from this position. Well, you can see just a little part of the screen, which is sometimes enough if you’re just tuning in/listening to a re-run of your favorite syndicated show like How I Met Your Mother (of which there are currently 48 on my DVR and 47 of which I’ve already seen… thrice).
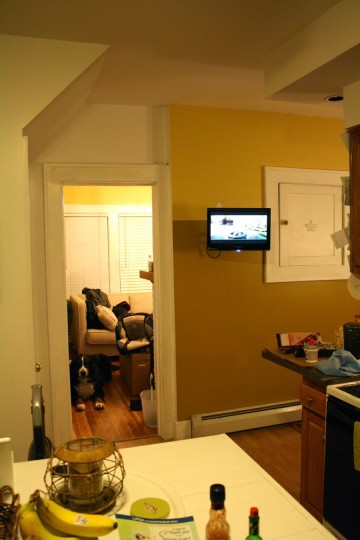
Because of this arrangement, we agreed to test out the kitchen/dining room area for the new, free-to-him-slash-us TV. The location we agreed upon was on that wall you see in the above photo that faces into both the kitchen and the dining room, to the left of that white built-in shelf; we figured this would solve the “who-gets-to-see-half-of-the-tv-through-the-doorway” matter and also encourage me to cook more (which I realize is an incredibly, incredibly lame thing to say, but I’m totally going to become the next Martha, not to be confused with @TheNextMartha or @The_Next_Martha since there are already lots of people in line ahead of me). See? This is my view from the kitchen island before… with counters and couch covered with projects. True story, sometimes I leave a mess… for a week at a time:
Of course we had a few questions/concerns before we got started:
- Could the Dish Network hook up to it without getting a new receiver? Yes! Here’s a picture of Pete proving it during a test set-up:
- Does it mean we have to be watching the same programming on both the living room and kitchen TVs? (We can! But we also figured out how to tap into the master bedroom receiver when it’s not in use!)
- Are there going to be lots of ugly exposed wires? (Weren’t sure about this until we actually got started… keep reading!)
Since it was going to be wall-mounted, I picked out this bracket that was pretty universal in design; it’s right from Amazon, easy peasy. We also ordered a 20′-long red-white-yellow video/audio cable, which is what we found that we needed to connect the new TV to the living room receiver.
Bonus: I had a $20 Amazon credit from a LivingSocial deal I bought a few months ago.
Double bonus: Pete’s an Amazon Prime member which means he can get pretty much anything with free 2-day shipping. If you order a lot from Amazon I totally recommend this. Pays for itself. We’re even considering buying household products like paper towels and dish rags from Amazon now too.
Before we even started drilling holes and pulling cables through walls, we installed the bracket and TV on the wall… you know, just to be sure we really, really wanted it there. We started with a stud finder, which was really just Pete’s finger furiously tapping. It’s pretty obvious where the studs are, which you probably already know.
 I’m sure there’s a few different ways to go about mounting a TV on your wall, but we started by attaching the bracket to the TV first so that we could see exactly where the TV needed to be to remain centered, and also so we could tell where the bracket needed to rest against the wall, since it would either have to land on a joist or be toggle bolted into the drywall. Somehow the bracket base lined up perfectly with the joist – the odds of this seem impossible to calculate, and I like numbers.
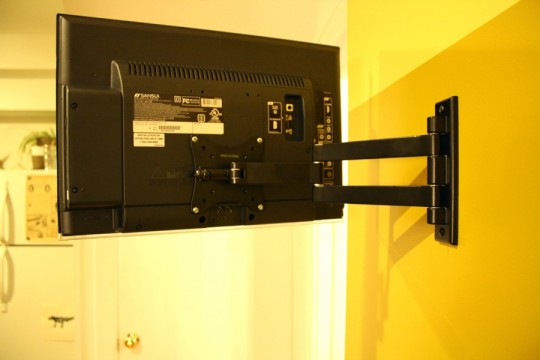 It looked pretty damn good. Really damn good. Of course, then came the hard part, which was figuring out how we were going to wire the cable and power it up.
There were a number of routes we considered, but when you start to figure in how ugly exposed wires over door frames are, and the number of joists you have to intersect to go through the wall, it becomes mind numbing (and horrifying). Pete had a great idea (the winning idea) to route the new cable from the back of the satellite receiver, down through a hole in the floor behind the TV that the other cables were already going through, right on down into the basement, and (wait for it, this is incredible) back up from the basement into the kitchen.
This is where it gets interesting, people (thanks for hanging in there): Pete realized that we could remove a small, small piece of baseboard, and feed the wire up through a hole that would be covered when the baseboard was replaced. He scored the paint that was holding it in place with his trusty Husky knife, the one he wrote about here.
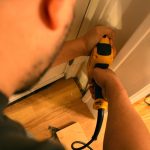
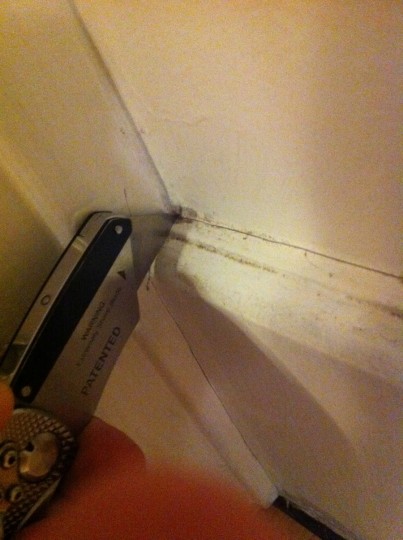 And when it came to drilling the hole, it involved using this drill bit, which as you can imagine, reinforced Pete’s manliness. He drilled through to the floor to make a hole into the basement.
The exposed wire was actually the perfect size to be hidden in this poorly-constructed kitchen doorway frame, which has a gap between it and the wall that you’d never notice unless you were man-handling the doorframe, or, you know, running wires in random places which is exactly how I noticed it, exactly 23 months after moving into my house.
The wire easily looped up and around the door frame, is completely hidden, and made the trek through the wall much shorter – we only needed to navigate from the top of the doorframe down to the hole, which was located just before the first joist. There’s a tiny hole on the top of the doorway that you’d never know was there if I didn’t show you this photo. I need to touch up that scuff from the drill when I get a chance:
 After we drilled a hole directly behind the TV, we fed the video/audio cable from above the doorway downwards to the new hole. To grab it, we bent a wire hanger into a hook and stuck it in the hole behind the TV; once it snagged, we pulled it right on through. See in this picture you can see the black wire draped over the doorframe? It’s totally hidden, you’ll see a photo at the end.
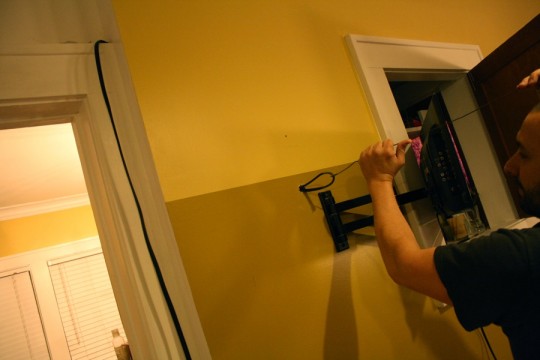 The power cord was going to enter from another direction. That built-in shelf (my one-stop-shop) actually has an outlet installed in the back of it, so we drilled into the inside of the shelf, and fed the power cord through to the hole behind the TV; this was a little harder than the first wire since we had to go through the joist that the bracket was installed in, so we bent up another metal hanger to serve as a tool to help guide the cord horizontally over to the hole.
 And it worked! The wires both pop through the same tiny hole behind the TV, and remain hidden behind the monitor while still allow a little flex for when we want to shift the bracket around.
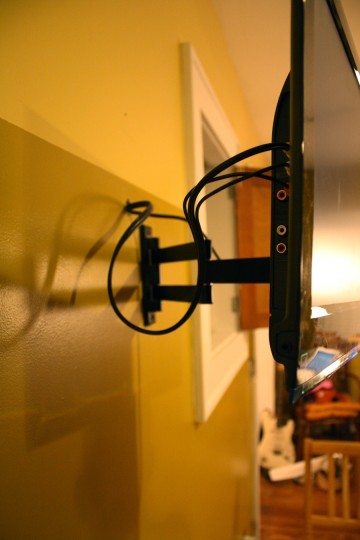 It also looks fantastic from both the kitchen…
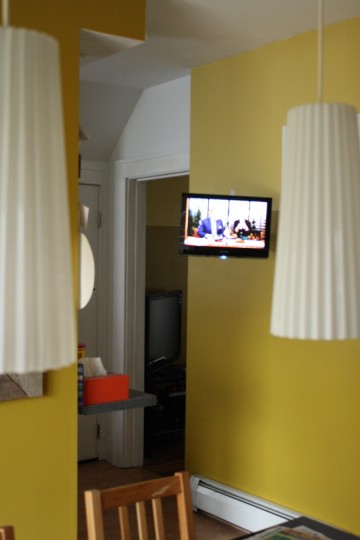
…and the dining room where I’m currently working from as I write this… watching Regis & Kelly again.
I see many productive nights accompanied by New Adventures Of Old Christine in my future (there are 52 syndicated episodes on the DVR that I still need to chip away at chronologically). Could I have written a longer post about a TV install? No. Thanks for sticking with me.







6 Comments
That looks great! We’re going to wall mount a tv on our back proch… whenever we get it back from my parents.
From your parents? Get it back so you have time to install it before the wonderful springtime! Oh, shoot, you live in FL so you’re only anticipating stifling hot temps… :)
Yeah, they gave the tv to us a few Christmases ago and then borrowed it from us when we found a great deal on a bigger one that we couldn’t pass up (I feel like a shopaholic when I say that, but our living room is sort of massive, so a slightly bigger one made sense). They just found a great deal on a new tv, so now we have to convince my dad that his Man Cave does not need our tv ;)
Big room needs a big TV, that’s logical. I even referenced a couch-distance-to-screen x available-wall-area grid when I chose mine. But with that said, if you have the room that’s smaller to use it in, get that back, yo. Find him a TV deal he can’t pass up (if he’s ok with a 19″ I really like this new one).
Well hung. (Sorry)
(p.s., Regis & Kelly? Come on, Emily.)
Guilty pleasure. Maybe not even that guilty anymore. And good background banter when I’m workin’.