When we set out to rent our home, we made ourselves a list with about 30 line items detailing what we needed to do to our current house to “make it rentable” to tenants. I use some quotes there, and picture me using exaggerated air quotes too, because our house was totally rentable in its current form. I’ve lived here comfortably for four years and so could anyone else. Regardless of that, the things that we’ve lived with harmoniously for the last few years are also things we can’t imagine making any of our tenants deal with, so naturally we’re spending some time to make the house nicer than it ever was when we lived here. We figured it was about time to fix things like (1) the squeak in the bathroom door hinge, a squeal that was piercing enough to actually warrant us leave the door open while we used the facilities–yeah, sometimes we’re those people–and we’ve known since 2011 that (2) the doorbell surround would need to be updated, since it popped loose about 72 hours after I wrote about making it. Our bathroom door is squeak-free (and even has an updated doorknob that locks, lucky tenants!) and new doorbell is pretty, efficient, and secure. It was $13 at The Home Depot, a “splurge” if you’ve ever browsed the selection, and I likey.

Switching a doorbell is a piece of cake, but the list of things we need to do is still a long one, even after having spent last week and the better part of our three-day weekend getting down on most of the rehab.
(3) Regrouting the kitchen floor was one of the bigger jobs at hand; we’ve had trouble with the grout that I used between the vinyl tiles in the kitchen, and I when I wrote about the issue, had basically relegated myself to the plan to fully replace the floor with a non-grouted vinyl tile. What a surprise it was to hear from multiple readers/commenters that I should try a grout that was polymer fortified first, that it might have a little more flex in our still bouncy kitchen floor, and we might find it to hold up better, or at least not crackle away like stale cracker bits. At $4.98/container, we spent $15 on 3 of a neutral gray color. I did not search high and low or shop around for brands, and the tile expert at the store didn’t know from experience if it would hold up any better, but it’s worth the try and really appreciated the recommendation.

Pete followed through with making even more floor repairs before we got started to lessen any remaining signs of bounciness, just to make sure that we were putting the grout in the most solid floor that we could. As it has involved before, marking those bouncy spots requires one of us to stand in the kitchen and bounce around a lot to get the subfloor to squeak or visibly bounce against the joists in the basement ceiling so that the problem areas can be shimmed. It’s really not a one-person job, and it’s most effective if you weight yourself down while you hop… think, carry a bag of cement, potting soil, your kid, whatever.
Removing the old grout was easy, in part because it had mostly been swept away or at least loosened itself between the tiles. With a flathead screwdriver and a Shop Vac, we made our way around the room clearing out every gap to make space for new grout.

The new polymer fortified grout went on smooth, and having to pause and remix each of the three containers every so often was actually a good thing: sometimes when you make too large of a batch of grout (or mortar, or cement, etc.) it can dry out before you have an opportunity to use it all, meaning waste, or a poor working product. Tiny portioned containers meant that we always had fresh grout at the end of our putty knife.

And so far? So good. It might be too early to tell if this is going to be an issue again, but we felt good for trying it once more and spending $15 instead of having entire do-over and spending $200 on tile. It’s one of those things we’ll monitor closely for the sake of our tenants, even though the flooring in most apartments I rented was utter filth.

Also in the kitchen, I got around to (4) finishing the backside of the basement door. Remember when I created a faux-detail on the front of our basement access door to hide a massive pet door hole? I mirrored the same treatment to the backside of the door (since the hole was also visible there).

The panels were actually added sometime in late November, which only further proves that all of our in-progress projects fell into a black hole vortex in December, the month we got married. Further evidence to the left, where you’ll notice that the drywall is missing from the ceiling as we spent time repairing the squeaky stairs. That baby took 7-months to work its way back up, because sometimes we don’t care about finishing what we start in a blog-gonna-impress-you-worthy timeline. (Real-life high-five.)
I only just got around to painting the paneled door white, so it’s our future tenants that will definitely enjoy its finished work more than we will, but I’m thrilled that it looks completed. We had leftover primer and white paint from other projects, and were able to prime it one day, and then paint it the next, so it was el cheapo and easy to complete. Cody bomb.

(5) We changed the batteries in all of the smoke alarms, and added a new (talking!) smoke alarm-slash-carbon monoxide detector in the hallway outside of the bedrooms. Fancy pants.
(6) We also got around to transplanting Myrtle into the garden beds surrounding our backyard patio; the patio is in a very shady part of our yard, and I had actually set out to buy a bunch of hostas to fill in the beds this spring (we have some great LivingSocial coupons to a local greenhouse that we’ll have put to use another way) but the myrtle was f-r-e-e, transplanted in part from the front garden where it was starting to rage out of control, and from the sheer acres of myrtle at Pete’s parents house, wherein you can shovel a few pails worth of the stuff and still not notice any gaping spots in the garden. I’ve mentioned that flats of myrtle at the gardening center can cost upwards of $35, right? Whoa. Thanks for saving us $100. If it fills out as well as it has in other spots in the yard, we can expect the circular garden surrounding the flagstone patio to be lush and beautiful by next spring. It may appear from this instagram photo that we are burying evidence of some sort, but I can assure you that we are not. Also, we did have permission to transplant the stuff, so don’t think we’re just covertly stealing it.

(7) We painted a lot of trim, too. Inside, outside, upstairs, downstairs, you name it, we touched it up, and Cody promptly rubbed his body against it. He is very white-blotchy, and very not concerned about his lack of coordination around wet paint.
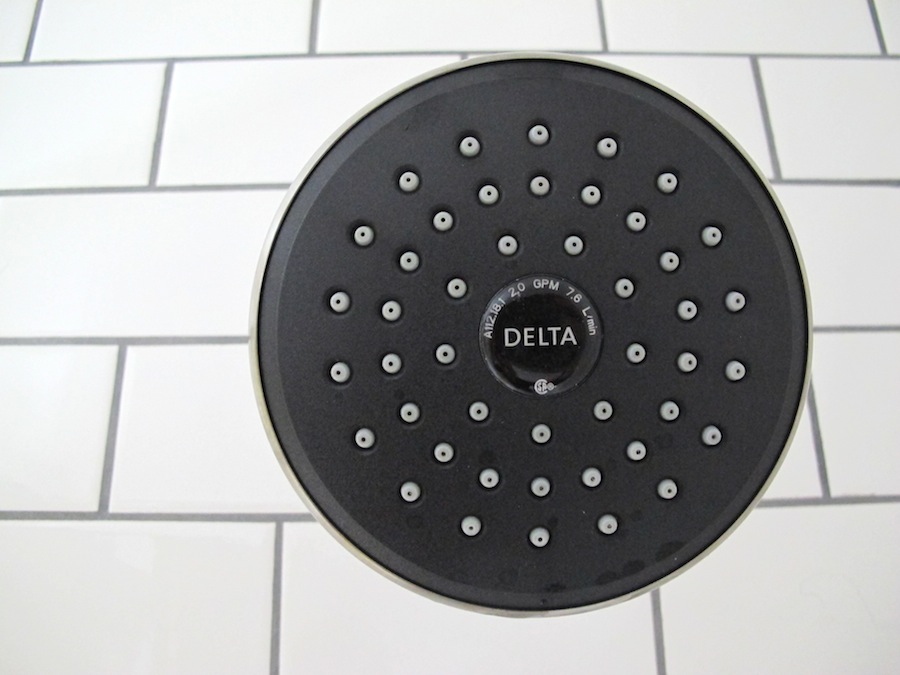
We upgraded some hardware throughout the house, namely, the two products that I was given to use/review during my sponsorship with Delta Faucets: (8) the kitchen’s Touch2O faucet, and (9) the bathroom’s shower head.
When we upgraded the plumbing in the bathroom, we had purchased a new valve and because of how companies bundle products, when you buy a valve, you’re also buying the handle, tub spout, and a coordinating shower head. That spare shower head that we didn’t use immediately, we saved, and I was able to screw into place in a pinch. It’s the nicest apartment shower head, like, ever. Of course we are totally cool with tenants swapping it out for their own, that’s the nice thing about a shower head being so easy to alternate with a little bit of PTFE tape.
To update the kitchen sink, I bought a comparable faucet to fill in the void left by swiping our Touch2O. To fit the two holes that the hired countertop crew had drilled into the countertop last fall, I chose the same faucet style that featured a pull-out sprayer and stand-alone soap dispenser. While I had expected/hoped to be able to get the identical Delta Faucet model that we had before (the Lewiston) it was no longer being carried locally, so I chose a close #2, the Cicero in a Brilliance Stainless finish.

Having just installed the Touch2O faucet last fall, it was easy to recall how to uninstall/reinstall and made the swap quick. I don’t actually mind working in the tight spaces beneath the sink, so long as water isn’t spraying at me.

Short of being non-touch sensitive, we actually like this faucet model a lot. It’s handle is a little easier to turn on and off at your desired water pressure (the Touch is always set to flow how you pre-set the water, which can sometimes be frustrating), and the spray/jet buttons are located on the top of the pull-out handle rather than being hidden beneath. Easy to use, and looks pretty.

There are still several things on our list, but we’re getting closer to completion which is good, because we’re also getting closer to knowing a certain closing date for our new house. Fingers crossed!


9 Comments
You have been busy – Nice work! I like that new faucet which looks ample and sturdy. I have been looking at new kitchen faucets to go along with the new sink we will be putting in that is for a single spout type. So many options out there. Going from a standard 3 port tap set to a single, I want something that will be durable, operates intuitively and looks great, of course :) Will check out the Delta.
I do love the Deltas. There are so many different brands and models and finishes out there to choose between, though I find it hard to determine what will be sturdy and stable and reliable in-store… the showroom-esque aisles always leave the products feel flimsy, especially when it comes to pull out sprayers, because they’re never set up in a way that you can test how they handle and retract. Good luck!
I really like the doorbell you installed. Do you have a link to the product or the brand/model etc?
Thanks!
Voila – I hope this helps! http://www.homedepot.com/p/Heath-Zenith-Wired-Bronze-Finish-LED-Key-Finder-Round-Push-Button-DW-602/202216958#.UaYHgWSG2vI
Cody bomb? Whazit – to check who is reading? Myrtle, from prior advice I actually found some to “borrow” myself. Fill in an area I am naturalizing with flagstones, stepable plants and “stuff”. And yes it Does look like you are hiding some evidence of some sort – we will be watching you Emily and Pete!….what the heck are you up to…
He finds himself in the background of many images. Happened to poke his nosey napping face through the space in the doorway when I snapped the picture!
Yes yes I see now, Cody what a great dog. And Big! He likes to steal the scene I am sure….
best of luck with banging out the list … the move and yep … ultimately landlord-dom.
Thanks jb!