This post was originally published on DIY Network’s blog Made + Remade in June 2014.
Flashback to first grade, I remember learning everything to do with telling time on one of these sweet yellow clocks. They were – and I believe still are – a much-loved teaching tool. The yellow clock is iconic to me, and of course something I want to own to encourage curiosity and learnin’ in my own household because, education!
If you want to start small, you can recreate one for yourself in an afternoon with not much more than a paper plate, a paper fastener, vinyl numbers, construction paper, and colorful paint. Piece it together, and let the kids play!

Step 1
Paint a plain paper plate to start. I used a yellow spray paint that I already owned, but you can just as easily paint it with yellow paint from your kid’s own craft bin.

Step 2
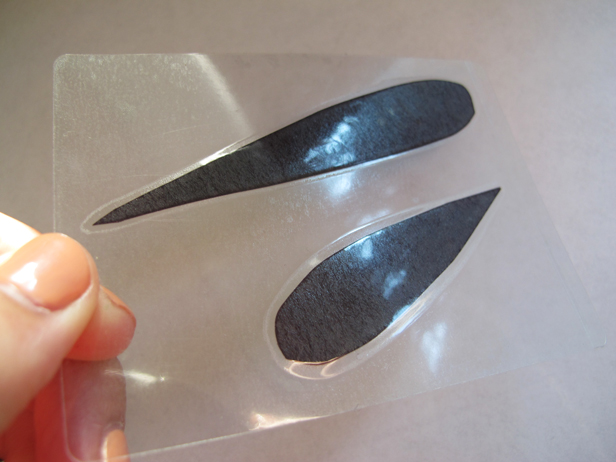
While you wait for the yellow paint to dry, cut 2 hands for the clock out of construction paper. I chose black, and made them in two sizes, measuring 3″ and 5″ in length. Because the paper was likely to tear easily, I laminated the hands using handy Self-Laminating Sheets, and then used the hole punch to create a hole in the one end of both arms so they would attach to the clock.
Step 3
Locate the center of your dried paper plate, and punch a hole in it using the pointed end of your paper fastener. Remove the fastener without attaching it; you’ll just use that hole as a point of reference for the gears you’re going to paint on the plate.

Step 4
Paint in your favorite details for effect; this version won’t have functional gears like its awesome inspiration piece, but it can still look good. Vinyl numbers around the clock at appropriate intervals create a great effect, but paint in numbers with your neatest penmanship if necessary.

Step 5
Finish off your iconic educational clock by attaching the hands you made with the paper fastener. Hand it off to the kids and let them have fun learning how to tell time!


Leave A Reply