This post was originally published on DIY Network’s blog Made + Remade in June 2014.

No doubt that I housed at least 1,000 caterpillars in my critter catcher between the ages of 5-10. I also named them, but that’s beside the point here. Collecting creepy crawlers and everyday ants is some right of passage, so every kid deserves to have a critter catcher in his or her arsenal of playthings.
Looking to make one yourself? It’s mighty easy if you have access to a few tools.
Step 1
Consider the size that you want your catcher to be. For the base of mine, I cut a piece of 8″ pine board to measure 8″ wide x 10″ long.
Step 2
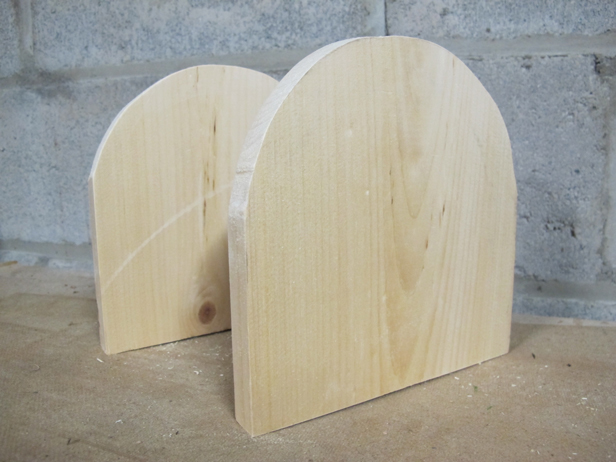
The critter catcher will be mostly open for air flow and visibility, but you will need to construct front and back walls and a doorway to the cage. Create a template using scrap paper, and transfer the shape of the template onto two pieces of wood (the height of my walls measure 8″ wide x 9″ high).

Step 3
Use a jigsaw to cut out along your template lines.
Step 4
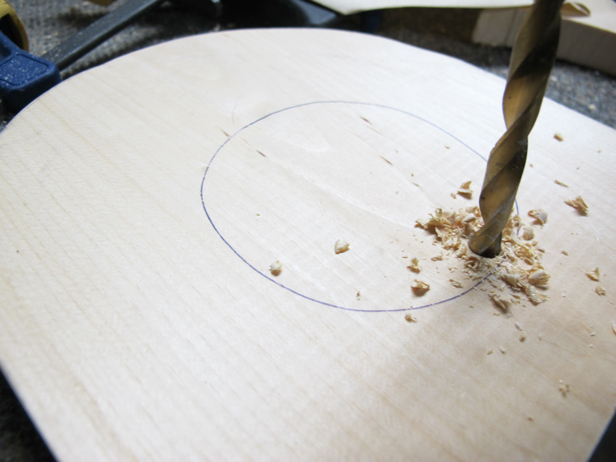
You’ll need to create an access door for the front of your critter catcher. I cut a 3″ opening in the front panel of wood using a jigsaw, first using a drill bit to create an opening for the jigsaw blade to fit in.
Step 5
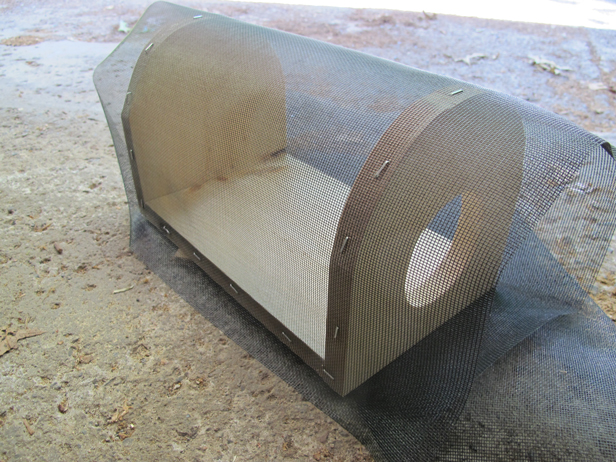
Attach the front and back panels to the 4″ x 6″ base that you cut initially. I used a little bit of wood glue and clamped the pieces together, and added brad nails in each side to reinforce the lap joints in the structure.

Step 6
Measure the length of netting that you need to cover the critter catcher. Allow for a little overhang on all sides – you’ll trim off the excess in the next step – and use an electric stapler to attach the netting to the wooden frame.
Step 7
Trim the overhang from the critter catcher using a utility knife.

Step 8
I trimmed a piece of scrap plywood to serve as a door, and attached it using a bolt so that it can slide side-to-side to open. Note that in this photo a screw is holding it in place … once I loosened the screw to allow my daughter to paint (see the next photo), I realized that I could improve upon it with a bolt and nut! Because this catcher would be carried all over the yard, I also found it nice to add a piece of wood along the top (nailed in place with the brad nailer), and screwed a length of belt to the board to create a handle.

Step 9
Customize your finished critter catcher with a paint treatment if you’re feeling creative, and then add a final eye hook and latch to prevent the door from swinging open. Have fun collecting little creatures!


Leave A Reply