• Home
  • about emily
  • before + after
  • HGTV + DIY Network
  • good press
  • contact
  • Let’s Organize These Posts:

    • Art Attack
    • Backyard
    • Barn
    • Basement
    • Bathroom
    • Beach
    • Bedrooms
    • Being Thrifty
    • Business-y
    • Buying and Renting and Selling
    • Casual Celebrations
    • Closets
    • Curb Appeal
    • Dainty Details
    • Deck
    • Decor
    • Dining Room
    • DIY
    • Dog-Related
    • Entryway
    • Flooring
    • For the Kids
    • Garage
    • Gardening
    • Helping The Economy
    • HGTV + DIY Network Projects
    • Holiday-Related Projects
    • Home Safety
    • Kitchen
    • Lighting
    • Living Room
    • Merry Travels
    • Office Space
    • Organized
    • Other Pads
    • Outdoor Living
    • Scooter Fun
    • Stairwell
    • Sunroom
    • Supporting Sponsors
    • The Art Room
    • Tools
    • Uncategorizable
    • Wedding
    • Windows
    • Work-pads
  • Search

  • Hi, I’m Emily

    Emily Fazio

    I'm a home improvement enthusiast, living a very merry DIY lifestyle.

    You can find me writing for Home Living Handbook, HGTV.com, and a handful of other websites. Follow me on facebook and instagram, or drop me a note if you'd like. I love notes.

    Thanks for visiting!

  • BROWSE POSTS BY CATEGORY:

    • Art Attack (7)
    • Backyard (92)
    • Barn (8)
    • Basement (27)
    • Bathroom (43)
    • Beach (13)
    • Bedrooms (73)
    • Being Thrifty (53)
    • Business-y (12)
    • Buying and Renting and Selling (23)
    • Casual Celebrations (36)
    • Closets (17)
    • Curb Appeal (44)
    • Dainty Details (8)
    • Deck (23)
    • Decor (286)
    • Dining Room (37)
    • DIY (578)
    • Dog-Related (24)
    • Entryway (59)
    • Flooring (58)
    • For the Kids (32)
    • Garage (17)
    • Gardening (70)
    • Helping The Economy (30)
    • HGTV + DIY Network Projects (283)
    • Holiday-Related Projects (80)
    • Home Safety (12)
    • Kitchen (87)
    • Lighting (31)
    • Living Room (77)
    • Merry Travels (21)
    • Office Space (21)
    • Organized (41)
    • Other Pads (14)
    • Outdoor Living (12)
    • Scooter Fun (8)
    • Stairwell (20)
    • Sunroom (22)
    • Supporting Sponsors (43)
    • The Art Room (3)
    • Tools (43)
    • Uncategorizable (1)
    • Wedding (28)
    • Windows (14)
    • Work-pads (10)
  • Search

  • Pages

    • blog
    • Good Press: Special Features, Freelance Projects, and Long-Term Clients
    • Privacy Policy
    • about emily
    • before + after
      • before + after – transforming my first home
      • before + after, our current home
    • contact me
    • choose a badge and share the merrypad.com love
merrypad website logo with acorn and text
  • Home
  • about emily
  • before + after
  • HGTV + DIY Network
  • good press
  • contact

Building My Workbench

January 12, 2011

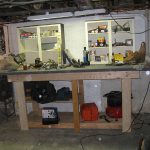
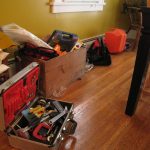
Here's the wall of tools that's been in my dining room for 8 months. Ever since we built the deck in the summer of 2010 my tools have kinda just been strewn about Emily’s dining room or dumped in a wooden box we found at a garage sale. You may not know this about me, but I’m kind of obsessed with the care and organization of my tools. It makes me very uncomfortable when they’re lying around or dumped in a big wooden box. It makes my skin crawl. After the basement “bathroom” was demolished (we wrote about that here and here) we were left with a lot of extra lumber, and the plan was to reuse as much as possible to make a nice workbench as a place to store my tools. It was also going to be something I could stand at, drink a beer at, and take junk apart at.

Something beefy.
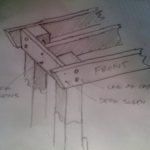
Something I could wail on if the occasion presented itself.

My buddy Marty caught wind of this, and since he’s built a million of these things, he wrote an awesome comment and pretty much did all of my thinking for me; he even sent me some sketches like this one to the right. Marty’s comment can be read in full here ifyou’re interested, but here’s a slightly rearranged excerpt, which involves his recommendation of the actual work surface:

Top the bench with layers. Like girls do with clothes. Or how gossip magazines say celebrities cut their hair (not that I read them, unless left on the workbench). Or something more manly…a mexican dip you eat during halftime while watching the Bills play.

First layer: 3/4 ply. Good ol’ plywood.

Not OSB. Not even CDX. No need for exposure. Just “D” plywood. Or maybe “C”. Or if Pete finds something on the side of the road, then…okay…that.

Second layer: 3/4 MDF. Medium-density Fibreboard. Yes, that’s an “re” in Fibre since I think it came from across the pond prior to having it in the US. MDF is nice and flat and works (finishes) well. Plus it’s dense, so dogs under the bench will experience a -3dB reduction in hammer blow noise.

Third layer: Carpet. Tucked away in the corner, your big box home center has some bland gray/charcoal closed loop short pile carpet. Yeah, on that big rotating carpet holder thing that I desperately want to know the keycode to operate. It’s like the last type of carpet you would put inside your home, but if you put it on your porch it would be like “damn, this is nice carpet”. And on your bench even nicer.

The carpet isn’t too nice that you’d be afraid to drill into it, or wipe that extra silicone from your finger onto it…because it’s still crappier than your work pants. But it offers some cushion when you want to assemble that new nickel-plated bathroom light fixture without a scratch. And, it looks nice.

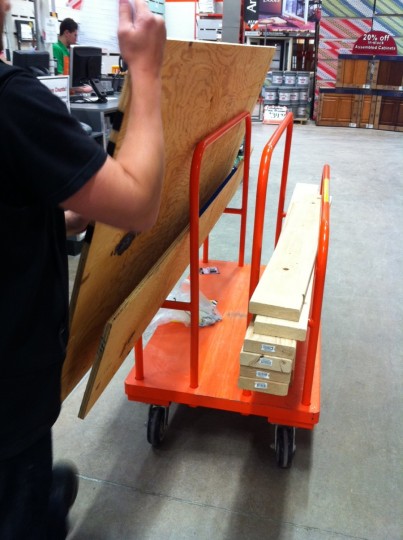
Surveying the wood from the basement demo, I decided against using the toilet-water-soaked, moldy 2x6s, so a trip to Home Depot was in order. Here’s the list of what I bought:

  • 8 Carriage bolts, washers, lock washers, nuts (I’d guess <$10. It was all zinc-plated, no galvanized materials necessary for an indoor workbench.)
  • 1 sheet of 3/4″ plywood ($20 to double the thickness of the tabletop; there was already one good 8′ x 3′ piece back at the house, which not coincidenally, is exactly the size of the workbench. We had the store cut the new plywood into a narrower 36″ width to match the size of the piece we had at the house.)
  • (2) 2″x6″x8-foot boards (cut in half to have 4-foot legs) and (2) 2″x6″x10-foot boards (cut to 7′ and 3′ for the frame supporting the tabletop). Total <$20.
  • Lots of screws ($40, because I bought the largest boxes available. Better value, and won’t go to waste.)
  • Gray indoor/outdoor carpet ($25. It was approximately 50-cents per sq. ft. for 48 square feet.)

Construction was kept simple. I’ll detail what I did photo-by-photo, but if I’m too vague anywhere, please write for more insight:

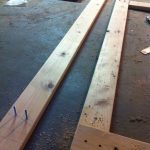
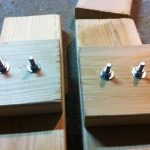
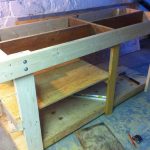
  • Photo 1&2: I started by attaching the 2×6 legs to the 7-foot-long 2×6 boards by pre-drilling and securing carriage bolts. Once the front and back of the table were upright, I attached the shorter 3′ pieces to finish the top frame, making the tabletop a rectangular area that stood about 40″ high.
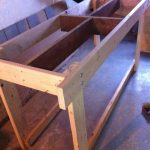
  • Photo 3: I beefed up the frame for the tabletop, and started the frame for the bottom shelf, which is secured to the bottom of the legs.
  • Photo 4: Make the bottom shelf. In my case there was a piece of 3/8″ plywood lying around that fit right in with one rip lengthwise. The extra 3/4 plywood from the original 4×8′ sheet was just enough to make a completely solid half-shelf by attaching a couple of spare 2×4 boards as legs and building off them.
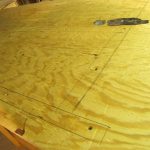
  • In Photo 5, I’m showing you an outline that I made so that I could tell exactly where the tabletop frame was – I wanted to accurately drill into the frame, and doing the sketch removed any guesswork and saved time.
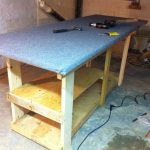
  • Photo 6&7 show the table pre-carpet and with the final carpeted surface. Only tip: staple the carpet nice and tight. I sort of wrapped the corners of the carpet like a present, and staple-gunned it into place.
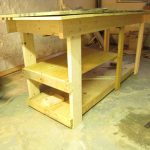
  • Photo 8 is the final table – Emily had those two wooden shelves (found them on the side of the road one day) and they fit perfectly in the space above the table.Only other thing worth noting is that I’m working to reroute some electrical/outlets so that there’s more light above the table than the fluorescent light I stuck up there temporarily.

Dimensions: 8′ w x 3′ d x 42″ h

All I have to do now is start organizing. Total spend for this project was $115, (but $40 was for screws, now there are a lot of extra screws for future projects).

P.S. Emily built her gardening table for the basement too. Except she used 100% recycled materials from the old bathroom (and some of the jillions of screws i bought); she’ll be posting some photos of that soon.

Share

Basement  / DIY

Pete
Pete is the creator of dadand.com. Dadand is a mashup of all things dad-, and dude-related. DIY, repairs, cars, gadgets, whatever. Plus we're chasing around kids and fixing toys.

4 Comments


Marty
January 12, 2011 at 3:28 pm
Reply

That bench is awesome. Thanks for the props…


    Emily
    January 12, 2011 at 4:26 pm

    And thank YOU for the tips!

Dave
January 13, 2011 at 9:23 am
Reply

This post is great. What you two are doing is great too.
See you soon.


    Emily
    January 13, 2011 at 12:46 pm

    Thanks Dave! We’ll see you again soon!

Leave a Reply Cancel reply

Your email address will not be published. Required fields are marked *

This site uses Akismet to reduce spam. Learn how your comment data is processed.

  • HI, I’m Emily

    Emily Fazio

    I'm a home improvement enthusiast, living a very merry DIY lifestyle. Follow me on facebook and instagram, or drop me a note if you'd like. I love notes.

    You can find me writing for Home Living Handbook, HGTV.com, and a handful of other websites.

    Thanks for visiting!

  • Instagram

    merrypad

    I’ll always say yes to a maker space experience, I’ll always say yes to a maker space experience, and The Shed at @timberland’s HQ did not disappoint ✌️🥾 @homelivinghandbook 

Final footwear design not shown 🙂

PS tagging some cute shoes they gifted from the Fall 2024 collection!
    I made the call and snapped off the elephant garli I made the call and snapped off the elephant garlic scapes yesterday evening. Who’s going to help us harvest and eat the next 1,000? 🧄🧄🧄🧄
    Hi! Boy, do I have things to share. 🎉 🫶 Fr Hi! Boy, do I have things to share. 🎉 

🫶 Friendly reminder to focus on balance and wellness: Pete and I lived abroad with our family for the entire month of August 2023. If you ever have the opportunity to work remotely, I promise it to be a worthwhile adventure that’ll change your POV in so many ways. And, If you need an in with an incredible AirBnB in Denmark, DM me. From new playgrounds and museums to the culture and design, making this trip a reality continues to be something we celebrate every day, and I wish everyone can experience it on some level.

💻 Friendly reminder to say yes to new (overwhelming) opportunities: The professional celebration happened upon our return. Last fall, I was approached to launch @homelivinghandbook, a new Pursuit channel for @mensjournal that highlights home improvement and DIY! It has been really fun to see it come to light, and truly one of the most exciting partnerships I’ve ever had. Timing couldn’t have been better, and I’m really happy to see how it grows over time. Please follow along — the team published 150 articles in two months, covering all kinds topics for home enthusiasts! So much more to come. #linkinbio #homelivinghandbook

✌️ the end, many thanks for your support!
    How much garlic is too much garlic? Maybe we’ll How much garlic is too much garlic? Maybe we’ll find out in 2024. Finished planting 1,005 cloves (and 19 shallots) in three new beds at the farm, and crossed one huge chore off my list 📝 #gardennotes #garden2024
    Instagram post 18003690670970980 Instagram post 18003690670970980
    We grew these fools. We grew these fools.
    pumpkin patch is doing great✌️#year1 #squashbl pumpkin patch is doing great✌️#year1 #squashblossoms #pumpkinpatch
    follow emily: @merrypad


  • Like Us On Facebook

    Facebook Pagelike Widget


  • Popular Posts

    • How to Dye Pasta Different Colors (Halloween Recipe) 75 views
    • The Easy Way to Hang Art on Brick or Stone 32 views
    • How to Make Your Own Barn Quilt 22 views
    • Create a Unique Spider Web Pumpkin 22 views
    • Designing a Durable Wooden Fence For Our Beautiful Backyard Garden 22 views
    • Reasons We Recessed Our Induction Cooktop 18 views
    • Stepping It Up 17 views
    • The Easy Fix For Broken IKEA Drawers 17 views
    • Using Counter-Snap Screws to Fix Squeaky Floors 16 views
    • New Storm Doors, Finally 14 views


  • BROWSE POSTS BY CATEGORY:

    • Art Attack (7)
    • Backyard (92)
    • Barn (8)
    • Basement (27)
    • Bathroom (43)
    • Beach (13)
    • Bedrooms (73)
    • Being Thrifty (53)
    • Business-y (12)
    • Buying and Renting and Selling (23)
    • Casual Celebrations (36)
    • Closets (17)
    • Curb Appeal (44)
    • Dainty Details (8)
    • Deck (23)
    • Decor (286)
    • Dining Room (37)
    • DIY (578)
    • Dog-Related (24)
    • Entryway (59)
    • Flooring (58)
    • For the Kids (32)
    • Garage (17)
    • Gardening (70)
    • Helping The Economy (30)
    • HGTV + DIY Network Projects (283)
    • Holiday-Related Projects (80)
    • Home Safety (12)
    • Kitchen (87)
    • Lighting (31)
    • Living Room (77)
    • Merry Travels (21)
    • Office Space (21)
    • Organized (41)
    • Other Pads (14)
    • Outdoor Living (12)
    • Scooter Fun (8)
    • Stairwell (20)
    • Sunroom (22)
    • Supporting Sponsors (43)
    • The Art Room (3)
    • Tools (43)
    • Uncategorizable (1)
    • Wedding (28)
    • Windows (14)
    • Work-pads (10)


  • a little bit of everything, friends, DIY, and inspiration

    • Dadand.com < My husband and his BFF
    • HGTV
    • Home Living Handbook, a Pursuit Channel for Men's Journal
  • Some Legal

    Merrypad incorporates the occasional affiliate link to Amazon.com and Minted; we link to many other websites and products, but if it is in context of a paid sponsorship, it is always noted as such. Please review the privacy policy and contact me if you have any additional questions.

    Theme customized by Pete Fazio Creative, the guy from dadand.com.


© Copyright Merrypad