This post was originally published on DIY Network’s blog Made + Remade in October 2012.
There’s something about the change in seasons in the northeastern United States that brings me back to a different point in life. I have memories of exploring my parents rural, wooded property and lingering in amongst hundreds of Aspen trees that glistened gold and shook loudly in the breeze. I’m learning a lot about Aspen varieties as I write this post, one thing being that these Quaking Aspens are the among the most widely distributed tree in all of the USA, extending from the Mexico border all the way up to Canada so maybe dozens, or hundreds, or thousands of you have similar experiences enjoying this particular piece of wilderness, but more so than a lesson in dendrology (I’m sure you’re wondering whereabouts I’m going with this) the trees are plentiful with inspiration.
And with that said, I reinterpreted a little bit of it for my own home in the form of a simple DIY vase.
Whether you’re more familiar with white birch or aspen or any other type of white-barked tree in your native region of North America, you’ll appreciate the contrast between the white exposed bark and the dark brown and black scars. These trees carry a distinctive fashion. And sure, there are many ways to reinterpret this bark texture, but these are the materials I chose to work with:
- One glass vase (two are shown, but I ended up working with the taller, more tree-like of the vases that was <$5 at the craft store)
- Assorted spraypaint (I spent $10 on three colors, an almond brown and dark brown, and a plain satin white)
- Assorted rubber bands (A pack of 100 was <$2)

I started by spray painting the plain glass vase with the two shades of brown because I wanted a little of each color to represent the scarred bark.

When the spray paint was completely dry, I began wrapping the vase with rubber bands, overlapping them in an interpretive way, keeping in mind that the covered areas would remain brown on the finished vase.

Over the rubber bands, I spray painted the satin white. To cover the browns evenly without drips, I had to apply about three light coats.

When it had dried completely (I left it alone for a whole day to cure) I carefully removed the rubber bands. I didn’t have much trouble stretching them off, but it would be easy to snip them too in case you’re worried about damaging the overlaying spray paint.
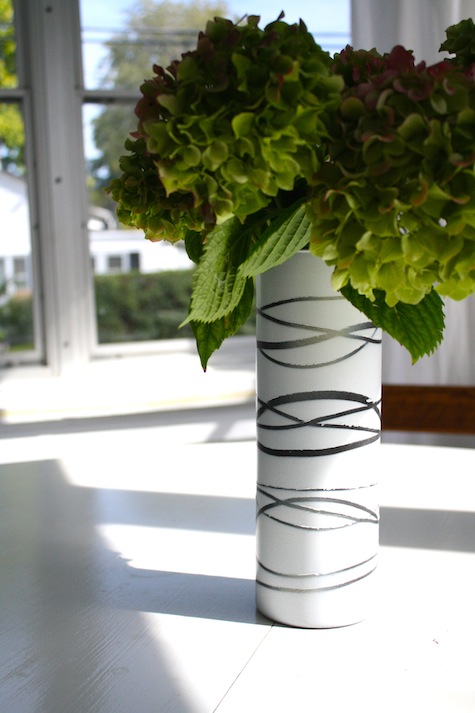
The finished piece is really pretty. There are some areas where the lines aren’t perfectly clean, as you can see in this close-up photo, but from afar it looks great. An interpretive little vision that can transition from fall into winter.
I like it filled with some branches too, in this case, curly willow branches that I harvested from my parents yard.

Are you making anything especially autumnal to celebrate the change in seasons?


Leave A Reply