In the grand scheme of do-it-yourself home improvement, we got a lot done on Day 9 of our bathroom renovation. True story, Day 9 of active construction translates to Day 29 in real-life time. Still no toilet.
Coming off of 4 straight days of tiling, being able to cross more than one thing off the list in one fell swoop felt really productive. More than anything, I was mostly relieved to find that grouting the shower didn’t take 4 straight days too. In addition to getting our grout on, I cleaned up some drywall issues and began to prep for new window trim. Now things are movin’ fast.

It was all about the walls today, and because we only had a half-day to commit to laboring, we made the most of it. The newly tiled shower walls were ready for grout, the still-drywalled walls received some cosmetic updates, and the windows went bare. After 4 days spent installing subway tiles, we were inching closer towards having a fully functional shower.
The walls in the bathroom were kind of a mess. There were clear signs that over the years, owners had hung pictures and shelves, and caused physical damage to areas that required patching. The trim was upgraded, but not well, and as band-aided as it all was, we knew we could repair a lot of the problems with a simple skim coating.
The plan to refinish problem areas was no big deal; it goes smoothly and dries quickly, and then can be sanded smooth. I like to sand by hand rather than use a power sander, by the way. Hand sanding the sensitive, lightly-coated areas allowed me to carefully judge how much pressure I was applying, and to allow me to carefully judge how much pressure I was applying and to make sure and not over-sand any areas. Too much sanding would have made smooth areas concave again, and that meant I’d be back to the skim coating bucket to re-apply more coats of compound.
I also rolled some primer onto the freshly repaired walls for future coats of paint.

The ceiling had a little work done, too, in the same vein. Skimming is satisfying!

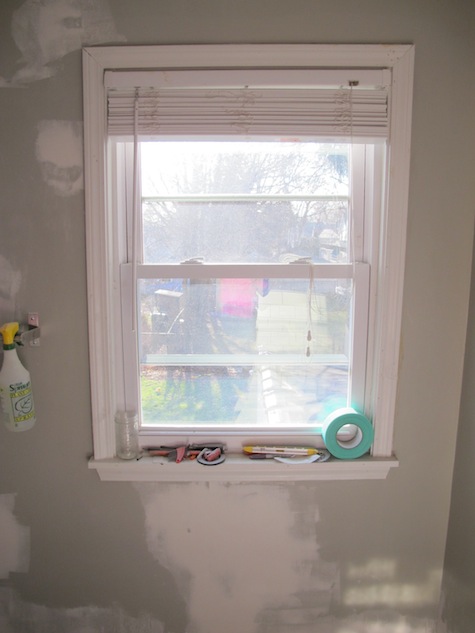
Part of the wall preparedness process involved taking the window trim off.

I left the window trim on during demo day just in case the trim was helping to keep the room insulated (it’s January). I had nightmarish moments about removing the trim and causing the whole second story to be drafty for however many weeks we would be working on the bathroom, and sure enough, off came the trim and in came the draft. Luckily, last time I was at the store I picked up a can of spray foam just to be safe, and when I removed the trim, I had it ready to fill any gaps with a fresh squeeze. With the foam in place and hardening, I left it alone to expand and do its thing.

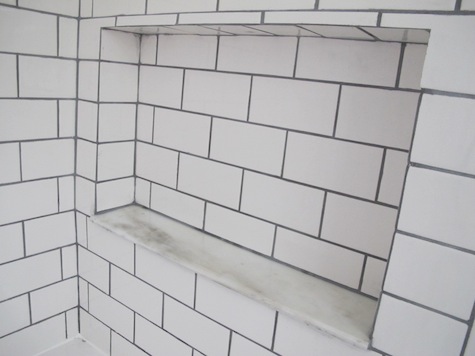
While it was curing, I moved on to the grout. Pewter gray grout was the color of choice in finishing the subway tile shower. In reality, it was very close to the mortar color that we had worked with, so you’re not going to see a dramatic difference between the mortar and the grout, but I’ll hone in on the technique we used in grouting. It worked well. We moved fast.
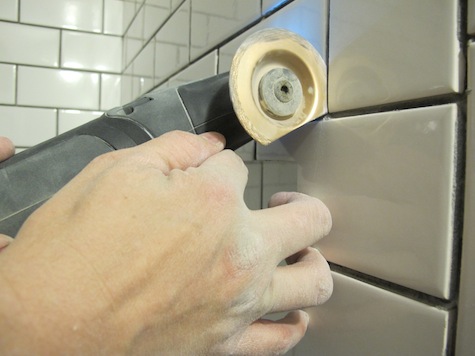
Before I could actually begin applying grout, there were a few spots that hadn’t been completely mortar-free. These were areas where the mortar had squeezed up between the tiles and not been cleared away well enough. We worried that the grout wouldn’t adhere properly in these areas. Before we bought a formal grout remover tool (about $5 at the hardware store), I used a multi-cutter with a carbide circular blade to notch out problem areas. I tested the blade on the surface of unused tiles to see if it caused any damage, of course, and once we were sure we wouldn’t do any damage to the installed tiles, used the edge of the blade to saw away excess mortar.
With the excess mortar cleared, I cleaned the tile well in preparation for grouting, using the shop vac to remove any loosened mortar and debris.

And then we got grout-crazy. Following the instructions on the grout bag, we mixed a small batch and got started.
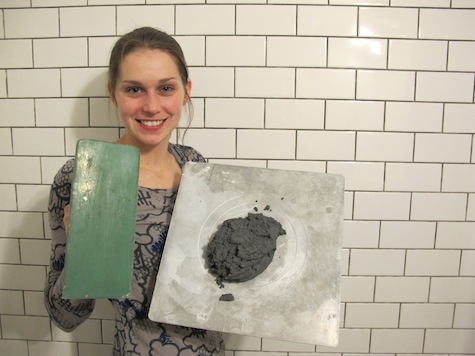
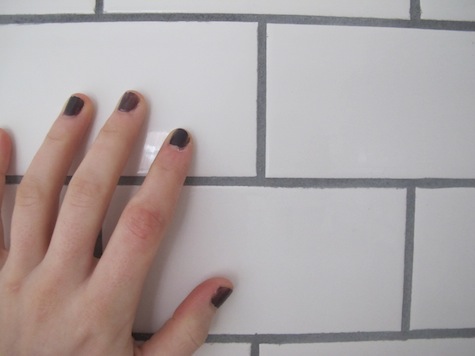
With the grout float in one hand and the hawk in the other, I worked my way over the wall, smushing grout into the spaces and wiping off the excess at a diagonal to the tile lines. When it comes to grouting, the most common bit of know-how I’ve encountered is to wipe diagonally because it keeps the edge of the float from gouging into the smooth lines of grout.
We did choose to use a sanded grout because our lines were 1/8″ thick; according to the brands we were looking at, non-sanded was safe up for spaces up to 1/8″, and sanded was recommended for anything larger. We fell kind of in the middle here and could have used either, but chose sanded because it seemed like it might be more durable for the long haul.

Going through the entire shower applying grout only took about an hour; Pete and I took turns in order to rest our grouting arms and mix more for each other to use. Like with the mortar, we only mixed in small batches (probably enough to do 20 sq. ft. with each batch to keep the grout really fresh), so we had to mix more on 4 separate occasions, or just about every 10 minutes.

About a half-hour into grouting, we also began to slowly wipe down the areas that were drying with a damp sponge to clean the surface of the tile and to remove additional excess grout from the lines. With another hour devoted to carefully cleaning the tiles with a sponge, we were left with defined grout lines (and dirty faces).
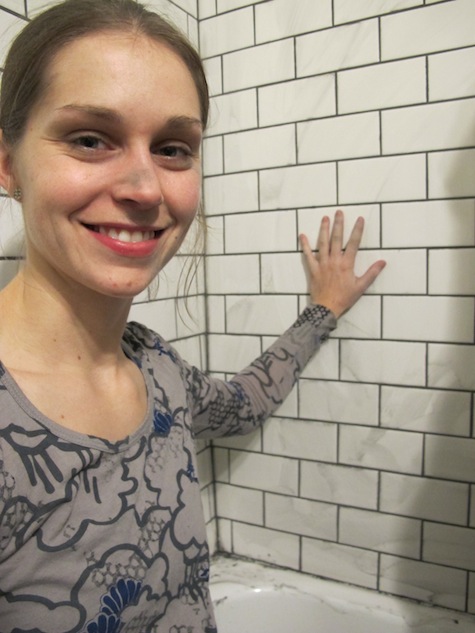
After a few more hours of drying, the grout bag instructions asked us to go over the tiles once more with cheesecloth. I used a thin rag to clean off the remaining thin layer of grout that was covering the surface and then left the room alone to cure overnight.
With the walls sanded and the grout drying, we felt like a lot of progress had been made in a very short amount of time: Soon we’d be able to shower again, soon we’d be able to paint the walls, and next we’d be able to start working on the floor!
To read more stories about this renovation:
Day 3: Building custom shower shelves, moisture barriers, and cement board
Day 4: Replacing the shower valve and finishing the cement board
Days 5, 6, 7, 8: A 4-day tiling marathon


7 Comments
I am now feeling like a complete amateur with our bathroom renovation! But grateful to have found this through AT. We’re close to where you are–have demoed the shower and installed some of the hardibacker. Still need to fix some plumbing snafus. But shopping for tile this weekend. That’s WAY more fun than plumbing. :-) Glad you’re just a step or two ahead of us.
Thanks for stopping by, Rita! Excited to learn more about your progress. The plumbing snafus were the most unexpected little surprises, but I guess I should have expected them! Good luck shopping for tile and preparing to install!
Found you through the Apartment Therapy home tour. It’s so nice to see another Rochester, NY Emily in Blogland. I look forward to following along.
Emily
Hi Emily! Nice to “see” you also – you’re in Rochester?
Not in the city, but Ontario County.
Can we revisit the topic of grout from this semi-old post? I see you used the color pewter. Did you find that it was accurate when compared to the color swatch from the store? All of the reviews for the pewter grout from HD say that it is significantly lighter in application than in the swatch. Hoping for your real-life take on it. Thanks!
P.S: Any tips on mixing it? (Or did I miss those somewhere?)
Hey Harper! Sorry for the delayed response; I haven’t been able to find my grout color chip guide to compare the color sample to what’s actually on the shower walls, so I can’t be exacting in my response, but it seemed pretty close to me. I was only looking for something lighter than black and darker than the Delorian Gray that I would be using on the vinyl floor tiles, so I wasn’t being uber-picky and Pewter ended up being a good neutral fit for me. All I can say with certainty is that it is NOT different enough for me to notice if it’s different from what I imagined.
There would be mixing instructions on any bag of grout powder you buy, but I didn’t follow the instructions super-closely. I worked in really, really small batches, mixing a cup of powder with a few tablespoons of water and mixing really well by hand (not with a mixing paddle since it was such a small volume) until the consistency was like… ummm… wet sand. It needed to be wet enough to be mashed into the cracks easily, but stick together enough so it doesn’t slide down the wall (if it’s a wall you’re doing) or so that when you brush over the cracks with a grout float and damp sponge it doesn’t all wipe away. The grout will dry up on you really fast (faster than mortar) which is why I stuck to making small batches often, but keep in mind if you mix it too watery, you can pretty easily just let it sit for a few minutes and it’ll start to thicken up again itself. Or you can add another pinch of dry grout to the mix just like you might add more flour to your pie crust to thicken it up. And then if it’s drying up too fast on you while you work, I found that it was OK to trickle a few drops of water and remix/re-moisten as you work.
Hope this helps!